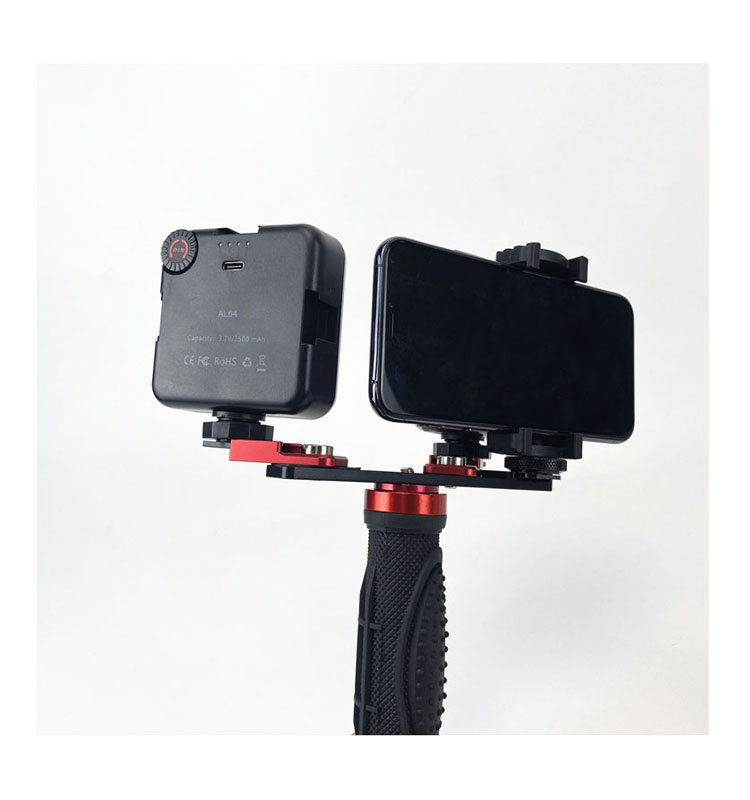
Dental mobile photography lamps have become indispensable tools in modern dental practices, enabling practitioners to capture clinical documentation with consistent, high-quality illumination. These portable lighting systems support everything from case presentation and treatment planning to insurance documentation and patient education. However, like all clinical equipment, photography lamps require systematic maintenance to deliver reliable performance and extend their operational lifespan.
Proper care of your dental mobile photography lamp not only protects your investment but also ensures consistent image quality for accurate clinical documentation. This guide covers essential maintenance practices, troubleshooting common issues, and recognizing when equipment replacement becomes necessary.
1. Cleaning and Disinfection Protocols
Regular cleaning and disinfection of your dental mobile photography lamp equipment prevents cross-contamination between patients and maintains optimal light transmission through the lens and housing.
Daily Cleaning Procedures
After each clinical session, wipe down all external surfaces of the lamp with a soft, lint-free microfiber cloth. Pay particular attention to the lens cover, as fingerprints and debris directly impact image quality. For the lamp housing and handle, use a mild detergent solution (pH-neutral) with warm water, then dry thoroughly with a clean cloth.
Never spray cleaning solutions directly onto the lamp. Instead, dampen your cleaning cloth with the solution and wipe gently to prevent moisture from entering internal components. Avoid paper towels or abrasive materials that can scratch optical surfaces.
Disinfection Best Practices
Following cleaning, disinfect all surfaces that come into contact with patients or the clinical environment. Use EPA-registered, dental-grade disinfectants that are compatible with medical equipment. Common options include quaternary ammonium compounds or low-level disinfectants specifically formulated for optical and electronic devices.
Apply disinfectant to a clean cloth rather than spraying directly on the equipment. Allow the manufacturer's recommended contact time (typically 1-10 minutes depending on the product), then wipe with a damp cloth to remove residue. Some disinfectants can leave a film that reduces light quality if not properly removed.
Important: Avoid alcohol-based solutions stronger than 70% isopropyl alcohol, bleach solutions, hydrogen peroxide above 3%, or phenolic compounds, as these can damage plastic components, degrade seals, and cloud optical elements over time.
Lens Care Specifics
The lens or diffuser is the most critical optical component. Clean it using lens-safe solutions and microfiber cloths designed for camera optics. If you notice stubborn smudges or fingerprints, use a circular motion from the center outward. Inspect the lens regularly for scratches or cloudiness that could compromise image quality.
2. Proper Storage and Handling
How you store your dental mobile photography lamp between uses significantly affects its longevity and performance reliability.
Environmental Conditions
Store your photography lamp in a clean, dry environment with stable temperature and humidity levels. Ideal conditions range from 15-25°C (59-77°F) with relative humidity between 30-70%. Extreme temperatures can affect battery performance and LED lifespan, while high humidity promotes corrosion of electrical contacts.
Keep the equipment away from direct sunlight, as UV exposure can degrade plastic housings and cause premature yellowing of diffusers. Avoid storage near heat sources such as sterilizers, autoclaves, or south-facing windows.
Protective Storage Solutions
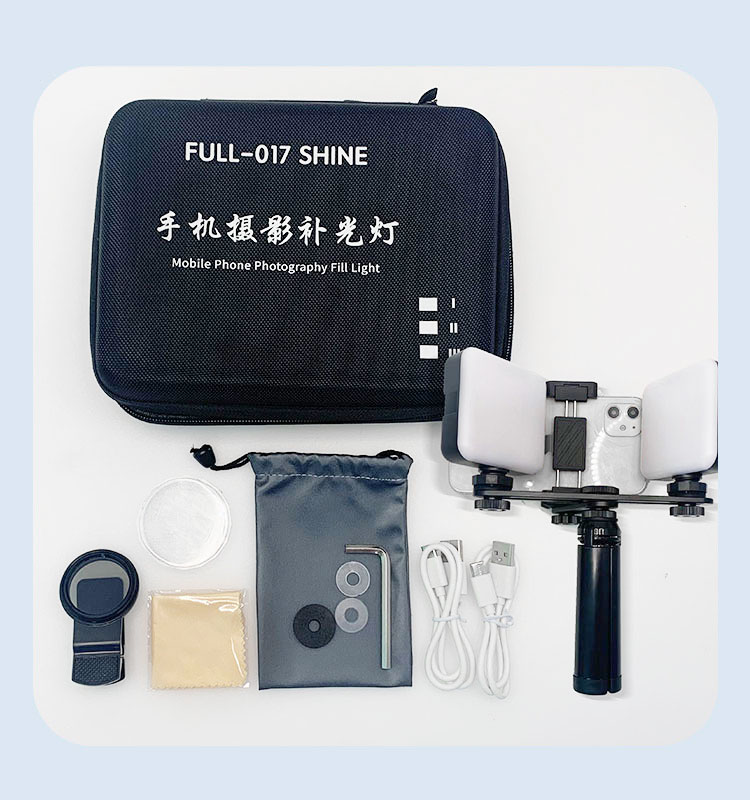
Always use a dedicated protective case or cover when the lamp is not in use. A hard-shell case provides the best protection against impact damage during storage and transport. If your lamp came with a manufacturer's case, use it exclusively, as it's designed to accommodate the specific shape and fragile components.
For lamps stored on charging stations or wall mounts, ensure the mounting hardware is secure and positioned away from high-traffic areas where the equipment could be knocked over. Consider installing padding or protective bumpers around storage areas.
Transportation Guidelines
When moving equipment between operatories or taking it to off-site locations, always secure it in a padded carrying case. Remove batteries from the lamp before extended transport to prevent accidental activation or battery drain. If transporting multiple items together, separate the lamp from other instruments to prevent scratching or crushing.
For practices with multiple operatories, assign each lamp a designated storage location to minimize unnecessary handling and reduce the risk of drops or collisions.
3. Battery Care and Power Management
Battery performance directly impacts the portability and reliability of mobile photography lamps. Proper battery maintenance extends both battery life and overall equipment functionality.
Charging Protocols
Follow the manufacturer's charging recommendations precisely. Most modern dental photography lamps use lithium-ion or lithium-polymer batteries, which perform best when kept between 20-80% charge rather than being fully depleted or constantly at 100%.
Avoid leaving the lamp on the charger continuously when not in use, as this can reduce battery capacity over time. Instead, charge the battery when it drops below 20%, and remove it from the charger once it reaches 80-100%, depending on your usage schedule.
Use only the manufacturer-supplied charger or approved replacements. Third-party chargers may not provide appropriate voltage regulation, potentially damaging the battery or creating safety hazards.
Battery Storage and Longevity
If you won't use the lamp for an extended period (more than two weeks), store the battery at approximately 50% charge in a cool, dry location. Lithium-based batteries experience minimal self-discharge but perform best when not left fully charged or depleted for long periods.
Monitor battery performance over time. Signs of battery degradation include rapid charge depletion, extended charging times, or the lamp shutting off unexpectedly even when the charge indicator shows remaining capacity. Most batteries retain good performance for 300-500 full charge cycles, after which replacement becomes advisable.
Temperature Considerations
Never charge batteries in extreme temperatures. Optimal charging occurs between 10-30°C (50-86°F). Charging in temperatures outside this range can reduce battery capacity and potentially create safety issues. Similarly, avoid using the lamp in very cold environments, as battery performance decreases significantly below 0°C (32°F).
4. Inspection, Bulb Replacement, and Component Maintenance
Regular inspection identifies potential issues before they affect clinical work or cause equipment failure.
Monthly Inspection Checklist
Conduct a thorough inspection at least monthly, examining:
- Housing integrity: Check for cracks, loose components, or damage to the outer shell
- Electrical connections: Inspect charging ports and battery contacts for corrosion or debris
- Mounting hardware: Verify that adjustable arms, joints, or brackets remain tight and functional
- Light output quality: Test for even illumination across the field, noting any dark spots or color shifts
- Switch and control functionality: Ensure all buttons, dials, and switches respond properly
- Power cables: Look for fraying, kinking, or damage to insulation
Document inspection findings in your equipment maintenance log, noting any changes from previous inspections.
LED and Bulb Replacement
Many modern dental photography lamps use long-lasting LED arrays rather than traditional bulbs. LEDs typically last 20,000-50,000 hours of operation, often outlasting other components. However, if you notice significant dimming (typically a 30% reduction from original brightness), color temperature shifts toward yellow or blue, or uneven illumination patterns, the LED array may need replacement.
For lamps with replaceable halogen or fluorescent bulbs, follow the manufacturer's replacement schedule or change bulbs when you observe:
- Noticeable dimming compared to when the bulb was new
- Flickering or unstable light output
- Color temperature changes affecting accurate shade matching
- Bulb life exceeding 75% of the rated hours, even if still functional
Replacement procedure: Always disconnect power before replacing any light source. Use only manufacturer-approved replacement bulbs or LED modules, as substitutes may have different electrical requirements, color temperatures, or physical dimensions. Handle halogen bulbs with a clean, lint-free cloth rather than bare hands, as skin oils can create hot spots that shorten bulb life.
Component Replacement Guidelines
Replace worn or damaged components promptly to prevent cascading failures. Common replacement parts include:
| Component | Replacement Interval | Warning Signs |
|---|---|---|
| Battery | 1-3 years or 300-500 cycles | Rapid discharge, swelling, reduced runtime |
| Power adapter | As needed | Frayed cables, intermittent charging, unusual heat |
| Diffuser/lens cover | As needed | Scratches, cloudiness, cracks, yellowing |
| Mounting brackets | As needed | Loosening, stripped threads, cracks |
| LED array | 5-10 years | Significant dimming, color shift, dead spots |
Always use manufacturer-recommended replacement parts. While aftermarket components may be less expensive, they can void warranties, compromise performance, or create safety issues.
5. Staff Training and Professional Servicing
Equipment care is a team responsibility. Proper training ensures all staff members who use the photography lamp understand maintenance requirements and proper handling techniques.
complete Staff Training
Develop a training protocol covering:
- Proper handling and positioning techniques to avoid drops or impacts
- Daily cleaning and disinfection procedures specific to your equipment model
- Battery management including charging protocols and storage guidelines
- Inspection procedures and how to identify common problems
- Proper storage after use, including case placement and battery removal if applicable
- Documentation requirements for equipment logs
- Who to contact when problems arise
Conduct hands-on training sessions rather than relying solely on written materials. Have staff members demonstrate proper techniques to confirm understanding. Schedule refresher training annually or when new staff join the practice.
Designating Equipment Champions
Assign one or two team members as equipment champions responsible for weekly inspections, battery management, and serving as the first point of contact for equipment issues. This creates accountability and ensures consistent care standards.
Professional Servicing Schedule
Even with excellent daily care, professional servicing remains essential. Schedule annual professional inspections with qualified technicians who can:
- Perform electrical safety testing
- Calibrate light output and color temperature
- Inspect internal components not accessible during routine maintenance
- Update firmware if applicable
- Verify compliance with manufacturer specifications
- Document service history for warranty and liability purposes
Contact the manufacturer or an authorized service center rather than attempting complex internal repairs yourself. Unauthorized repairs can void warranties and create safety hazards.
Troubleshooting Common Photography Lamp Issues
Understanding common problems and their solutions minimizes downtime and prevents minor issues from becoming major failures.
Dim or Uneven Light Output
Possible causes: Dirty lens or diffuser, aging bulb or LED, low battery charge, damaged reflector
Solutions: Clean optical surfaces thoroughly, check battery charge level, test with fully charged battery, inspect bulb or LED for degradation, verify power settings are at maximum
Lamp Won't Turn On
Possible causes: Dead battery, faulty power switch, damaged charging port, internal electrical failure
Solutions: Verify battery is charged and properly seated, test with different power source if applicable, inspect switch for damage or debris, check charging indicator lights, consult manufacturer support
Inconsistent Color Temperature
Possible causes: Mixed old and new bulbs (if multiple bulbs), aging LED array, damaged color filters or diffusers
For additional resources on maintaining your dental practice equipment, explore our guide on caring for your dental burs and learn about dental instrument sterilization protocols. When you're ready to upgrade your clinical tools, browse our selection of dental accessories and clinic kits designed for modern dental practices.
Remember: consistent, proactive maintenance is always more cost-effective than reactive repairs. Invest a few minutes daily in equipment care, and your dental mobile photography lamp will serve your practice reliably for years to come.