
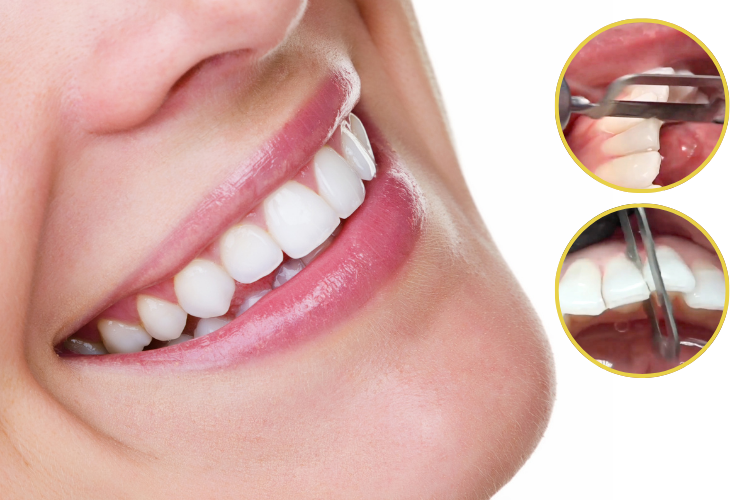
What Is Interproximal Enamel Reduction (IPR)?
Interproximal enamel reduction, commonly known as IPR, is a controlled procedure that removes small amounts of enamel from the sides of teeth where they touch each other. Orthodontists use IPR to create space for alignment when extraction is not warranted, to improve tooth-size discrepancies (Bolton discrepancy), and to reshape contact points for better long-term stability after braces or clear aligners.
Typical enamel removal ranges from 0.1 mm to 0.5 mm per contact surface. Because healthy enamel is roughly 1.0 to 1.5 mm thick on most anterior teeth, removing a conservative amount stays well within safe limits and does not increase the risk of caries or sensitivity when performed correctly. The technique has been used safely in orthodontics for over three decades and is supported by extensive clinical research.
What Does an IPR Kit Include?
A well-designed IPR kit provides instruments for every stage of the procedure: initial separation, calibrated reduction, and final surface smoothing. Most kits contain the following components:
- Diamond-coated interproximal strips in graded grit sizes (coarse, medium, fine, and extra-fine)
- Thin diamond discs or oscillating saw blades for motor-driven reduction
- Thickness gauges or probes to measure the gap created
- Polishing strips to smooth and remineralize the treated surface
- Organized holder or cassette with color-coded slots for quick identification
The B&D Diamond Ortho-Strips Kit packages all of these components in a single autoclavable cassette. Each strip is color-coded by grit size, which eliminates guesswork during fast-paced clinical sessions.
Step-by-Step IPR Workflow
Following a consistent sequence reduces the chance of removing too much or too little enamel. The workflow below applies to manual strip-based IPR, which gives the operator the greatest tactile feedback.
- Assess contact tightness. Use a probe or separator to evaluate the contact. Tight contacts may need an initial pass with a coarse strip or a thin diamond disc to open enough space for the finer strips to enter.
- Begin with a coarse or medium strip. Insert the strip through the contact with a gentle sawing motion. Keep the strip centered on the contact and avoid tilting it toward the gingiva. Apply light, even pressure and let the diamond coating do the work.
- Switch to a fine-grit strip. Once the target width is nearly reached, move to a finer strip to refine the surface. This step removes the scratches left by the coarser grit and begins to smooth the enamel.
- Measure the gap. Use a thickness gauge to confirm the amount removed matches the treatment plan. Recheck both the mesial and distal surfaces to ensure uniform reduction.
- Finish with an extra-fine or polishing strip. A final pass with an extra-fine strip or a dedicated polishing strip closes the scratch pattern and creates a smooth, glossy surface that resists plaque accumulation.
- Apply fluoride. Coat the treated surfaces with a fluoride varnish or acidulated phosphate fluoride gel to promote remineralization of the freshly exposed enamel.

Five Common IPR Mistakes and How to Fix Them
1. Working Out of Sequence
Jumping between grit sizes or skipping the measurement step leads to inconsistent results. Always progress from coarse to fine in order and measure after the medium-grit stage so you can stop before over-reducing.
2. Choosing the Wrong Tool for the Contact
Loose contacts do not need a disc or coarse strip. Starting with too aggressive an instrument on an already-open contact will remove enamel faster than intended. Match the tool to the tightness of the contact: disc or coarse strip for very tight contacts, medium strip for moderate contacts, and fine strip for naturally loose contacts that only need minor reshaping.
3. Uneven Enamel Removal
Angling the strip or applying uneven pressure creates a wedge-shaped gap instead of parallel walls. Hold the strip at a consistent angle (roughly parallel to the long axis of the tooth), use magnification if available, and check with a probe periodically. Uneven reduction can compromise the fit of aligners and the esthetics of the final result.
4. Soft-Tissue Injury
The papilla between teeth sits directly in the path of the strip. Protect the gingiva by using a separator or wedge to push the tissue away before stripping. If bleeding occurs, stop, apply pressure, and reassess your access before continuing. Patients will remember soft-tissue trauma more than any other part of the visit.
5. Using Worn-Out Strips
Diamond strips lose cutting efficiency after repeated use and sterilization cycles. A dull strip forces the clinician to apply more pressure, which increases the risk of slipping and damaging adjacent teeth. Inspect strips before each use and discard any that feel smooth or show visible grit loss. The B&D IPR Kit is built for durability, but all diamond-coated instruments have a finite service life. Keeping a fresh set of strips on hand for each patient ensures consistent cutting performance and predictable results.

Manual Strips vs. Motor-Driven IPR
Clinicians can perform IPR with hand-held strips, oscillating handpiece attachments, or thin diamond discs mounted on a slow-speed handpiece. Each approach has trade-offs:
| Method | Pros | Cons |
|---|---|---|
| Manual strips | Best tactile feedback, lowest risk of over-reduction, no heat generation | Slower on tight contacts, more hand fatigue in full-arch cases |
| Oscillating handpiece | Faster than manual, good control, moderate feedback | Requires a specific handpiece attachment, higher cost |
| Diamond disc on slow-speed | Fastest cutting, good for very tight contacts | Least tactile feedback, higher risk of over-cutting and soft-tissue injury |
Many experienced orthodontists use a combination: a disc to open a very tight contact, followed by manual strips to fine-tune the reduction and finish the surface.
When Is IPR Indicated?
IPR is most commonly prescribed in the following situations:
- Mild to moderate crowding (1-5 mm) where extraction would be excessive
- Bolton discrepancy when upper and lower tooth widths do not match
- Black triangles between teeth caused by bone loss or triangular crown shapes -- reshaping the contact can help close the gap
- Aligner refinement when a case is nearly finished but small space is still needed for final tooth movement
- Post-orthodontic retention to create tighter contacts that help prevent relapse
IPR is generally avoided on teeth with existing restorations at the contact, teeth with very thin enamel (such as lower incisors in some patients), and in patients with active caries or poor oral hygiene.
Tips for Better Results
- Plan IPR amounts digitally before starting treatment. Most aligner software calculates strip amounts per contact as part of the setup.
- Use magnification (loupes or a microscope) to verify strip placement and avoid gingival contact.
- Record the amount removed at each contact in the patient chart so you can track cumulative reduction across visits.
- Pair IPR with a fluoride protocol to protect freshly stripped enamel surfaces.
For more on how diamond instruments are graded by grit size, see our article on diamond vs. carbide dental burs. If you are also looking for finishing and polishing options after restorative work, our guide to polishing discs and brushes covers the full range of surface-finishing instruments.
Key Takeaways
- IPR is a safe, conservative space-gaining technique when performed within accepted enamel-thickness limits.
- A color-coded IPR kit with graded strips simplifies tool selection and reduces clinical errors.
- Always follow a coarse-to-fine sequence, measure after each stage, and finish with polishing and fluoride application.
- Inspect strips for wear before every use and replace dull instruments promptly.
Ready to upgrade your IPR workflow? Explore the B&D Orthodontic IPR Kit for a complete, color-coded stripping system designed for both beginners and experienced orthodontists.