Best Drill Bit to Remove Acrylic Nails + DIY Guide
What is the best drill bit to remove acrylic nails? A carbide or ceramic bit is usually best for fast bulk removal, then a finer bit should be used as the acrylic gets thinner so you do not over-file the natural nail.
Removing acrylic nails with a nail drill saves time compared to soaking, but choosing the wrong bit can lead to heat damage, nail thinning, or painful filing. Selecting the right drill bit for acrylic removal is one of the most important decisions you will make.
This guide covers the best drill bits for removing acrylic nails, the correct speed and pressure settings, and step-by-step technique to protect the natural nail underneath.

Why the Right Drill Bit Matters for Acrylic Removal
Acrylic is a hard, bonded material that sits directly on your natural nail plate. A bit that is too aggressive can cut through both layers before you notice. A bit that is too fine will generate friction heat without making progress, which causes discomfort and potential burns. The goal is controlled, efficient material removal that stops at the thin acrylic layer closest to the natural nail, leaving the final residue for gentle hand-filing or buffing.
Carbide Bits: The Top Choice for Acrylic Removal
Carbide nail drill bits are the industry standard for acrylic removal and the option most experienced nail technicians reach for first. Made from tungsten carbide, these bits feature machined flutes (cutting edges) that shave acrylic in clean strips rather than grinding it into dust.
Recommended Carbide Bit Specs for Acrylic
| Feature | Recommendation |
|---|---|
| Cut type | Medium (2XC) or Coarse (XC) cross-cut |
| Shape | Barrel or tapered barrel |
| Head size | 3/32" shank, medium head |
| Speed | 15,000 - 20,000 RPM for bulk removal |
| Direction | Forward or reverse depending on dominant hand |
How Carbide Bits Remove Acrylic
The fluted design lifts material in chips rather than pulverizing it. This produces less heat and less dust compared to abrasive-coated bits. A two-way (2XC) cross-cut carbide works in both rotation directions, making it practical for both left- and right-handed technicians.
Pro tip: Use a coarse carbide to take down the bulk of the acrylic (roughly 80%), then switch to a fine carbide or sanding band to approach the natural nail. Never attempt to drill all the way to the natural nail with a coarse bit.
Safety Bits: Precision Without Pressure
Safety bits, sometimes called cone bits or under-nail cleaner bits, have a smooth, non-cutting tip that prevents accidental drilling into the nail bed. They are not designed for bulk acrylic removal, but they fill an important role in the removal process.
When to Use a Safety Bit During Acrylic Removal
- Cuticle area cleanup: After removing the bulk acrylic, use a safety bit at low speed (5,000-8,000 RPM) to clean around the cuticle and sidewalls.
- Thinning the last layer: The rounded tip reduces the risk of gouging as you get close to the natural nail.
- Beginners: If you are new to e-filing, a safety bit offers more forgiveness while you develop pressure control.
Diamond Bits: Use With Caution on Acrylics
Diamond nail drill bits are coated with diamond grit particles bonded to a metal core. While they are excellent for natural nail prep and cuticle work, they are not the best first choice for acrylic removal.
Diamond vs. Carbide for Acrylic: Head-to-Head
| Factor | Carbide | Diamond |
|---|---|---|
| Removal speed | Fast, clean strips | Moderate, abrasive grinding |
| Heat generation | Low | Higher |
| Dust production | Less (chips) | More (fine powder) |
| Natural nail risk | Lower with cross-cut | Higher if pressure applied |
| Best use stage | Bulk removal | Final smoothing only |
If you do use a diamond bit on acrylic, choose a medium grit and keep the speed below 15,000 RPM. Keep the bit moving constantly and never press down. Let the abrasive do the work.
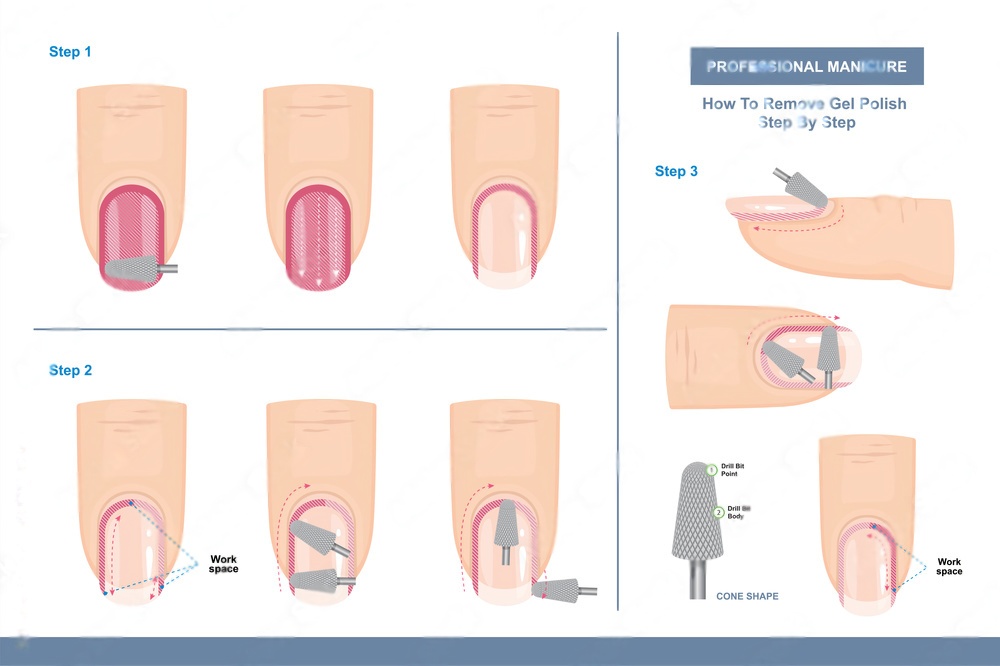
Step-by-Step Acrylic Removal With a Nail Drill
- Prep the nail: Remove any nail polish or topcoat with acetone or a non-acetone remover. This prevents the bit from clogging.
- Attach a coarse carbide barrel bit to your e-file. Set the speed to 15,000-18,000 RPM.
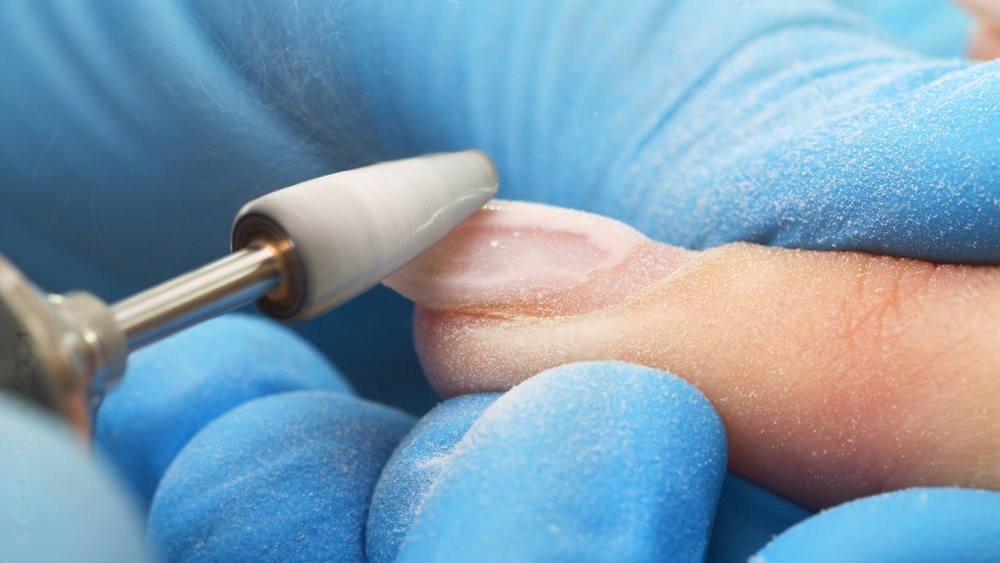
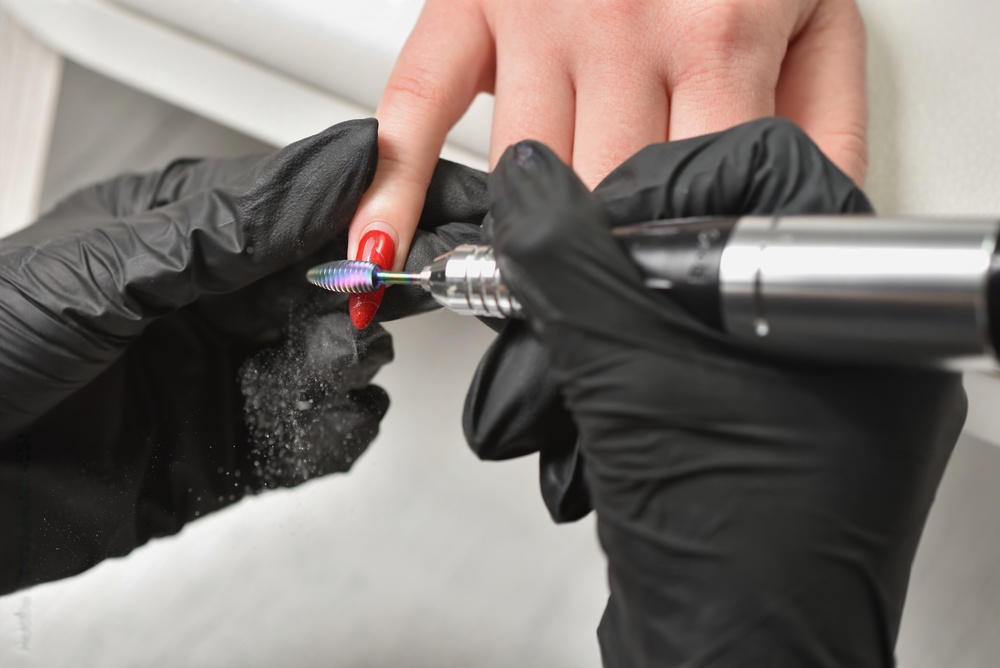
- Remove bulk acrylic: Hold the drill at a slight angle and move in one direction across the nail surface. Use feather-light pressure. The bit should glide, not dig.
- Stop at the color change: As you thin the acrylic, the surface becomes slightly translucent. Stop drilling when you see this transition. You should still have a thin layer of acrylic protecting the natural nail.
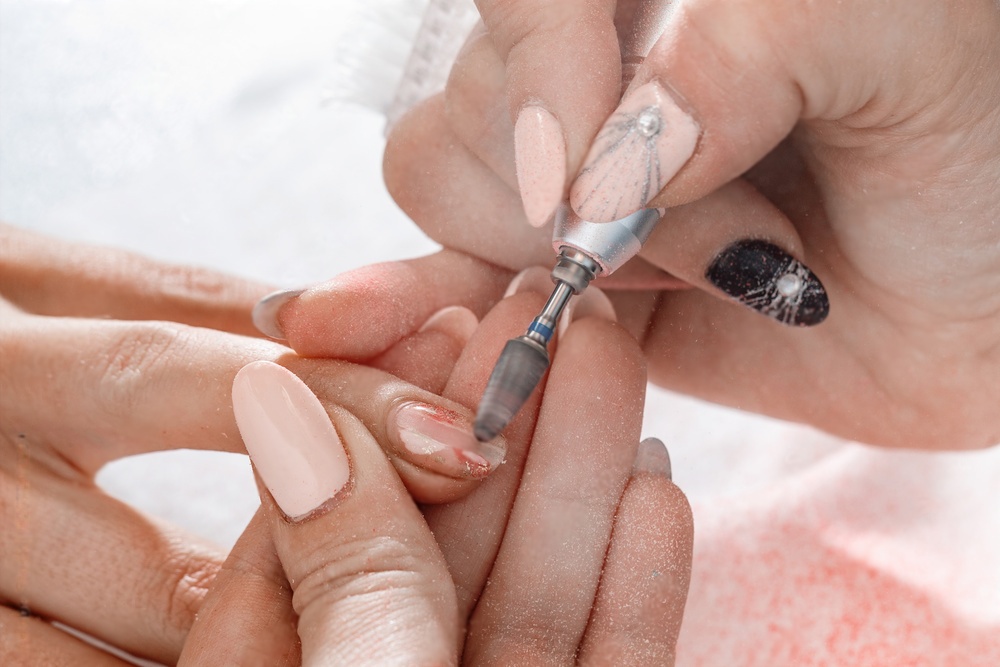
- Switch to a fine bit or sanding band (180 grit): Reduce speed to 8,000-10,000 RPM and gently refine the remaining acrylic.
- Buff and hydrate: Use a silicone polisher or buffer to smooth the natural nail, then apply cuticle oil.
How to Remove Acrylic Nails at Home
Not everyone has a nail drill at home, and even if you do, there are times when a different approach makes more sense. Here are three proven methods for removing acrylic nails yourself, ranked from fastest to most gentle.
Method 1: Nail Drill Removal (Fastest — 10-15 Minutes)
If you own an e-file, this is the quickest route. Follow the step-by-step process outlined above: start with a coarse carbide at 15,000-18,000 RPM for bulk removal, switch to a fine bit at 8,000-10,000 RPM as you approach the natural nail, then finish by hand. Total time per hand is about 5-8 minutes once you have the technique down.
Method 2: Acetone Soak (No Tools Needed — 30-45 Minutes)
- File the top coat: Use a coarse nail file (100-grit) to scratch through the shiny top layer. This lets the acetone penetrate faster.
- Soak in pure acetone: Pour enough 100% acetone into a shallow bowl to cover your nails. Submerge your fingertips for 20-30 minutes.
- Scrape gently: The acrylic should look soft and gummy. Use a wooden cuticle pusher to gently lift and scrape the softened material. Never force it — if it resists, soak for another 5 minutes.
- Buff and moisturize: Smooth any residue with a 240-grit buffer, then apply cuticle oil generously. Acetone dries out the nail and surrounding skin, so hydration is critical.
Method 3: Acetone and Foil Wrap (Less Mess — 25-40 Minutes)
This method works the same as the soak but uses less acetone. File the top layer, soak a cotton ball in pure acetone, place it on the nail, and wrap each fingertip tightly in aluminum foil. Wait 20-25 minutes, then unwrap one nail at a time and push off the softened acrylic. The foil traps heat from your fingers, which speeds up the dissolving process compared to an open bowl soak.
When to Skip DIY and Visit a Salon
Go to a professional if your acrylics have been on for more than 6 weeks without a fill, if you notice any green discoloration under the nail (possible fungal infection), or if you have damaged or very thin natural nails. A trained technician can remove problem nails without making the situation worse. The $10-20 salon removal fee is worth it when your nail health is at stake.
Common Mistakes to Avoid
- Holding the bit in one spot: This causes heat rings and can burn the client. Keep the bit moving at all times.
- Too much pressure: Let the bit cut on its own. Pressing harder does not speed up removal; it just generates heat.
- Wrong RPM: Going too fast with a coarse bit is a recipe for over-filing. Start lower and increase only if needed.
- Skipping the final hand-file step: Always finish the last thin layer by hand to avoid drilling into the natural nail plate.
- Using a worn-out bit: Dull carbide bits require more pressure to cut, which increases heat. Replace bits when the flutes appear rounded or smooth.
How to Clean Acrylic Drill Bits
Acrylic residue builds up fast. When product packs into the flutes of a drill bit, cutting efficiency drops, the bit runs hotter, and you end up pressing harder — which is hard on both the nail and the natural plate underneath. Regular cleaning keeps your bits performing like new and extends their lifespan significantly.
Cleaning Carbide Bits
- Use a brass wire brush to knock off loose acrylic debris while the bit is dry. Brush in the direction of the flutes, not against them.
- Soak the bit in 100% acetone for 5–10 minutes to dissolve stubborn acrylic residue.
- Scrub again with the brass brush, then rinse under warm running water.
- Pat dry with a lint-free cloth and allow to air dry fully before storing.
Avoid steel brushes — they scratch carbide and accelerate wear on the cutting edges.
Cleaning Diamond Bits
- Place bits in an ultrasonic cleaner filled with water and a few drops of enzymatic cleaning solution. Run a full cycle (typically 3–5 minutes).
- If you don't have an ultrasonic cleaner, soak in an enzymatic solution for 10 minutes, then gently scrub with a soft brush.
- Rinse thoroughly and dry completely before use or storage.
Do not use acetone on diamond bits — it can degrade the bonding that holds the diamond grit in place.
Sterilization for Salon Use
Cleaning removes debris, but sterilization is a separate step required for reusable bits in a salon setting. Carbide and stainless steel bits that contact the skin or nail plate should be autoclaved between clients. For proper protocols, refer to this sterilizing and handling guide for rotary instruments.
Sanding Bands for Acrylic: A Supporting Role
Sanding bands are disposable abrasive sleeves that fit over a reusable mandrel. They are not ideal for primary acrylic removal because they grind rather than cut, which means more heat and slower progress. However, they fill a useful role in the final stages of the removal process.
A 180-grit sanding band at 8,000-10,000 RPM is effective for thinning the last thin layer of acrylic after the carbide bit has done the heavy lifting. The disposable nature of sanding bands also makes them a hygienic choice in salon settings where cross-contamination is a concern. Use a fresh band for each client and discard it after the service.
How to Prevent Heat Damage During Acrylic Removal
Heat is the number one complaint clients have during drill-based acrylic removal. Understanding where heat comes from helps you prevent it.
Heat is generated by friction between the bit and the acrylic surface. Three factors increase friction: pressing the bit against the nail, holding the bit in one spot too long, and using a dull or clogged bit. Address all three and your clients will feel little to no warmth.
- Keep the bit moving: Glide across the nail surface in smooth, sweeping motions. Each pass should cover the full length of the nail.
- Use zero pressure: Rest the bit on the acrylic and let the rotation do the work. The weight of the handpiece alone provides enough contact.
- Check your bit condition: Before each client, inspect the carbide flutes. If the cutting edges look rounded or shiny, the bit is dull and needs replacing.
- Work in short intervals: File for 3-5 seconds, then lift the bit and let the nail cool for a moment. This is especially important when approaching the natural nail.
Recommended Drill Bit Kit for Acrylic Removal
A practical acrylic removal setup includes three bits:
- Coarse cross-cut carbide barrel for bulk removal
- Fine carbide or 180-grit sanding band for approaching the natural nail
- Silicone polisher for final buffing and shine
This three-bit system covers the full removal process from start to finish while keeping the natural nail protected at every stage. Investing in quality bits from a reputable manufacturer pays for itself in faster service times and fewer client complaints about heat or nail damage.
Frequently Asked Questions
What grit carbide bit is best for removing acrylics?
A medium cross-cut (2XC) carbide bit is the most versatile choice. It removes acrylic efficiently without being so aggressive that beginners lose control. Coarse (XC) bits work faster but require more experience.
Can I remove acrylic nails with just a sanding band?
Technically yes, but it takes much longer and generates more heat. Sanding bands are abrasive rather than cutting, so they grind through acrylic slowly. Use them for the final thinning stage, not the bulk removal.
How do I know when to stop drilling?
Watch for a slight color change and increased flexibility in the nail. The acrylic will look more translucent as it thins. When you can gently flex the nail with your finger, stop the drill and switch to hand-filing.
How to use nail drill bits for beginners?
Start with a safety bit (the kind with a smooth, non-cutting tip) and set your e-file to 5,000-8,000 RPM. Hold the handpiece like a pen and use zero pressure — just let the bit rest on the surface while it spins. Practice on artificial nail tips before working on real nails. Once you can file a tip evenly without creating dips or thin spots, you are ready to move to natural nails. Gradually increase your speed as your control improves, but there is no rush. Many experienced techs do fine detail work below 10,000 RPM.
What is the best drill bit for acrylic sheet cutting?
If you mean cutting acrylic sheets (plexiglass) rather than acrylic nails, that requires completely different tooling. For acrylic sheet cutting, use a carbide straight-flute or spiral O-flute router bit designed for plastics. Nail drill bits are far too small and not shaped for sheet cutting. The RPM ranges, feed rates, and cooling requirements are different applications entirely.
Choosing the right drill bit makes acrylic removal faster, safer, and more comfortable for both the technician and the client. For more information on how different bit types compare, see our guide on types of nail drill bits and their uses. If you are new to e-filing, our complete guide to nail drill bits for manicure covers the fundamentals of technique and safety.
Need an Acetone-Free Removal Workflow?
For a complete step-by-step approach, read How to Remove Acrylic Nails Without Acetone for the full drill sequence, RPM tips, and aftercare.
FAQ: Acrylic Removal Bits
Carbide vs ceramic? Both can work well. Carbide is commonly chosen for fast cutting, while ceramic can feel smoother and run cooler for some users.
How do you avoid heat? Keep the bit moving, reduce pressure, and switch to a finer bit as soon as most of the acrylic is removed.
