Diamond Burs for Beginners: Types, Uses, and Care Tips
Diamond burs are among the most frequently used rotary instruments in clinical dentistry. Whether you are a dental student, a new assistant, or a practitioner expanding your toolkit, understanding how these instruments work will help you choose the right bur for every procedure and get consistent results from day one.
This guide covers diamond bur construction, common shapes, grit classifications, clinical techniques, and maintenance routines so you can work with confidence.

What Are Diamond Burs?
A diamond bur consists of a metal shank bonded with industrial diamond particles. The diamond coating acts as the cutting surface, allowing the bur to grind through enamel, dentin, porcelain, and composite resin efficiently. Because diamond is one of the hardest materials available, these burs maintain their cutting ability longer than many alternatives.
Diamond burs are primarily used with high-speed handpieces operating between 300,000 and 450,000 RPM, although certain shapes also work at lower speeds for finishing procedures. They require water coolant during use to prevent thermal damage to the pulp.
How Diamond Burs Are Made
There are two main manufacturing methods, each producing burs with distinct performance characteristics:
- Electroplated diamond burs – A single layer of diamond particles is bonded to the shank using a nickel electroplating process. These burs are cost-effective and offer aggressive initial cutting, but the diamond layer wears over time. They are the most common type in everyday clinical practice.
- Sintered diamond burs – Diamond particles are distributed throughout a metal matrix that is fused to the shank under high heat and pressure. As the surface layer wears, fresh diamond is exposed, giving sintered burs a significantly longer working life. They are popular in laboratory work and for cutting hard ceramics.
For a detailed comparison of these two manufacturing approaches, see our article on sintered vs. electroplated diamond burs.
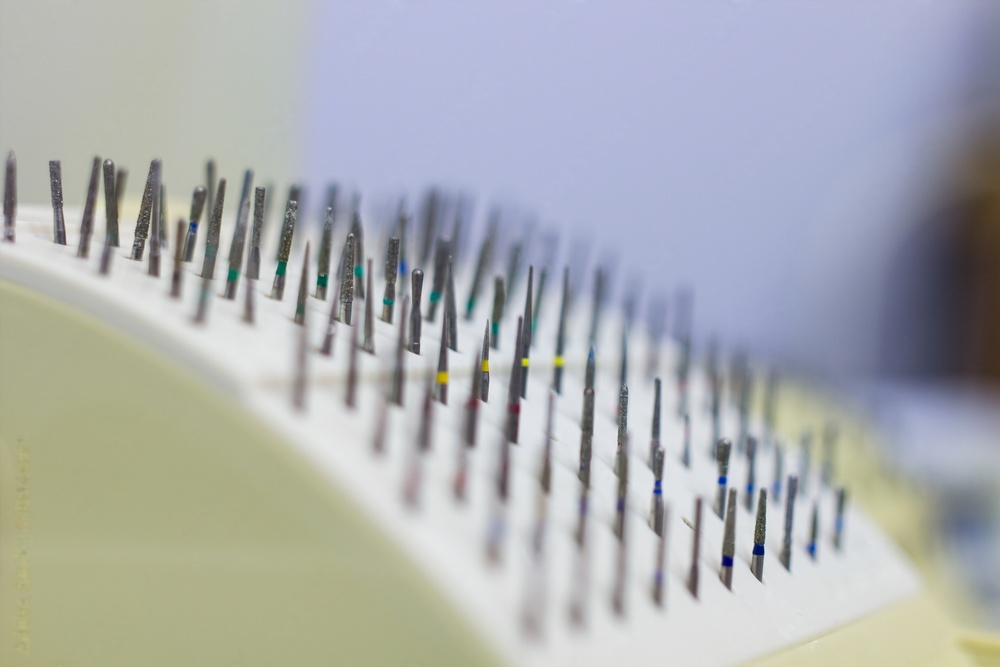
Common Diamond Bur Shapes and Their Uses
Diamond burs come in dozens of shapes. The table below lists the ones you will encounter most often in general practice:
| Shape | Common Name | Primary Uses |
|---|---|---|
| Round | Ball | Initial cavity access, caries removal, creating retention points |
| Pear | Pear / 330 shape | Cavity outline form, undercut preparation |
| Tapered flat-end | Flat-end taper | Crown preparation, shoulder finish lines |
| Tapered round-end | Round-end taper | Crown preparation, chamfer finish lines, veneer preps |
| Flame | Flame | Subgingival margin refinement, interproximal contouring |
| Wheel | Wheel / Lenticular | Shoulder reduction, seat preparation for inlays |
| Cylinder flat-end | Flat-end cylinder | Bulk reduction, flat wall preparation |
| Football | Egg / Football | Occlusal reduction, lingual surface contouring |
| Needle | Needle / Pin | Detail work, fissure access, orthodontic adjustments |
Selecting the right shape is the first step toward efficient tooth preparation. When in doubt, tapered round-end and tapered flat-end burs handle the widest range of crown and veneer preparations.
Understanding Diamond Grit Sizes
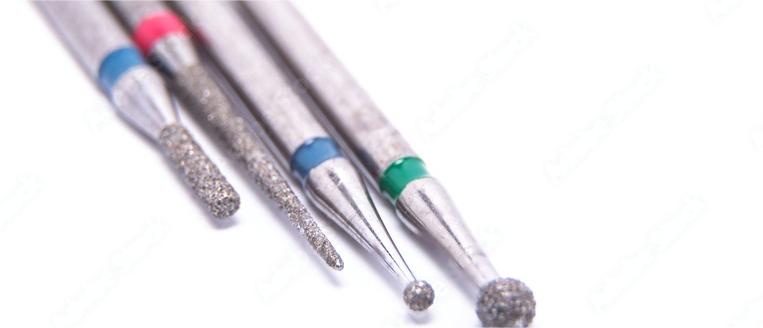
Grit size determines how aggressively a diamond bur cuts and what kind of surface finish it leaves. Grit is measured in micrometers and is usually indicated by a color band on the bur shank:
| Color Band | Grit Category | Particle Size (μm) | Typical Application |
|---|---|---|---|
| Black | Super coarse | 180–250 | Rapid bulk removal of tooth structure or old restorations |
| Green | Coarse | 125–180 | Initial crown and bridge preparation |
| Blue (or no band) | Medium / Standard | 106–125 | General-purpose cutting, most routine preparations |
| Red | Fine | 50–80 | Smoothing preparation walls, refining margins |
| Yellow | Extra fine | 20–50 | Final finishing, pre-impression margin refinement |
| White | Ultra fine | <20 | High-gloss polishing of composites and ceramics |
A common clinical workflow uses a coarse or medium bur for the initial preparation, followed by a fine or extra-fine bur of the same shape to refine the margins before taking an impression. This two-step approach saves time while producing a clean finish line.
How to Use Diamond Burs Effectively

Choose the Right Bur First
Match the bur shape to the preparation design and the grit to the stage of the procedure. Starting with a bur that is too fine wastes time; starting with one that is too coarse risks removing more structure than planned.
Use Light, Sweeping Strokes
Let the diamond coating do the work. Pressing hard does not speed up cutting; it increases heat generation and accelerates bur wear. A light, brushing motion across the tooth surface produces the best results.
Keep the Bur Moving
Holding a spinning diamond bur in one spot concentrates heat and can damage the pulp. Continuous movement distributes cutting forces evenly and reduces the risk of thermal injury.
Always Use Water Coolant
High-speed diamond burs must operate under a water spray. The standard recommendation is a minimum of 50 mL per minute of coolant directed at the cutting site. Without adequate water, temperatures at the bur-tooth interface can exceed the threshold for irreversible pulp damage.
Monitor Bur Condition
An electroplated diamond bur that feels like it is skating across the surface instead of cutting has likely lost its diamond coating. Continuing to use a worn bur leads to excessive pressure, higher heat, and a rough preparation surface. Replace burs at the first sign of reduced cutting efficiency.
Maintenance and Care for Diamond Burs
Proper cleaning and sterilization extend bur life and protect patients. Follow these steps after every use:
- Rinse immediately – Hold the bur under running water to remove loose debris before it dries and hardens on the diamond surface.
- Scrub with a brass wire brush – Gently brush along the length of the bur head to dislodge embedded material. Avoid steel brushes, which can damage the diamond coating.
- Ultrasonic cleaning – Place burs in an ultrasonic cleaner with an enzymatic solution for the manufacturer-recommended cycle time. This step removes debris that manual brushing misses.
- Inspect under magnification – Check for missing diamond particles, bent shanks, or corrosion. Discard any bur that shows visible damage.
- Autoclave sterilize – Package burs and sterilize according to your infection-control protocol. Standard steam autoclaving at 134 °C is appropriate for most diamond burs.
- Store properly – Keep sterilized burs in a clean bur block or organizer, separated to prevent contact damage between instruments.
For more detailed cleaning protocols, read our guide on how to clean diamond dental burs.
Diamond Burs vs. Carbide Burs: When to Use Each
New clinicians often wonder whether to reach for a diamond bur or a tungsten carbide bur. The short answer is that each excels in different situations:
- Diamond burs work best for cutting through enamel, porcelain, and ceramic materials. They produce a rougher surface at the microscopic level, which can be an advantage when bonding composite to a preparation.
- Carbide burs are preferred for cutting dentin, removing old amalgam restorations, and creating smooth cavity walls. They produce cleaner, chip-free margins on softer substrates.
Many preparation workflows combine both types: a diamond bur for the initial enamel reduction and a carbide bur for refining the internal walls and margins. Understanding the strengths of each instrument helps you work faster with better outcomes.
Choosing Quality Diamond Burs
Not all diamond burs are manufactured to the same standard. When evaluating suppliers, look for consistent diamond particle distribution, concentricity of the bur head on the shank, and accurate shank dimensions that fit your handpiece without wobble. Poor-quality burs vibrate, cut unevenly, and wear out quickly, costing more in the long run than investing in reliable instruments from the start.
Browse our full selection of diamond dental burs to find the shapes and grits you need for your practice.
Key Takeaways
- Diamond burs use bonded diamond particles to cut hard dental materials efficiently at high speed.
- Electroplated burs are economical for routine use; sintered burs last longer for demanding applications.
- Match the bur shape to your preparation design and the grit to the stage of the procedure.
- Use light pressure, continuous motion, and adequate water coolant to protect the pulp and extend bur life.
- Clean, inspect, and sterilize burs after every patient to maintain cutting performance and infection control.
With a solid understanding of diamond bur types, grits, and techniques, you will be able to approach any preparation with the right instrument and the confidence to use it well.
