How to Choose a Dental Intraoral Camera in 2026
Why Intraoral Cameras Matter in Modern Dentistry
An intraoral camera is a small, pen-sized imaging device that captures high-resolution photographs and video inside the patient's mouth. Since their introduction in the late 1980s, these cameras have moved from expensive novelty items to everyday clinical instruments. Today they are standard equipment in general practices, orthodontic offices, and prosthodontic clinics around the world.
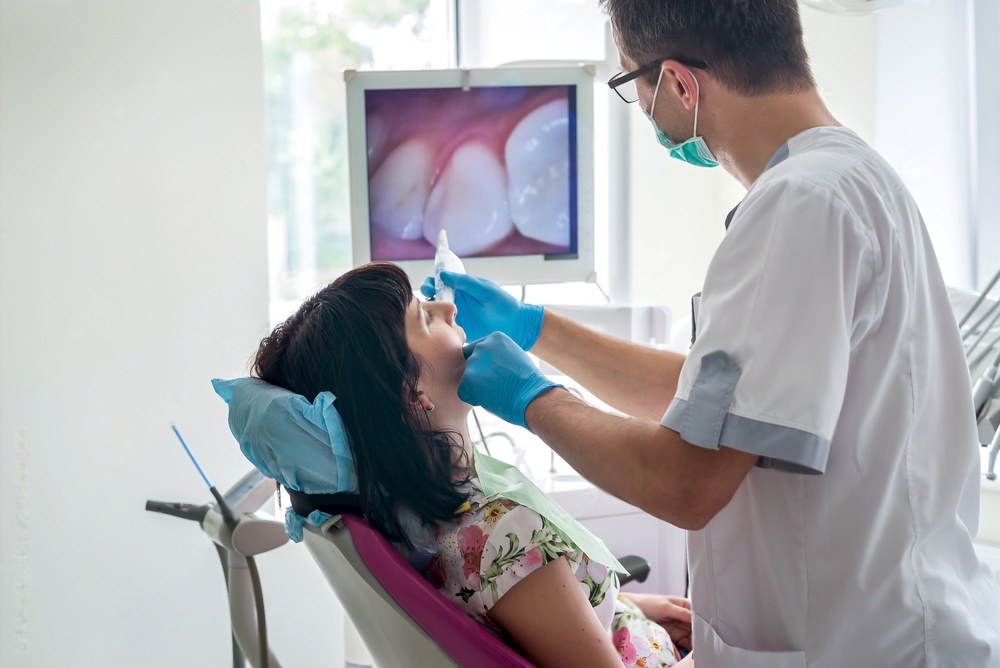
Intraoral cameras serve two main purposes. First, they give clinicians a magnified, well-lit view of hard-to-see areas such as interproximal surfaces, subgingival margins, and the distal aspects of molars. Second, they improve patient communication by putting real-time images on a chairside monitor. When patients can see the crack in their own tooth or the failing margin on an old restoration, treatment acceptance rates go up significantly.
Key Factors When Choosing an Intraoral Camera
With dozens of models available at price points ranging from under one hundred dollars to several thousand, narrowing down the options requires a clear set of priorities. The sections below cover the most important selection criteria.
1. Image Quality and Resolution
Image quality is the single most important specification. A camera that produces blurry or poorly lit images defeats its own purpose. Look for the following:
- Sensor resolution -- Most current models offer at least 2 megapixels. Higher-end units reach 5 MP or above, which is useful for documentation and insurance submissions.
- Auto-focus vs. fixed focus -- Auto-focus cameras adapt to varying distances inside the mouth, reducing the number of out-of-focus shots. Fixed-focus models are simpler but require the operator to maintain a consistent working distance.
- LED illumination -- Bright, evenly distributed LED lighting is non-negotiable. Some cameras include multiple LED rings or adjustable brightness settings to minimize shadows on curved tooth surfaces.
Before purchasing, request sample images taken with the camera you are considering. Manufacturers often provide demo units for a trial period. Use this opportunity to photograph a range of clinical situations, including deep preparations, tight interproximal contacts, and posterior teeth, to confirm that quality meets your expectations.
2. Connectivity and Software Compatibility
An intraoral camera is only as useful as the software ecosystem it connects to. Consider these points:
- USB vs. wireless -- USB cameras plug directly into a computer and are typically recognized immediately. Wireless models communicate over Wi-Fi or Bluetooth and allow greater freedom of movement, but they require battery charging and may experience occasional signal drops.
- Practice management integration -- Confirm that the camera works with your existing practice management software (Dentrix, Eaglesoft, Open Dental, or others). TWAIN-compliant cameras generally connect to most platforms without additional drivers.
- Image format and storage -- Standard JPEG output is the most universally compatible. Some cameras also save in DICOM format for integration with medical imaging systems.
Wireless cameras have improved considerably in recent years, but for reliability in a busy multi-operatory practice, a wired USB connection still tends to cause fewer disruptions during patient appointments.

3. Ergonomics and Ease of Use
The camera will spend most of its working life in a clinician's or assistant's hand, so comfort matters. Evaluate the following:
- Weight and balance -- A camera that is too heavy causes hand fatigue during extended photo sessions. Most modern units weigh between 50 and 120 grams.
- Grip design -- Look for an anti-slip coating or textured grip that remains secure even when gloved hands are slightly moist.
- Capture button placement -- The shutter button should be easy to reach with the index finger without shifting your grip. Some models offer foot-pedal capture or freeze-frame functionality controlled from the software.
- Tip size and angle -- A slimmer tip reaches posterior areas more easily. Angled tips (45 or 90 degrees) can capture occlusal views with less patient discomfort.
4. Infection Control
Every instrument that enters the oral cavity must meet strict infection-control standards. Most intraoral cameras use disposable plastic sheaths that slide over the camera tip. Check that replacement sheaths are readily available and reasonably priced, since they become an ongoing consumable cost. Some premium cameras feature autoclavable metal tips that can be sterilized and reused, reducing waste and per-patient supply expense.
5. Durability and Build Quality
Dental equipment takes constant handling. Cameras get passed between operatories, dropped occasionally, and cleaned repeatedly. A metal or reinforced-polymer housing holds up far better than thin plastic. Check the manufacturer's warranty period and terms. A two-year or longer warranty with coverage for defects and normal wear is a reasonable benchmark.
6. Price and Total Cost of Ownership
The purchase price is only part of the equation. Factor in the cost of disposable sheaths, software licensing fees (if any), and potential repair or replacement after warranty expiration. Budget-priced cameras can perform admirably for basic documentation, but practices that rely on high-resolution imaging for case presentation or insurance claims may find that investing more up front pays off over time through fewer retakes and better image quality.
Here is a rough price-tier comparison:
| Price Tier | Typical Resolution | Connectivity | Best For |
|---|---|---|---|
| Under $300 | 1-2 MP | USB only | Basic documentation, small practices |
| $300 - $800 | 2-3 MP | USB or wireless | General practice, patient education |
| $800 - $2,000 | 3-5+ MP | USB and wireless | Insurance documentation, specialist clinics |
| Over $2,000 | 5+ MP, video | Full integration | High-volume practices, teledentistry |
How to Evaluate a Camera Before Buying
The best way to judge an intraoral camera is to test it in your own operatory. Follow these steps:
- Request a loaner unit or attend a trade-show demonstration where you can handle the camera yourself.
- Photograph a typodont or a willing staff member's teeth under normal clinical lighting conditions.
- Transfer the images to your practice management software and confirm they display correctly in the patient chart.
- Have every team member who will use the camera try it. Ergonomic preferences vary, and buy-in from the whole team increases actual usage rates.
- Compare at least two or three models side by side before committing.

Maintenance Tips for Intraoral Cameras
Proper care keeps image quality high and prevents premature failure:
- Wipe the lens window after every patient with an alcohol-free optical cleaning wipe. Residue from prophy paste or bonding agents degrades image clarity fast.
- Store the camera in its cradle or a padded case when not in use. Leaving it loose on the counter invites drops and scratches.
- Inspect the USB cable or charging contacts regularly for damage. A frayed cable is the number-one cause of intermittent connection problems.
- Follow the manufacturer's firmware update schedule. Updates sometimes improve image processing algorithms or add compatibility with newer operating systems.
Intraoral Cameras and the Broader Digital Workflow
An intraoral camera fits into a larger digital dentistry toolkit alongside intraoral scanners, CBCT units, and CAD/CAM milling systems. While the camera captures 2D photographs for documentation and patient education, an intraoral scanner generates 3D surface data for digital impressions. The two devices complement each other rather than compete. Practices moving toward a fully digital workflow often start with an intraoral camera because the learning curve is gentle and the immediate benefit to patient communication is clear.
If your practice also handles in-house milling, pairing strong diagnostic imaging with precision rotary instruments makes a noticeable difference. Our selection of CAD/CAM milling burs is designed to work with all major milling units. For a broader look at where dental technology is headed, read our article on the future of dentistry, from AI to biocompatible tools.
Final Recommendations
Choosing the right dental intraoral camera comes down to matching your clinical needs with the right balance of image quality, connectivity, ergonomics, and budget. Start by defining what you need the camera to do most often -- patient education, insurance documentation, or clinical diagnosis -- and let that priority guide your comparison shopping. Test before you buy, involve your whole team in the evaluation, and factor in long-term consumable costs alongside the sticker price. A well-chosen intraoral camera will quickly become one of the most-used instruments in your practice.
For other instruments and supplies that support a smooth clinical workflow, explore our dental accessories catalog.
