How to Sterilize Dental Instruments: A Step-by-Step Guide
How to Sterilize Dental Instruments Properly
Sterilization is a non-negotiable part of every dental practice. Every handpiece, bur, explorer, and mirror that contacts a patient's mouth must be cleaned and sterilized between uses to prevent cross-contamination and infection. Regulatory bodies such as the CDC and OSHA set strict guidelines for instrument processing, and following them protects both patients and clinical staff.
This guide walks through the complete sterilization workflow, from personal protective equipment to final storage, so every step is handled correctly.
Step 1: Safety Precautions Before Handling Used Instruments
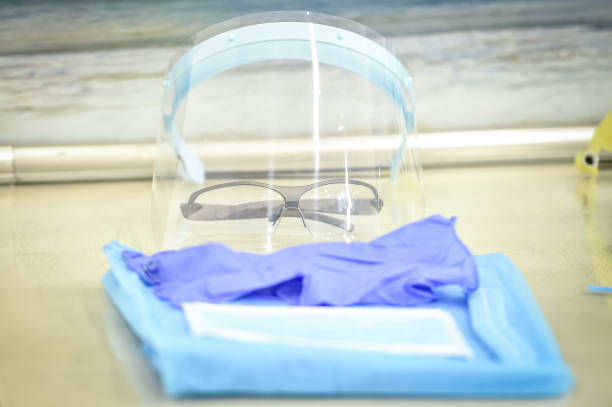
Before touching any contaminated instrument, staff must put on appropriate personal protective equipment (PPE). This is the first and most important step in the sterilization process.
Required PPE
- Puncture-resistant utility gloves: Standard exam gloves are not sufficient for instrument processing. Heavy-duty nitrile or rubber utility gloves rated for puncture resistance are required.
- Protective eyewear: Safety glasses or a face shield prevent splashes of contaminated water or cleaning solution from reaching the eyes.
- Face mask: A surgical mask protects against aerosols generated during rinsing and ultrasonic cleaning.
- Protective clothing: A fluid-resistant gown or lab coat keeps contaminated material off street clothing.
PPE should be donned before any instruments are moved from the treatment room to the sterilization area. This reduces the risk of accidental exposure during transport.
Step 2: Transport and Pre-Cleaning
Used instruments should be transported in a puncture-resistant, leak-proof container from the operatory to the processing area. Avoid carrying loose instruments by hand, even with gloves on.
Once in the sterilization area, separate sharps from other instruments immediately. Needles, scalpel blades, and broken burs go directly into a designated sharps container. Never recap needles or attempt to bend or break them before disposal.
Rinse all remaining instruments under running water to remove gross debris such as blood, saliva, and cement. This preliminary rinse makes the subsequent cleaning step more effective and prevents organic material from drying onto instrument surfaces.
Step 3: Cleaning Methods
Cleaning is not the same as sterilization, but it is a required prerequisite. Organic debris left on instruments can shield microorganisms from the sterilization process, so thorough cleaning is essential for sterilization to work.
There are three primary cleaning methods used in dental offices:
Ultrasonic Cleaning
Ultrasonic cleaners use high-frequency sound waves to create microscopic cavitation bubbles in a cleaning solution. These bubbles implode on contact with instrument surfaces, dislodging debris from areas that are difficult to reach by hand, such as the flutes of dental burs and the joints of hinged instruments.
To use an ultrasonic cleaner effectively:
- Fill the chamber with the manufacturer-recommended enzymatic or detergent solution at the correct dilution ratio.
- Place instruments in a perforated basket or cassette so they are fully submerged but not stacked on top of each other.
- Run the cycle for the time specified by the manufacturer, typically 6 to 10 minutes.
- Remove the basket and rinse all instruments thoroughly under running water to eliminate cleaning solution residue.
Automatic Instrument Washers
Washer-disinfectors automate the cleaning process using a combination of water jets, detergent, and thermal disinfection. They offer several advantages over ultrasonic cleaning:
- Reduced manual handling of contaminated instruments
- Standardized and reproducible wash cycles
- Built-in thermal disinfection step that reduces bioburden before sterilization
Automatic washers are a good investment for practices processing large instrument volumes, as they save time and reduce the risk of sharps injuries during manual handling.
Manual Scrubbing
When ultrasonic cleaners and automatic washers are unavailable, instruments may be cleaned by hand. Manual scrubbing should be the last resort because it carries the highest risk of sharps injuries and is the least consistent method.
If manual cleaning is necessary:
- Use a long-handled brush to keep hands away from sharp edges and tips.
- Scrub instruments under water to minimize aerosol generation.
- Use an enzymatic detergent to help break down protein-based debris.
- Inspect each instrument visually after scrubbing to confirm all debris has been removed.
Step 4: Drying and Inspection
After cleaning, instruments must be dried before packaging. Excess moisture can interfere with steam sterilization and promote corrosion on carbon steel instruments. Pat instruments dry with disposable towels or allow them to air-dry on a clean surface.
This is also the right time to inspect instruments for damage. Check dental burs for worn cutting edges or bent shanks. Examine hinged instruments for stiffness or corrosion at the joint. Instruments that no longer function properly should be discarded, not sterilized and returned to service.
For guidance on evaluating bur condition, our article on caring for your dental burs provides practical tips.
Step 5: Packaging for Sterilization
Cleaned and dried instruments are placed into sterilization pouches, wraps, or cassettes before being loaded into the sterilizer. Proper packaging serves two purposes: it allows the sterilant (steam, heat, or chemical vapor) to reach all instrument surfaces during the cycle, and it maintains sterility after the cycle until the instruments are opened for use.
Packaging Guidelines
| Packaging Type | Best For | Seal Method |
|---|---|---|
| Self-seal pouches | Individual instruments or small sets | Adhesive strip |
| Heat-seal pouches | Individual instruments or small sets | Heat sealer |
| Sterilization wrap | Instrument cassettes, larger bundles | Autoclave tape |
| Rigid cassettes | Procedure-specific instrument sets | Wrap or container lid |
Each package should be labeled with the date of sterilization and a load number for traceability. Many practices also include a chemical indicator strip inside the package to confirm that sterilization conditions were met.
Step 6: Sterilization Methods
Three sterilization methods are commonly used in dental settings. Each has specific parameters that must be met for effective microbial kill.
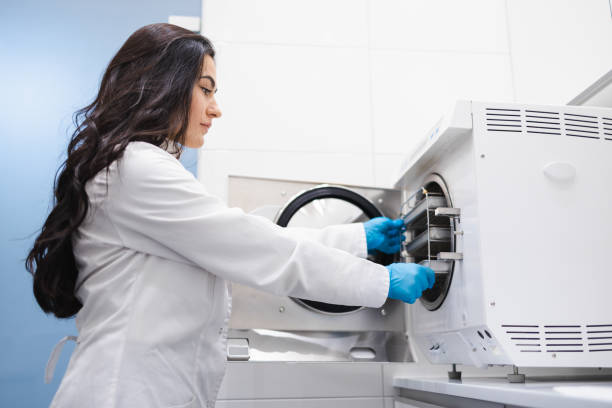
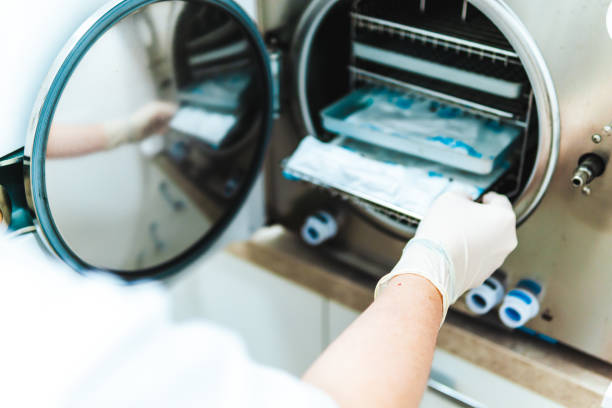
Steam Sterilization (Autoclave)
The autoclave is the most widely used sterilizer in dentistry. It uses pressurized steam to destroy microorganisms, including bacterial spores. Standard autoclave cycles operate at one of two settings:
- 121 degrees C (250 degrees F) at 15 psi for 30 minutes
- 134 degrees C (273 degrees F) at 30 psi for 4 minutes (flash sterilization, for unwrapped instruments only)
Autoclaves work well for most dental instruments, including stainless steel hand instruments, tungsten carbide burs, and diamond dental burs. However, some materials and adhesives may degrade under repeated steam cycles, so always verify that instruments are rated for autoclave processing.
Dry Heat Sterilization
Dry heat sterilizers use high temperatures without moisture. They are suitable for instruments that may corrode in steam, such as certain carbon steel tools and some bur types. Typical settings are 170 degrees C for 60 minutes or 160 degrees C for 120 minutes.
Dry heat cycles are longer than autoclave cycles, so they are less practical for high-volume practices but remain a valid option when steam is not appropriate.
Chemical Vapor Sterilization
Unsaturated chemical vapor sterilizers use a mixture of alcohol, formaldehyde, ketone, acetone, and water heated under pressure. They operate at 132 degrees C and 20 psi for 20 minutes. The main advantage is reduced corrosion on carbon steel instruments compared to steam. The main drawback is the need for adequate ventilation due to chemical fumes.
Step 7: Monitoring and Verification
Running a sterilization cycle does not guarantee that sterilization occurred. Monitoring is required to verify that every load achieves adequate conditions for microbial kill.
Three Levels of Monitoring
- Mechanical monitoring: Check the sterilizer's gauges, printouts, or digital displays after each cycle to confirm that correct time, temperature, and pressure were reached.
- Chemical indicators: Internal and external chemical indicator strips change color when exposed to specific sterilization conditions. They confirm that the sterilant reached the instruments inside the package.
- Biological indicators: Spore tests are the gold standard for sterilization verification. A vial containing bacterial spores is processed with the load and then incubated. If no spore growth occurs, the cycle was successful. The CDC recommends biological monitoring at least weekly, plus with every implantable device load.
Step 8: Storage of Sterilized Instruments
Sterilized packages should be stored in a clean, dry, enclosed area away from sources of contamination. Avoid storing packages in drawers that are frequently opened or near sinks where splashing may occur.
Event-related shelf life is the current standard, meaning sterilized packages remain sterile until the packaging is compromised by tearing, moisture, or opening. However, packages should still be rotated on a first-in, first-out basis, and any package showing signs of damage should be re-processed before use.
Common Sterilization Mistakes to Avoid
Even experienced dental teams make processing errors. Here are the most frequent problems and how to prevent them:
- Overloading the sterilizer: Packing too many instruments into a single load prevents steam or heat from circulating properly. Follow the manufacturer's loading guidelines.
- Skipping the cleaning step: Debris shields bacteria from sterilization. Never place visibly soiled instruments directly into the sterilizer.
- Using expired solutions: Ultrasonic cleaning solutions and chemical vapor solutions lose effectiveness after their use-by date. Check expiration dates and dilution ratios regularly.
- Ignoring biological indicator failures: A positive spore test means the load was not sterilized. Immediately remove affected instruments from circulation, investigate the cause, and re-process.
For a related discussion on maintaining specific instrument types, see our article on how to clean and sterilize tungsten carbide burs.
Summary
Proper sterilization of dental instruments follows a clear sequence: PPE, transport, cleaning, drying, packaging, sterilizing, and monitoring. Each step depends on the one before it, and skipping any stage can compromise the entire process. By following established protocols and verifying results with biological indicators, dental practices maintain a safe environment for patients and staff while meeting regulatory standards.
