Abrasive sandpaper mandrels are among the most versatile accessories for rotary tools. Whether you work in jewelry fabrication, dental laboratory finishing, or general metalworking, a properly mounted sandpaper mandrel allows you to sand, grind, and polish interior surfaces that would be impossible to reach by hand.
This guide explains how to select, assemble, and use sandpaper mandrels effectively, along with safety precautions and maintenance tips that extend the life of your abrasives.
What Is a Sandpaper Mandrel?
A mandrel is a cylindrical shaft that mounts into the chuck or collet of a rotary tool such as a Dremel, flex shaft, or dental handpiece. A split mandrel has a narrow slot cut into one end that grips a strip of sandpaper, holding it securely while the tool spins. As the sandpaper wears down, you simply unwrap the used portion and expose fresh abrasive surface.
Mandrels are available in various shank sizes to fit different handpieces and rotary tools. For dental applications, mandrels typically conform to the standard 2.35mm (3/32-inch) shank diameter used with rotary tool accessories.
Tools and Materials You Will Need
Before starting, gather the following items:
- Split mandrel (appropriate shank size for your rotary tool)
- Abrasive sandpaper in the desired grit
- Scissors for cutting sandpaper strips
- Rotary tool (Dremel, flex shaft, or dental handpiece)
- Electrical tape or a small amount of adhesive (optional, for securing the strip)
- Safety equipment (detailed below)
Safety Precautions
Rotary tools spin at high speeds and generate fine particles. Taking proper precautions is not optional. Follow these guidelines every time you work with a sandpaper mandrel.
Eye Protection

Wear safety glasses or a face shield. Fragments of sandpaper, metal filings, and debris can be thrown from the workpiece at high velocity. Standard prescription glasses do not provide adequate side protection.
Respiratory Protection

Use a dust mask rated for fine particles (N95 minimum) when grinding or sanding for any duration. Materials such as metal alloys, ceramics, and resins produce fine dust that poses a respiratory hazard when inhaled over time.
Hearing Protection
For extended sanding sessions, wear ear plugs or ear muffs. Prolonged exposure to the high-pitched noise produced by rotary tools at operating speed can contribute to hearing damage.
How to Select the Right Grit
Grit number determines how aggressively the sandpaper cuts. Lower numbers indicate coarser abrasives that remove material quickly, while higher numbers produce finer finishes. The table below provides general guidance:
| Grit Range | Classification | Typical Use |
| 60 to 120 | Coarse | Heavy material removal, shaping rough surfaces |
| 150 to 320 | Medium | Smoothing scratches from coarse grits, intermediate shaping |
| 400 to 600 | Fine | Pre-polish finishing, removing light tool marks |
| 800 to 2000 | Very fine | Final finishing, preparing surfaces for polishing compounds |
For most interior finishing work on jewelry or dental prosthetics, start with a 320 grit to remove visible marks, then progress through 400 and 600 grit for a smooth result. If a mirror-like polish is required, follow up with a silicone rubber polisher after sanding.
Step-by-Step: Mounting and Using a Sandpaper Mandrel
Follow these steps to mount sandpaper on a split mandrel and begin sanding.
Step 1: Cut the Sandpaper Strip
Using scissors, cut a strip of sandpaper approximately 25mm (one inch) wide and 75 to 100mm (three to four inches) long. For wet and dry sandpaper, fold the strip in half lengthwise so the abrasive faces outward on both sides. This provides a thicker, more durable wrap.
Step 2: Load the Mandrel
Insert one end of the sandpaper strip into the slot of the split mandrel. Push it through far enough that about 5mm of paper extends past the slot on the other side. This anchoring tab prevents the strip from spinning free when the tool starts.
Step 3: Wrap the Sandpaper
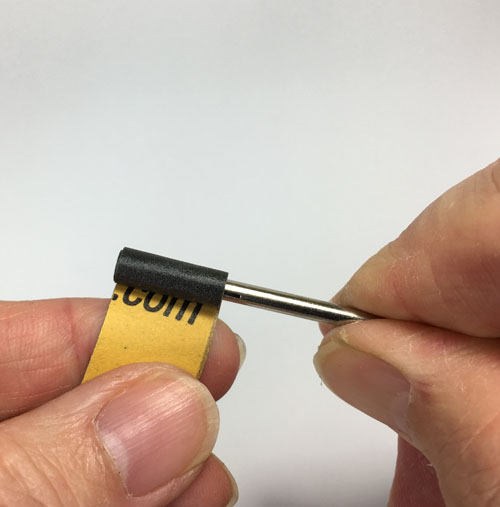
Wind the sandpaper tightly around the mandrel shaft in the direction opposite to the tool's rotation. Wrapping against the rotation direction ensures the paper tightens rather than loosening during use. Keep the wraps even and avoid overlapping more than necessary.
Step 4: Secure the End
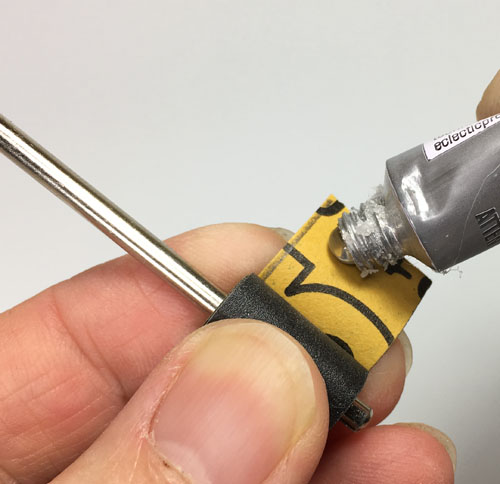
For added security, wrap a small piece of electrical tape around the trailing end, or apply a tiny drop of cyanoacrylate adhesive and hold it with a clip until set. This is especially helpful at higher speeds or when working on vibration-prone materials. Many experienced users skip this step at lower speeds where friction alone holds the paper in place.
Step 5: Insert the Mandrel into the Rotary Tool
Place the mandrel shank into your rotary tool's chuck or collet. Tighten it firmly. Give the mandrel a gentle manual spin to confirm the sandpaper is secure and the assembly is balanced. An unbalanced mandrel will vibrate excessively and produce an uneven finish.
Step 6: Begin Sanding
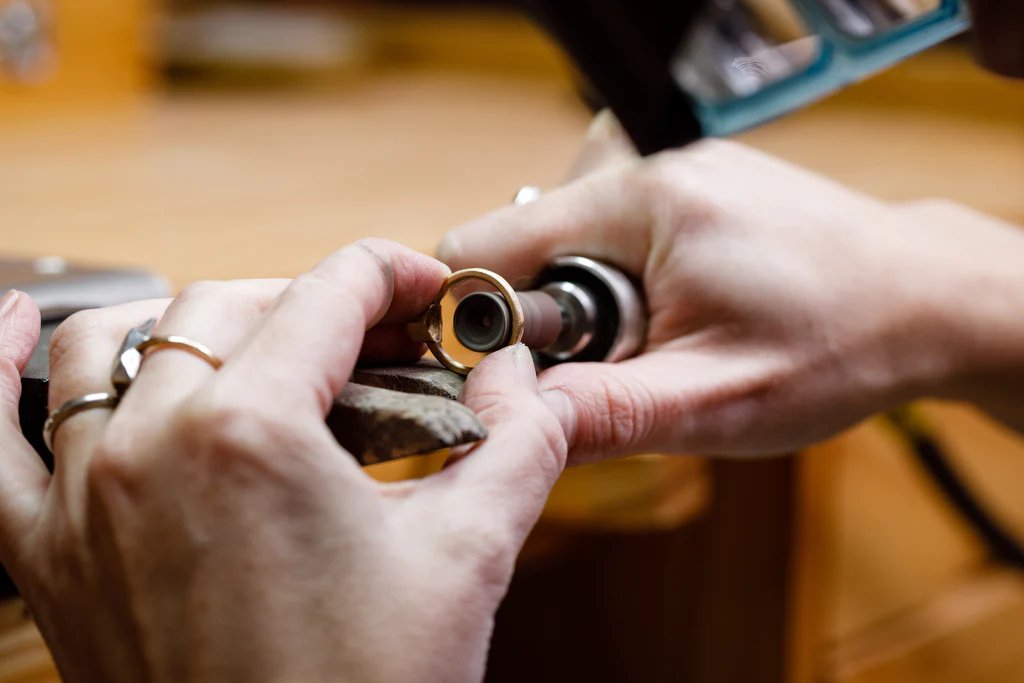
Start the tool at a low speed and gradually increase to your working RPM. Move the spinning mandrel steadily across the work surface with light pressure. Let the abrasive do the cutting rather than forcing it. For interior surfaces like ring bands, insert the mandrel and rock it gently back and forth to cover the full area.
Step 7: Replace Worn Sandpaper
When the abrasive surface becomes dull or clogged, stop the tool, tear off the worn section, and continue with fresh sandpaper underneath. When the strip is too short to maintain contact, unwrap it entirely and load a new strip.
Tips for Better Results
These practical tips will help you get cleaner finishes and longer life from your abrasives:
- Prefer wet sanding over dry sanding. Applying a small amount of water or lubricant prevents dust from clogging the abrasive surface, reduces heat buildup, and extends the usable life of the sandpaper significantly.
- Maintain a moderate speed. For most sandpaper mandrel work, 2,000 to 5,000 RPM is the recommended range. Higher speeds generate excessive heat and wear out the sandpaper faster without improving the finish quality.
- Progress through grits sequentially. Skipping grit steps leaves deep scratches that finer abrasives cannot remove efficiently. Each successive grit should remove the scratch pattern left by the previous one.
- Do not sand down to the adhesive backing. Stop before you reach the base layer of the sandpaper. Sanding on the backing material provides no abrasive action and can damage the workpiece surface.
- Inspect your work between grit changes. Use a loupe or magnifier to confirm that the previous grit's scratches have been fully removed before moving to a finer abrasive.
Dental and Laboratory Applications
In dental laboratory settings, sandpaper mandrels are commonly used for finishing the interior of crowns, bridges, and custom abutments. Fine-grit sandpaper mandrels also work well for smoothing acrylic denture bases and adjusting the fit surfaces of removable prosthetics. For related finishing techniques, see our guide on mounted stones for dental use.
Choosing Between Split Mandrels and Screw Mandrels
Split mandrels are the most common type for sandpaper strips, but screw mandrels are another option worth considering. Screw mandrels use a small screw at the tip to clamp pre-cut sanding discs in place. They are better suited for flat or convex surfaces where a disc shape provides more even contact than a wrapped strip. For concave and interior surfaces, split mandrels with wrapped strips remain the preferred choice due to their ability to conform to curved geometries. Having both types available in your toolkit ensures you can handle any finishing task efficiently.
Conclusion
A sandpaper mandrel is a simple, low-cost accessory that delivers precise results when used correctly. By selecting the appropriate grit for each stage, following proper mounting technique, and observing basic safety protocols, you can achieve professional-quality finishes on a wide range of materials. Take the time to practice the wrapping and loading process a few times before beginning critical work, and you will quickly develop the control needed for consistent results.