Cleaning Burs After Debonding: Step-by-Step Guide
Cleaning Burs After Debonding: A Practical Guide for Clinicians
Removing orthodontic brackets is only half the job. The residual adhesive left on enamel surfaces demands careful cleanup, and the right cleaning bur makes all the difference between a smooth finish and iatrogenic enamel damage. This guide walks through bur selection, proper technique, and post-cleanup finishing steps so you can deliver predictable results every time.
Why Adhesive Removal After Debonding Matters
After bracket removal, a layer of composite resin adhesive typically remains bonded to the tooth surface. Leaving this material in place creates several problems. The rough adhesive surface traps plaque, increasing the risk of demineralization and caries. It also creates an uneven texture that patients notice immediately with their tongue. Over time, residual adhesive can stain, creating cosmetic concerns that undermine the results of months or years of orthodontic treatment.
Proper adhesive removal restores the natural enamel surface, improves oral hygiene access, and gives patients the clean, polished result they expect on the day their braces come off. The challenge is removing all adhesive efficiently while preserving as much enamel as possible.

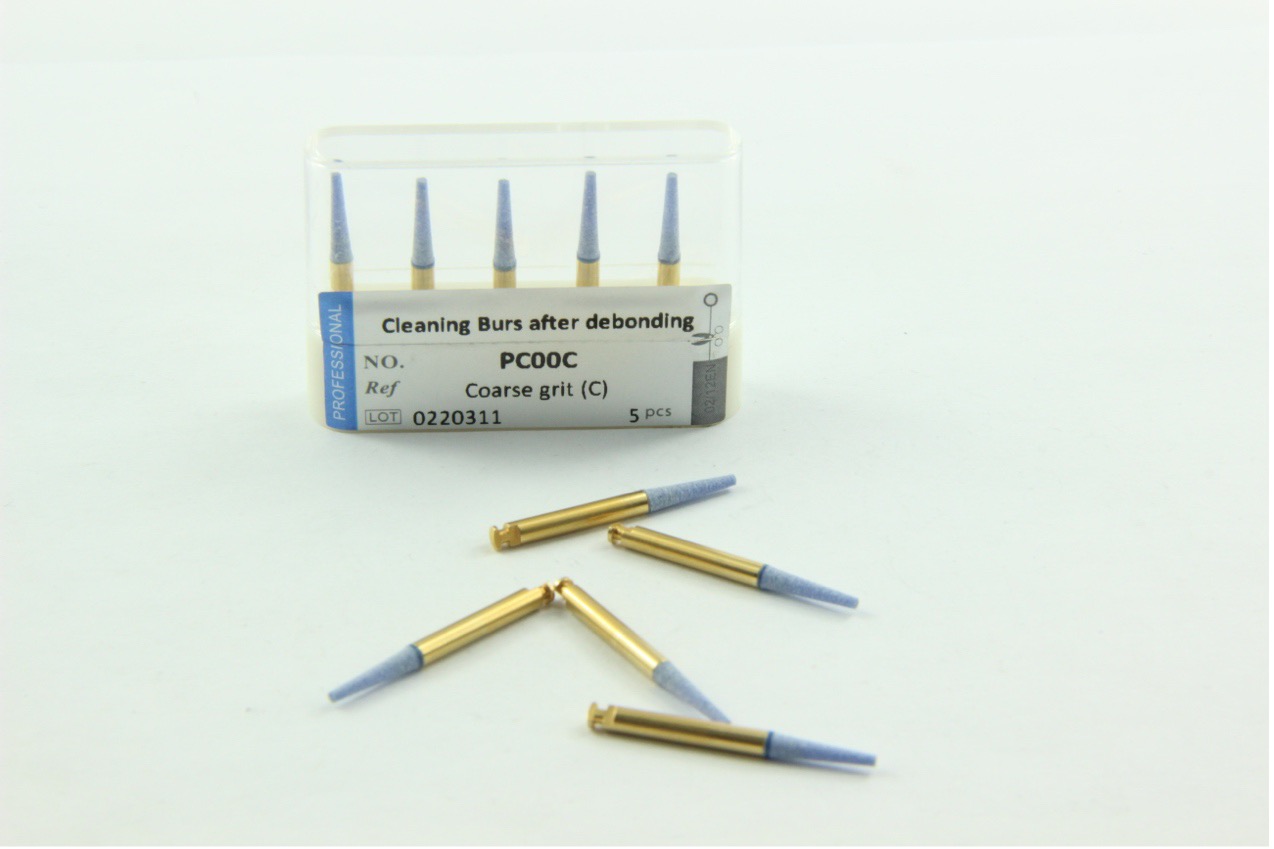
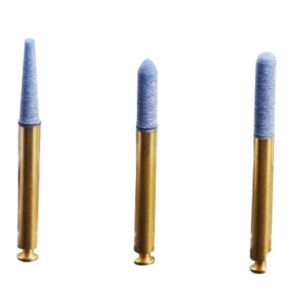
Types of Cleaning Burs Used for Debonding
Several bur types are commonly used for post-debonding adhesive removal. Each has distinct advantages depending on the clinical situation.
Tungsten Carbide Finishing Burs
Multi-fluted tungsten carbide burs (typically 12 or 16 flutes) are the most widely recommended option for adhesive removal. Their cutting action is predictable, and the multi-flute design produces a smoother finish than coarser options. Fluted carbide burs remove composite efficiently without generating excessive heat, and they allow the operator to distinguish between adhesive and enamel by tactile feedback and visual contrast.
Diamond Burs (Fine and Extra-Fine Grit)
Fine-grit diamond burs can remove adhesive quickly but require a lighter touch. They tend to remove enamel more aggressively than carbide finishing burs, so they are best reserved for situations with thick adhesive remnants. Follow up with a finer instrument to smooth the surface.
Fiber-Reinforced Composite Removal Burs
These specialty burs are designed to cut composite resin selectively while minimizing enamel contact. They are a newer option and are gaining traction in practices that prioritize enamel conservation.
For most clinical scenarios, a tungsten carbide finishing bur in a flame or egg shape offers the best balance of efficiency and enamel safety.
Step-by-Step Technique for Using Cleaning Burs
Follow these steps for safe and effective adhesive removal after debonding.
Step 1: Select the Right Bur Size and Shape
Match the bur to the tooth anatomy and the location of residual adhesive. A flame-shaped or round-end taper bur works well for anterior teeth, while a larger egg-shaped bur covers more surface area on premolars and molars. Check that the bur shank fits your handpiece (FG for high-speed, RA for slow-speed contra-angle).
Step 2: Set Appropriate Handpiece Speed
For tungsten carbide finishing burs, a slow-speed handpiece (20,000 to 40,000 RPM) gives you better tactile control. If using a high-speed handpiece, keep RPM moderate and use a light, brushing stroke. Always run with water coolant to prevent thermal damage to the pulp.
Step 3: Apply Light Pressure with a Brushing Motion
Place the bur against the adhesive surface and use short, sweeping strokes. Avoid pressing the bur hard against the tooth. Let the flutes do the work. Heavy pressure generates heat, increases enamel removal, and reduces your ability to feel when you have transitioned from adhesive to enamel. A brushing motion across the surface is far more effective than holding the bur in one spot.
Step 4: Work Under Direct Vision and Good Lighting
Residual adhesive is often visible as a slightly opaque or matte area against the glossy enamel surface. Use magnification loupes and an overhead light to clearly see the boundary between adhesive and clean enamel. Working blind increases the risk of removing healthy tooth structure.
Step 5: Rinse and Inspect Frequently
Stop every few seconds to rinse the tooth and inspect your progress. Use an air syringe to dry the surface briefly so you can see remaining adhesive. This iterative approach prevents over-reduction and ensures you remove adhesive evenly across the entire bonding site.
Step 6: Repeat Until the Surface Is Adhesive-Free
Continue the light brushing passes, rinsing between each round, until no adhesive remains. Run your explorer across the surface to confirm smoothness by tactile examination. The enamel should feel glassy and uniform.
Post-Cleanup Finishing and Polishing
Adhesive removal alone does not restore the natural enamel luster. A finishing and polishing sequence is needed to smooth any micro-scratches left by the bur and return the surface to a high shine.
Polishing Sequence
- Soflex discs or aluminum oxide polishing points: Use medium grit first, then fine and superfine, to progressively smooth the enamel.
- Rubber polishing cups with prophylaxis paste: A fine-grit prophy paste applied with a slow-speed rubber cup adds a final polish.
- Silicone polishers: Silicone rubber polishing points provide a one-step or two-step high-gloss finish directly on enamel.
After polishing, rinse thoroughly and dry the surface. The enamel should have a uniform, glossy appearance with no visible scratches or residual adhesive.
Common Mistakes to Avoid
| Mistake | Why It Matters | How to Prevent It |
|---|---|---|
| Using a coarse diamond bur on thin adhesive | Removes excessive enamel | Start with a multi-fluted carbide bur |
| Applying heavy pressure | Generates heat and gouges enamel | Use light, brushing strokes |
| Skipping water coolant | Thermal damage to pulp | Always run water spray during bur use |
| Not inspecting between passes | Over-reduction of enamel | Rinse and dry every few seconds to check progress |
| Skipping the polishing step | Leaves micro-scratches that trap stain and plaque | Always follow adhesive removal with a polishing protocol |
Bur Maintenance and Sterilization
Cleaning burs lose their cutting efficiency over time, especially tungsten carbide finishing burs whose fine flutes can clog with composite debris. After each use, scrub the bur with a brass-wire brush under running water to remove residual material. Ultrasonic cleaning followed by autoclaving at 134 degrees Celsius completes the sterilization cycle. Inspect burs before each use and discard any that show worn or chipped flutes, as dull instruments require more pressure and increase the risk of enamel damage. For more on bur care, see our guide on how to maintain diamond dental burs for longer life.
Choosing the Right Bur for Your Practice
The best debonding cleanup bur depends on your handpiece setup, case volume, and personal preference. Practices that handle a high volume of orthodontic debonding cases often keep a dedicated set of multi-fluted carbide burs in egg, flame, and round shapes. For occasional debonding, a single flame-shaped 12-flute carbide bur covers most situations well.
If you frequently encounter thick adhesive remnants or need to remove adhesive from ceramic brackets (which tends to bond more aggressively), consider adding a fine diamond bur to your tray for initial bulk removal before switching to carbide for final cleanup. For a broader look at bur selection across procedures, read our comparison of diamond burs and carbide burs.
Key Takeaways
- Multi-fluted tungsten carbide finishing burs are the gold standard for post-debonding adhesive removal.
- Use light pressure, a brushing stroke, and frequent inspection to protect enamel.
- Always follow adhesive removal with a polishing protocol to restore enamel gloss.
- Maintain and sterilize burs properly to preserve cutting efficiency and prevent cross-contamination.
- Match bur shape and size to the tooth and adhesive location for the most efficient cleanup.
