How to Care for Carbide Burs: Maintenance Tips That Work
Carbide burs represent a significant investment for any dental practice. Made from a sintered blend of tungsten and carbon, these instruments hold a sharp cutting edge through hundreds of procedures when maintained properly. Neglect that maintenance, however, and even premium burs lose their edge quickly, produce rough preparations, generate excessive heat, and pose a risk to patient safety.
This guide covers every aspect of carbide bur care, from post-procedure cleaning through long-term storage, with practical techniques you can put into use today.
Why Carbide Bur Maintenance Matters
A dull or damaged bur forces the operator to apply more pressure, which increases heat at the cutting site. In dental applications, that heat can injure pulp tissue, cause patient discomfort, and compromise restoration margins. Beyond clinical concerns, replacing burs prematurely adds up. A consistent maintenance routine keeps each bur performing at its best for its full expected lifespan.
Cleaning Procedures
Cleaning is the first and most frequent maintenance step. It should happen immediately after every use.
Manual Brushing
Use a brass-bristle brush to scrub debris from the flutes. Brass is softer than tungsten carbide, so it removes buildup without damaging cutting edges. Brush in the direction of the flutes, not against them, to avoid packing material deeper into the grooves.
Ultrasonic Cleaning
For a more thorough clean, place burs in an ultrasonic cleaner filled with an enzymatic cleaning solution. Run the unit for the manufacturer's recommended cycle time, typically 5 to 10 minutes. Ultrasonic vibrations dislodge debris trapped in crosscut patterns and fine flutes that manual brushing may miss.
What to Avoid
- Do not soak burs in bleach or strong oxidizing agents. These chemicals can corrode the tungsten carbide matrix over time.
- Do not use steel-bristle brushes. Steel is hard enough to chip carbide flutes.
- Do not leave debris on burs to dry. Dried composite, cement, and blood are much harder to remove than fresh residue.
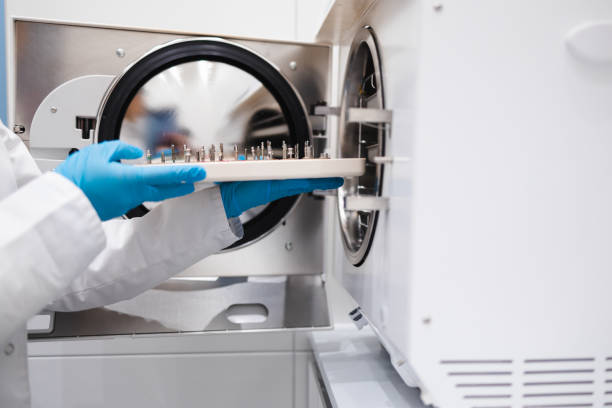
Sterilization Techniques
After cleaning, every bur must be sterilized before reuse. The two most common methods in dental practice are steam autoclaving and dry heat sterilization.

Steam Autoclaving
Steam autoclaving at 134 degrees C (273 degrees F) for 3 to 4 minutes (pre-vacuum cycle) or 121 degrees C (250 degrees F) for 15 to 20 minutes (gravity cycle) is the standard in most dental offices. Tungsten carbide handles these temperatures without losing hardness. Place burs in autoclave-compatible cassettes or pouches rather than loose trays to prevent contact damage.
Dry Heat Sterilization
Dry heat sterilization at 170 degrees C for 60 minutes is an alternative that eliminates moisture-related corrosion risk. It is especially useful for practices in humid climates where post-autoclave drying is difficult. The downside is longer cycle time.
Chemical Sterilization
High-level chemical disinfectants (glutaraldehyde-based solutions) can be used when heat sterilization is not possible. However, chemical methods are generally considered less reliable for spore elimination and should be a last resort. For a deeper discussion of sterilization protocols, see our article on sterilization and maintenance of dental burs.
Lubrication Methods
Lubrication reduces friction between the bur and the handpiece collet, preventing premature wear on both components.
When to Lubricate
Apply a thin film of bur lubricant or light machine oil to the shank before inserting the bur into the handpiece. Some practitioners also apply a drop of lubricant to the bur flutes before long procedures to reduce heat buildup at the cutting site.
Choosing a Lubricant
Use lubricants specifically formulated for dental instruments. General-purpose oils may contain additives that degrade handpiece seals or leave residues incompatible with sterilization. Your handpiece manufacturer's recommended lubricant is almost always the safest choice.
Storage Recommendations
How you store burs between uses has a direct effect on their condition and lifespan.
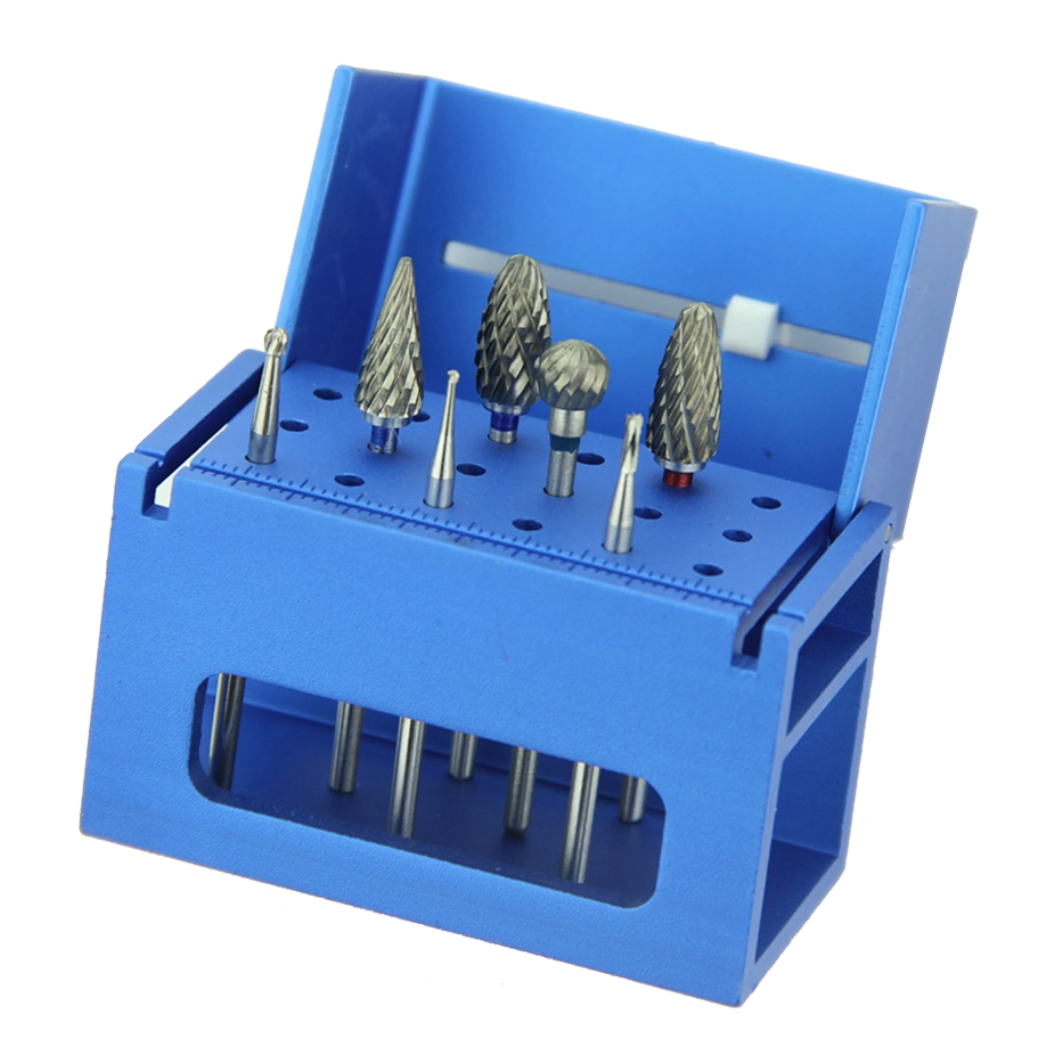
Bur Blocks and Organizers
Store each bur in its own slot in a bur block or organizer. This prevents burs from contacting each other, which causes chipping and edge damage. Autoclavable bur blocks that go directly from the sterilizer to the operatory streamline workflow and reduce handling.
Environmental Conditions
Keep bur storage areas dry, cool, and away from direct sunlight. Humidity accelerates corrosion, especially on burs that were not fully dried after autoclaving. A cabinet with a silica gel desiccant packet provides a cost-effective moisture barrier.
Organizing by Type and Condition
Separate new burs from used ones, and mark burs that are nearing end of life. Color-coded bur blocks or a simple labeling system prevents accidentally using a worn bur for a procedure that demands a sharp one. Many practices assign a color to each condition tier: green for new, yellow for moderate use, and red for burs due for replacement at the next audit.
Inspection Guidelines
Regular inspection catches problems before they affect clinical outcomes. Build inspection into your pre-procedure instrument check.
Visual Inspection
Examine the bur head under 2x to 4x magnification. Look for:
- Chipped, cracked, or missing flute segments
- Visible rounding of cutting edges (indicates dullness)
- Discoloration (blue or straw-colored tinting from overheating)
- Corrosion or pitting on the shank or head
Functional Check
Insert the bur into the handpiece and run it briefly. Listen for unusual vibration or rattling, which may indicate a bent shank. A bent bur creates eccentric rotation that produces inaccurate preparations and accelerates handpiece bearing wear.
When to Replace
Replace a carbide bur immediately if you find any of the following: chipped flutes, a bent shank, visible dullness, or heavy corrosion. Continuing to use a compromised bur risks patient injury and poor-quality work. Explore our tungsten carbide burs collection when it is time for replacements.
Sharpening Carbide Burs
While carbide burs are not routinely sharpened in the same way as hand instruments, minor edge restoration is possible.
Diamond Sharpening Stones
A fine-grit diamond stone can restore a slightly dulled cutting edge. Hold the bur in a pin vise and draw the stone along each flute at the original bevel angle. This technique works best on larger burs (FG #557, #701, etc.) where individual flutes are accessible.
Limitations
Sharpening cannot restore a badly worn or chipped bur. If more than 20 percent of the cutting surface shows wear, replacement is more cost-effective and clinically safer than attempting to restore the edge. For burs that you expect to cycle through frequently, consider our carbide bur options available in bulk packaging.
Preventing Rust and Corrosion
Tungsten carbide is resistant to corrosion under normal conditions, but the cobalt binder that holds the carbide grains together can corrode when exposed to moisture, chlorine-based chemicals, or acidic solutions over extended periods.
- Dry burs completely after autoclaving. Compressed air or a lint-free cloth works well.
- Avoid chlorine-based cleaners. Sodium hypochlorite attacks the cobalt binder.
- Apply a light oil film before long-term storage to create a moisture barrier.
Reducing Abrasive Wear
Certain habits accelerate bur wear unnecessarily:
- Excessive lateral pressure: Let the bur do the cutting. Pressing harder does not speed up the procedure; it just wears the flutes faster and generates more heat.
- Wrong bur for the material: Using a fine finishing bur for bulk enamel removal wears it out in a fraction of its normal lifespan. Match bur type to task. Our carbide bur guide explains which bur types suit which procedures.
- Running without coolant: Water spray cools the cutting site and flushes debris. Dry cutting forces debris to act as an abrasive between the bur and the workpiece.
Proper Handling Techniques
Small handling habits make a measurable difference in bur longevity:
- Always grip the bur by the shank, never by the cutting head.
- Insert and remove burs from the handpiece with the handpiece stationary, never while it is spinning.
- Do not drop burs on hard surfaces. Even a short fall onto a countertop can chip tungsten carbide.
- Use the correct handpiece for the bur shank type. Forcing an FG bur into a latch-type handpiece damages both the bur and the chuck mechanism.
Recommended Maintenance Schedule
| Task | Frequency | Notes |
|---|---|---|
| Brush and clean | After every use | Use brass brush or ultrasonic cleaner |
| Sterilize | After every use | Autoclave preferred; dry burs fully |
| Visual inspection | Before each procedure | Check for chips, dullness, corrosion |
| Lubricate shank | Before each use | Thin film of dental instrument oil |
| Functional spin test | Weekly or after damage concern | Listen for vibration or wobble |
| Full inventory audit | Monthly | Replace worn burs, reorder stock |
Summary
Caring for carbide burs is straightforward but requires consistency. Clean immediately after use, sterilize according to protocol, dry thoroughly, store in organized bur blocks, and inspect before every procedure. These steps protect your patients, extend the useful life of each bur, and keep your practice running efficiently. A small daily investment in bur maintenance pays back in better clinical outcomes and lower instrument replacement costs over time.
