
Polishing Discs and Brushes for Dental Restorations
A well-placed restoration means little if the surface finish falls short. Rough or poorly polished restorations collect plaque faster, irritate soft tissue, and look obviously artificial under overhead lighting. Polishing discs and brushes are the instruments that bridge the gap between a technically sound restoration and one that truly blends with natural tooth structure.
This guide walks through the types of polishing tools available, how to select the right abrasive grit, proper technique, sterilization protocols, and the most common mistakes that undermine your results.
Types of Polishing Discs and Brushes
Different restorative materials respond best to different polishing instruments. Choosing the wrong tool wastes time and can damage the restoration surface.
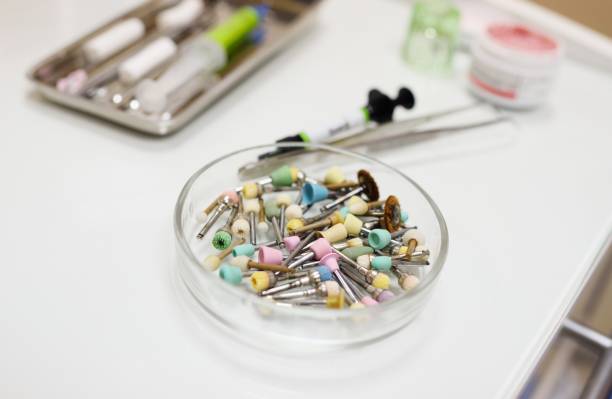
Polishing Discs
Polishing discs are thin, flexible abrasive discs that mount on a mandrel and spin at high speed. They come in sequential grit systems, typically color-coded from coarse to superfine. The main varieties include:
- Aluminum oxide discs - The most widely used type for composite restorations. Flexible enough to conform to convex and concave tooth surfaces.
- Diamond-coated flexible discs - Preferred for their ability to contour precisely to the tooth surface and achieve a high-gloss finish on composite.
- Silicon carbide discs - A good all-purpose option for both composite and ceramic materials, offering fast initial cutting.
Mandrels are sold separately and come in screw-type or snap-on configurations. Make sure the mandrel shank matches your handpiece type before ordering.
Polishing Brushes and Cups
Brushes and cups reach areas that flat discs cannot, particularly occlusal anatomy and lingual surfaces. Common options include:
- Goat hair brushes - Soft natural bristles for final high-gloss polishing with paste
- Nylon brushes with embedded abrasive - Impregnated with diamond or silicon carbide particles so no separate paste is needed
- Diamond-impregnated cups - Often used on ceramic restorations such as porcelain veneers and crowns to produce a natural-looking sheen
- Silicone polishing cups and points - Flexible abrasive-loaded instruments that work well on both composite and ceramic surfaces
Our silicone polishers and diamond rubber polishers are designed for these applications and come in multiple shapes to fit different restoration geometries.
Choosing the Right Abrasive Grit Size
Grit selection is the single most important decision in any polishing protocol. Using the wrong grit wastes time, and using too coarse a grit on a nearly finished surface creates scratches you will need additional steps to remove.
A standard grit progression for composite polishing looks like this:
| Step | Grit Level | Purpose | Typical Color Code |
|---|---|---|---|
| 1 | Coarse (40-80 micron) | Remove flash, gross contouring | Dark blue or brown |
| 2 | Medium (20-40 micron) | Remove scratches from step 1 | Medium blue or green |
| 3 | Fine (10-20 micron) | Smooth surface, eliminate visible scratches | Light blue or light green |
| 4 | Superfine (under 10 micron) | Final high-gloss polish | Pink, yellow, or white |
Skipping a step in this sequence is a frequent cause of dull finishes. Each grit level removes the scratch pattern left by the previous one. Jump from coarse to superfine and you will spend far longer trying to remove deep scratches that the superfine disc is not designed to handle.
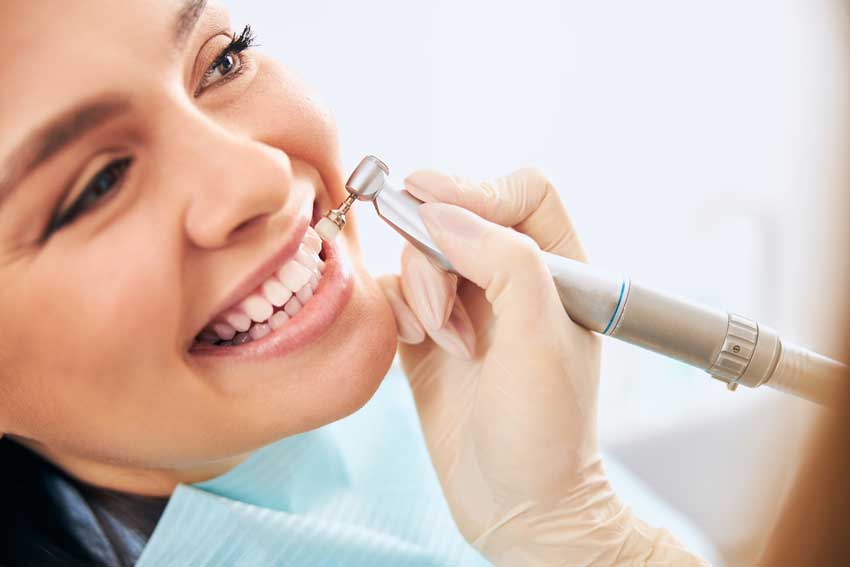
Polishing Technique: Step-by-Step
Even the best instruments produce poor results with bad technique. Follow these guidelines for consistent outcomes:
- Start with the coarsest grit needed. If the restoration only has minor surface irregularities, begin at medium rather than coarse to save time and preserve material.
- Use light, intermittent pressure. Let the abrasive do the cutting. Pressing hard increases heat, wears out the disc faster, and can deform the restoration contour.
- Move in a sweeping circular motion. Avoid holding the disc in one spot. Constant movement distributes the cutting action evenly and prevents flat spots.
- Dry-polish with discs, wet-polish with brushes. Most aluminum oxide disc systems work best dry because water reduces their cutting efficiency. Brushes and cups used with polishing paste, however, benefit from a damp surface.
- Wipe the surface between grit changes. Residual coarse particles trapped on the restoration will scratch it during the fine polishing step. Use a damp gauze or air-water syringe to clean thoroughly before moving to the next grit.
- Finish with a high-shine step. A final pass with a goat hair brush or superfine silicone cup loaded with diamond polishing paste gives the restoration a natural enamel-like luster.
For information on the rotary instruments that hold these polishing tools, read our guide on common handpiece problems and maintenance.
Preventing Overheating and Material Damage
Heat is the primary enemy during polishing. Excessive friction raises the temperature of the restoration and the underlying tooth, which can cause:
- Thermal damage to the pulp, leading to post-operative sensitivity
- Surface glazing on composite that traps imperfections beneath a deceptively smooth layer
- Discoloration of the restoration material
- Melting or smearing of composite resin, which fills in surface anatomy you intended to preserve
To prevent overheating, follow these rules:
- Apply only light pressure at all times
- Use intermittent contact rather than continuous grinding
- Monitor the restoration temperature by touching it with a gloved finger between passes
- Use water coolant or a cooling spray when polishing ceramic restorations or when using diamond-loaded instruments
- Reduce handpiece speed if you notice the surface becoming glossy too quickly, which indicates frictional melting rather than true polishing
Cleaning and Sterilizing Polishing Instruments
Polishing discs and brushes that contact intraoral surfaces must be sterilized between patients. Proper cleaning also extends instrument life. The standard protocol includes:
- Pre-cleaning: Rinse the instrument under running water immediately after use to remove debris before it dries.
- Ultrasonic cleaning: Place instruments in an ultrasonic bath with enzymatic solution for the manufacturer-recommended cycle time.
- Rinsing and drying: Rinse thoroughly after ultrasonic cleaning. Allow to air-dry or use compressed air.
- Autoclave sterilization: Wrap or pouch instruments and sterilize according to your autoclave protocol. Most silicone and metal-mandrel instruments tolerate standard 134 degrees Celsius cycles.
- Storage: Store sterilized instruments in a clean, dry environment. Avoid open-air bins where dust and moisture can recontaminate them.
Single-use polishing discs should be discarded after each patient. Reusable silicone cups and diamond-impregnated brushes can typically withstand multiple sterilization cycles but should be inspected for wear before each use. For a broader overview of instrument care, see our article on sterilizing dental burs.
Removing Stains and Surface Discoloration
Polishing discs and brushes are also useful for removing surface stains that develop on restorations over time. Tea, coffee, red wine, and tobacco are the most common culprits. To address staining:
- Start with a medium-grit disc to remove the outermost stained layer
- Progress through fine and superfine grits to restore the gloss
- Apply a diamond polishing paste with a brush or cup for the final shine
- Avoid aggressive coarse grits unless the stain is deeply embedded, as removing excessive material shortens the restoration lifespan
Regular recall polishing every six months helps prevent stain buildup from becoming a clinical problem.
Common Mistakes to Avoid
Years of clinical observation reveal several recurring errors in restoration polishing:
- Excessive pressure - Generates heat, wears instruments prematurely, and distorts restoration anatomy
- Skipping grit steps - Leaves visible scratch patterns that reduce both aesthetics and longevity
- Using worn or damaged discs - A disc that has lost its abrasive surface creates friction without cutting, producing heat with no benefit
- Wrong speed setting - Too fast causes overheating; too slow makes the disc grab and skip across the surface
- Polishing before contouring is complete - Polishing cannot fix poor anatomy. Finish all contouring with finishing burs before switching to polishing instruments
- Neglecting interproximal surfaces - Flat discs cannot reach tight proximal contacts. Use polishing strips or flexible points for these areas
Putting It All Together
A reliable polishing protocol does not need to be complicated. Match the instrument to the material, follow a sequential grit progression, use light pressure, and sterilize everything between patients. These four principles handle the vast majority of clinical situations.
For composite restorations, an aluminum oxide disc system paired with a silicone polishing cup covers both accessible and hard-to-reach surfaces. For ceramic work, diamond-impregnated brushes and cups deliver the natural-looking finish patients expect.
With the right tools and consistent technique, every restoration you place can leave the chair with a surface that patients and colleagues alike will notice for the right reasons.
