Dental Bur Blocks: Types, Benefits, and Cleaning Guide
What Are Dental Bur Blocks?
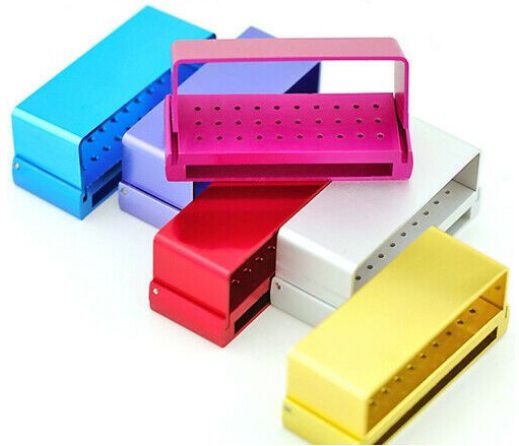
Dental bur blocks are specialized holders designed to organize, store, and transport rotary instruments in dental practices. Made from either autoclavable aluminum or high-grade polymer, these blocks feature precision-drilled holes that securely grip bur shanks, keeping each instrument upright and accessible.
Bur blocks come in a wide range of configurations. Compact models hold 10 burs for chairside use, while larger blocks accommodate 30 to 40 instruments for central sterilization areas. Most are color-coded, making it easy to assign specific blocks to different procedures or operatories.
Types of Dental Bur Blocks
Not all bur blocks serve the same purpose. Understanding the different types will help you choose the right option for your practice.
Aluminum Bur Blocks
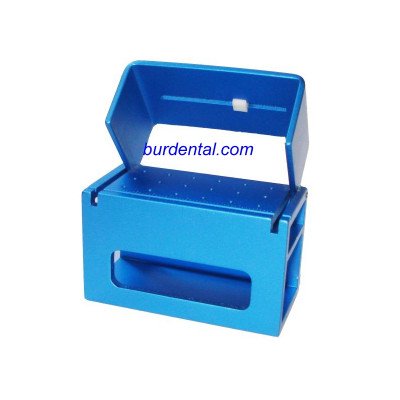
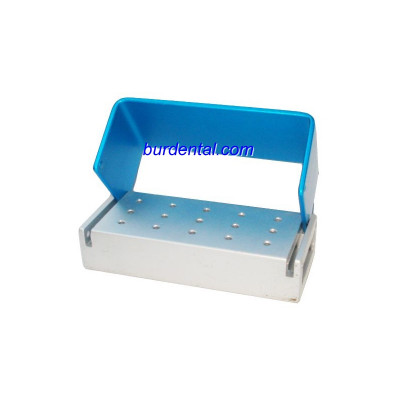
Aluminum blocks are the most common in clinical settings. They withstand repeated autoclave cycles without warping or degrading. The anodized coating provides corrosion resistance and allows for etched labels that identify each bur position. These blocks work well with both FG diamond burs and tungsten carbide burs.
Polymer (Plastic) Bur Blocks
Polymer blocks are lightweight and often less expensive than their metal counterparts. Many are designed to be disposable or semi-disposable, which can simplify infection control protocols. However, they may not tolerate as many autoclave cycles as aluminum models before showing signs of wear.
Magnetic Bur Blocks
Some newer designs use magnetic inserts to hold burs in place, adding an extra layer of security during transport between the operatory and sterilization area. These are especially useful for practices that move instrument trays frequently.
Benefits of Using Bur Blocks in Your Practice
Proper bur organization is more than a convenience. It directly affects clinical efficiency and infection control. Here are the main advantages:
- Systematic storage: Every bur has a designated slot, so you always know exactly where each instrument belongs.
- Faster instrument retrieval: Color-coding and labeled positions let you grab the right bur without searching through a tray or cassette.
- Improved sterilization: Bur blocks keep instruments separated during the cleaning and autoclave process, ensuring sterilant reaches all surfaces.
- Reduced sharps injuries: Loose burs rolling around in trays are a common cause of needlestick-type injuries. Blocks hold each instrument securely, reducing that risk.
- Extended bur lifespan: When burs are stored properly instead of tossed into a drawer, the cutting edges stay protected from contact damage.
How to Clean Dental Bur Blocks: Step-by-Step
Regular cleaning of bur blocks is required by infection control standards. Both manual and ultrasonic methods are acceptable, though ultrasonic cleaning is generally more thorough. Below are detailed instructions for each approach.
Method 1: Manual Cleaning
Manual cleaning is suitable when an ultrasonic unit is not available. Follow these steps carefully:
- Prepare a designated basin. Use a basin reserved exclusively for instrument cleaning. Never wash bur blocks in a general-purpose sink.
- Rinse under cool running water for at least one minute to remove visible debris and organic material.
- Soak in enzyme solution. Prepare a fresh bath of neutral-pH enzymatic cleaner (such as Enzol or a similar product) and submerge the bur block completely. Allow it to soak for a minimum of 10 minutes.
- Brush while submerged. Using a soft-bristled brush, scrub all surfaces of the block for at least one minute. Keep the block submerged during brushing to avoid aerosolizing contaminants.
- Rinse under warm running water for at least one minute to remove all cleaning solution residue.
- Dry thoroughly using a lint-free wipe or filtered compressed air. Moisture left in the bur holes can promote corrosion.
Method 2: Ultrasonic Cleaning
Ultrasonic cleaning uses high-frequency sound waves to dislodge debris from hard-to-reach areas, including the inside of bur holes. This method is preferred in most modern practices.
- Fill the ultrasonic unit with a fresh batch of neutral-pH enzymatic cleaning solution.
- Submerge the bur block completely and run the ultrasonic cycle for at least 15 minutes.
- Rinse under warm running water for at least one minute after the cycle is complete.
- Dry thoroughly with a lint-free wipe or filtered compressed air.
After cleaning with either method, the bur block should be packaged and processed through a steam autoclave according to the manufacturer's specifications before returning to clinical use.
When to Replace Your Bur Block
Even with proper maintenance, bur blocks do not last forever. Inspect them regularly and replace a block immediately if you notice any of the following:
| Warning Sign | Why It Matters |
|---|---|
| Blocked or clogged holes | Burs cannot seat properly, leading to instability and incomplete sterilization |
| Cracked or loose lid | Compromises containment during transport and autoclave processing |
| Faded anodized coating | Etched bur position labels become unreadable, causing identification errors |
| Visible corrosion or pitting | Corroded surfaces harbor biofilm and cannot be reliably disinfected |
| Physical deformation | Warped blocks may not hold burs securely, increasing the risk of sharps injuries |
Best Practices for Bur Block Organization
Getting the most out of your bur blocks requires a consistent system. Here are proven strategies used by efficient dental teams:
- Assign blocks by procedure type. Keep a crown prep block, an endo access block, and a finishing block so you can grab the right set for each appointment.
- Use color coding consistently. Match block colors to operatory numbers or procedure categories across your entire practice.
- Label every position. Use the manufacturer's etched labels or add your own with autoclave-safe markers. This is especially important when training new staff.
- Pair bur blocks with the right instruments. If you regularly use specific types of dental burs for certain procedures, pre-load blocks so they are ready for the next patient.
- Rotate stock. If you maintain multiple identical blocks, rotate them to distribute autoclave wear evenly and extend the life of each block.
Cleaning Your Burs Separately
While bur blocks keep instruments organized, the burs themselves also need individual attention. Diamond burs in particular require specific care to maintain their cutting efficiency. For detailed instructions on maintaining your diamond instruments, see our guide on how to clean diamond burs.
Sterilization After Cleaning
Cleaning alone does not make a bur block safe for patient use. After completing either the manual or ultrasonic cleaning process, the block must go through a full sterilization cycle. The standard method is steam autoclaving at 134 degrees Celsius for a minimum of three minutes in a pre-vacuum autoclave, or at 121 degrees Celsius for 15 minutes in a gravity displacement autoclave.
Always check the bur block manufacturer's instructions for maximum temperature and cycle recommendations. Some polymer blocks have lower temperature thresholds than aluminum ones and may warp or degrade if exposed to excessive heat. After autoclaving, allow the block to cool completely before handling, and store it in its sterilization pouch until it is needed for the next procedure.
Common Mistakes to Avoid
Even experienced dental teams sometimes fall into bad habits with bur block maintenance. Here are the most frequent errors and how to prevent them:
- Reusing cleaning solution: Always prepare a fresh batch of enzymatic cleaner for each cleaning cycle. Used solution loses its effectiveness and may redeposit contaminants.
- Skipping the soak step: Rushing through cleaning by skipping the 10-minute enzyme soak leaves organic debris in the bur holes, which can harden during autoclaving and become nearly impossible to remove.
- Air-drying without wiping: Letting bur blocks air-dry instead of actively drying them can leave water spots and mineral deposits that promote corrosion over time.
- Overloading blocks: Forcing burs into holes that are slightly too small damages both the bur shank and the block. Always match the bur shank diameter to the correct hole size.
- Ignoring wear on polymer blocks: Plastic blocks degrade faster than aluminum and should be inspected after every 20 to 30 autoclave cycles for signs of warping or hole enlargement.
Proper bur block management is a small investment of time that pays off through better infection control, faster procedures, and longer instrument life. By following the cleaning protocols above and replacing blocks when they show signs of wear, you ensure a safer and more organized working environment for your entire dental team.
