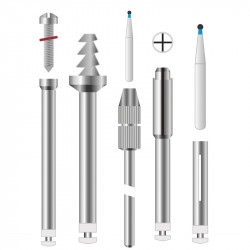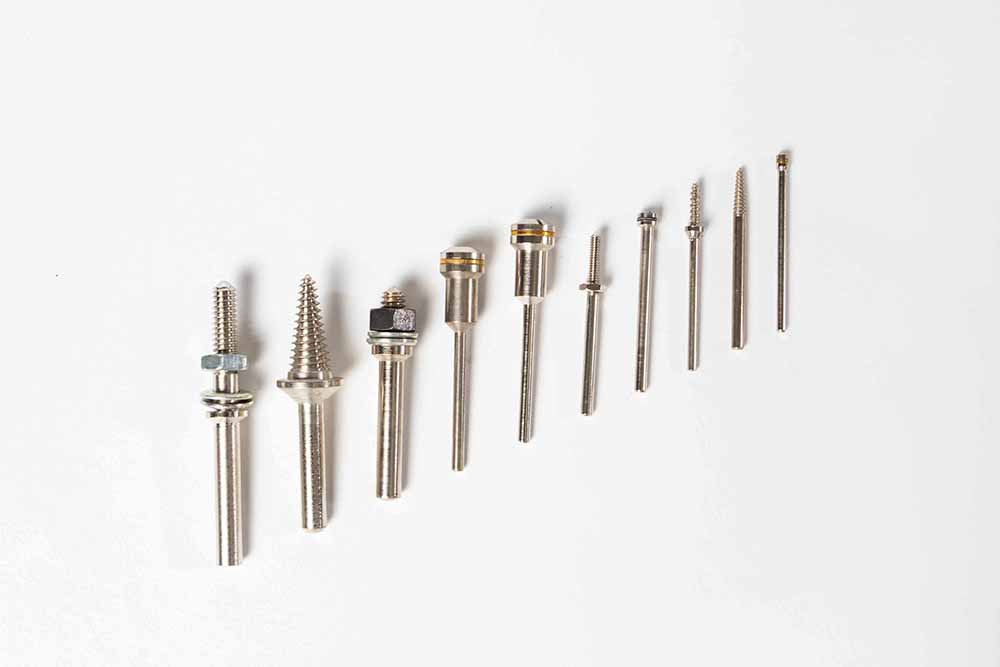
Mandrels are small but essential tools in both dental practice and laboratory work. They serve as the connection point between your handpiece and a wide range of rotary accessories such as discs, polishing wheels, and abrasive strips. Without the correct mandrel, even the best accessories cannot perform as intended.
This guide breaks down the main types of mandrels available, explains how each one works, and helps you determine which mandrel fits your specific application. Whether you work chairside or in the dental lab, understanding mandrel types will save you time and improve your results.
What Is a Mandrel?
A mandrel is a cylindrical rod designed to hold a partially machined product, rotary accessory, or abrasive material while it spins in a handpiece. The mandrel transfers rotational force from the handpiece motor to the attached accessory, allowing the operator to cut, grind, smooth, or polish with precision.
Mandrels are typically slightly tapered so they can grip firmly when inserted into a machined hole or collet. They are mounted on fixed centres within the handpiece and rotate continuously during procedures involving cylindrical surfaces, or intermittently when working on grooves and contoured areas.
Choosing the right mandrel depends on three factors: the shank type that matches your handpiece, the head style that fits your accessory, and the maximum operating speed recommended for your particular combination of mandrel and attachment.
Screw Type Mandrels
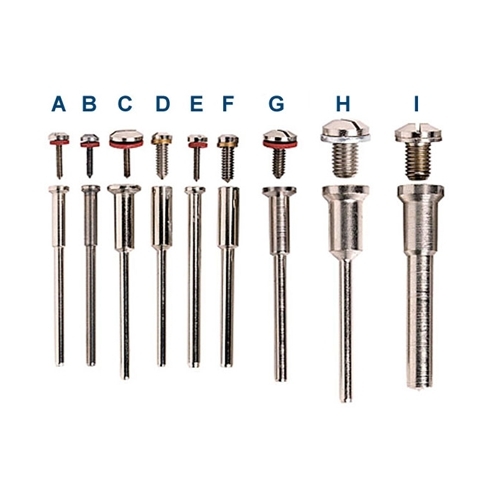
Screw type mandrels are the most commonly used mandrels in dental offices and labs. They feature a threaded screw at the tip that secures accessories with a centre hole, such as polishing discs, separating discs, and finishing wheels.
How Screw Mandrels Work
The accessory slides onto the mandrel shaft and is held in place by a small screw that threads through the arbor hole. This creates a firm, stable connection that prevents the disc or wheel from wobbling during rotation. The screw can be tightened by hand or with a small wrench, depending on the model.
Selecting the Right Screw Mandrel
When choosing a screw type mandrel, you must verify two measurements:
- Arbor hole diameter — The screw capacity of the mandrel must match the arbor hole size of your accessory. Common arbor hole sizes include 1.6 mm and 3.0 mm.
- Shank diameter — The mandrel shank must fit your handpiece collet. FG (friction grip) shanks measure 1.6 mm, RA (right angle) shanks measure 2.35 mm, and HP (handpiece) shanks measure 2.35 mm with a longer overall length.
A proper fit ensures safe operation and keeps your accessory running true without vibration.
Speed Considerations for Screw Mandrels
Maximum and recommended speeds depend on the type and diameter of the attached accessory. In general, smaller accessories and mandrels can safely operate at higher speeds than larger ones. Always consult the manufacturer speed rating before use, especially when working with silicone polishers and other flexible attachments.
Split Mandrels for Sandpaper
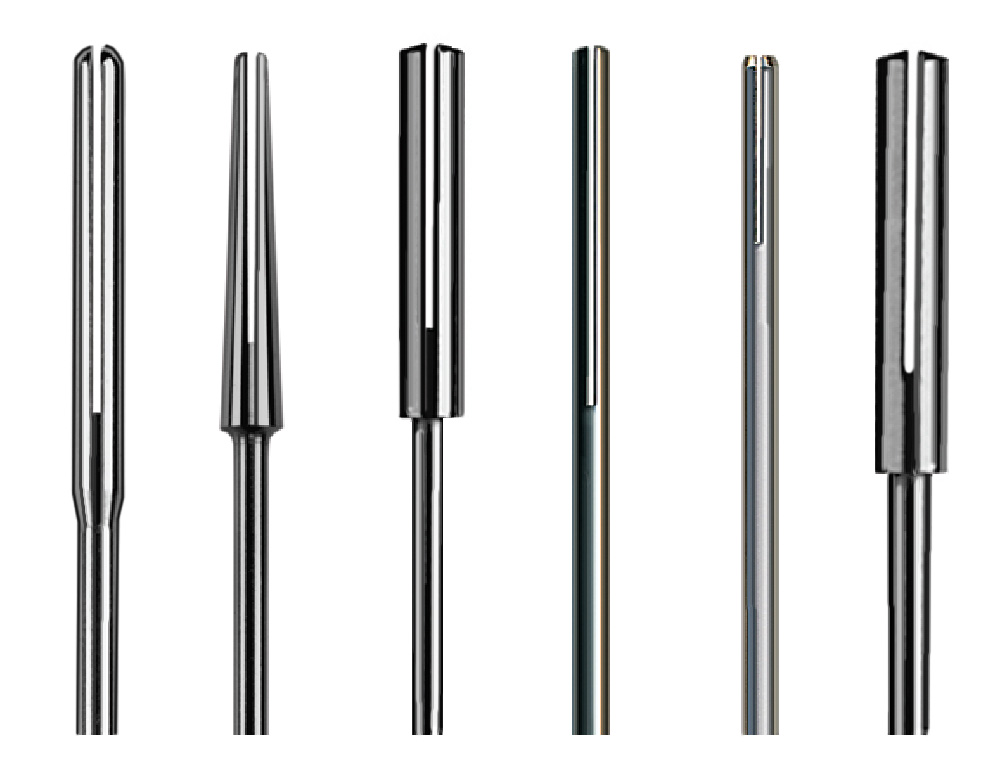
Split mandrels are purpose-built for wrapping abrasive materials around their shaft. They feature a narrow slit or "split" cut above a reinforced base, creating a slot where sandpaper, polishing cloth, or other flexible abrasives can be threaded and wound tightly around the mandrel body.
Straight vs. Tapered Split Mandrels
Split mandrels come in two main profiles:
| Profile | Best For | Typical Use |
|---|---|---|
| Straight | Flat and smooth surfaces | Finishing restorations, polishing flat metal surfaces |
| Tapered | Undercuts and concave areas | Reaching into tight spaces, contouring irregular shapes |
The straight version produces a uniform sanding surface and works well for finishing flat or gently curved restorations. The tapered version narrows toward the tip, giving the operator access to undercuts, grooves, and other hard-to-reach areas.
Tips for Using Split Mandrels
- Cut sandpaper strips to the correct width before loading. Strips that are too wide will extend past the mandrel and can catch on the workpiece.
- Thread the strip through the split slot and wrap it tightly in the direction of rotation. This prevents the strip from unwinding during use.
- Replace the abrasive strip as soon as it becomes worn. A dull strip forces the operator to apply excess pressure, which can generate heat and damage the workpiece.
- Start at lower speeds and increase gradually. This gives you better control, particularly when working on detailed areas.
Split mandrels are popular among jewelers and dental technicians alike. For more information on rotary tool accessories, see our guide on using felt bobs with rotary tools.
Snap-On (Moore's) Mandrels
Snap-on mandrels, commonly called Moore's mandrels, use a friction-fit mechanism to hold rotary accessories. Instead of a threaded screw, the mandrel head has a flat, disc-shaped platform with a small raised hub. The accessory snaps onto this hub and is held in place by friction alone — no tightening required.
This design makes accessory changes extremely fast. You press the disc onto the hub to mount it and pull it off to remove it. There are no screws to fumble with, no wrenches to locate. In a busy lab or chairside workflow where you need to swap between several disc grits in rapid succession, snap-on mandrels cut changeover time to almost nothing.
Common Uses for Snap-On Mandrels
Snap-on mandrels pair best with thin, lightweight accessories:
- Separating discs — Thin abrasive discs for cutting through metal frameworks, sprue channels, and acrylic bases. The quick-change design is ideal because separating discs wear out fast and need frequent replacement.
- Sof-Lex style polishing discs — Multi-step finishing systems that require cycling through four or more grit levels on the same restoration. Snap-on mounting makes the grit progression seamless.
- Thin diamond discs — Used for fine sectioning and interproximal reduction where speed of disc changes matters.
Snap-On vs. Screw-Type: When to Use Each
| Factor | Snap-On Mandrel | Screw-Type Mandrel |
|---|---|---|
| Accessory change speed | Seconds — press on/pull off | Slower — thread/unthread screw |
| Grip security | Friction only — adequate for light loads | Mechanical lock — secure under heavy loads |
| Lateral pressure tolerance | Low — disc may slip under side force | High — screw resists lateral deflection |
| Best accessories | Thin separating discs, polishing disc systems | Heavier wheels, rubber cups, thick discs |
| Typical shank | RA (most common) | RA, HP, or FG |
The rule of thumb: if you are changing discs more than a few times during a procedure and the accessory is thin and lightweight, reach for the snap-on mandrel. If the accessory is heavy, thick, or will face significant lateral force, the screw-type mandrel is the safer choice.
Adapter Mandrels
Adapter mandrels solve a common workflow problem: the need to switch between accessories with different shank diameters without changing the collet in your handpiece. These mandrels convert one shank size to another, letting you use a wider range of accessories with a single handpiece setup.
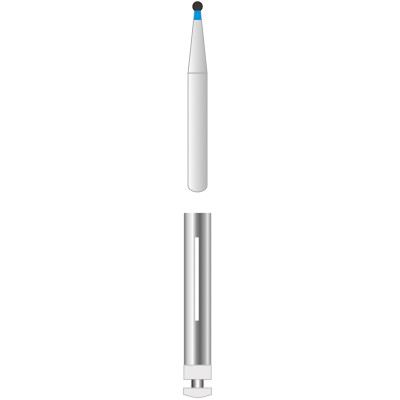
FG to RA Adapter Mandrels
The most common adapter mandrel converts FG (friction grip, 1.6 mm) accessories so they can be used in an RA (right angle, 2.35 mm) handpiece. This is particularly useful when you want to use an FG-shank diamond bur in a slow-speed contra-angle without swapping collets.
FG to HP Adapter Mandrels
Another common configuration converts FG shanks to HP (straight handpiece) shanks. This allows chairside accessories to be used with laboratory straight handpieces, which is helpful for dental technicians who prefer working with HP-shank instruments.
When to Use Adapter Mandrels
Adapter mandrels are most valuable in situations where:
- You need to switch between FG and RA accessories frequently during a procedure
- Your inventory includes accessories in one shank size but your handpiece requires another
- You want to minimize downtime caused by collet changes
- You are working in a lab setting and need to test chairside accessories on bench handpieces
Keep in mind that adapter mandrels add a small amount of length to the overall tool assembly. This can slightly affect the balance and reach of the accessory, so practice with the adapter before using it on a patient.
Choosing the Right Mandrel: Quick Reference
Use this comparison table to identify which mandrel type best suits your needs:
| Mandrel Type | Holds | Shank Options | Best Application |
|---|---|---|---|
| Screw Type | Discs, wheels, cups with centre holes | FG, RA, HP | Polishing, separating, finishing |
| Snap-On (Moore's) | Thin discs with snap-fit holes | RA (most common) | Quick disc changes, multi-step polishing |
| Split (Straight) | Sandpaper strips, polishing cloth | RA, HP | Smoothing flat surfaces |
| Split (Tapered) | Sandpaper strips, polishing cloth | RA, HP | Reaching undercuts, tight areas |
| Adapter (FG to RA) | FG-shank accessories | RA | Using FG burs in contra-angle |
| Adapter (FG to HP) | FG-shank accessories | HP | Using FG burs in straight handpiece |
Mandrel and Disc Compatibility Chart
Not sure which mandrel pairs with which accessory? This chart maps common rotary accessories to the correct mandrel type and shank combination:
| Accessory | Mandrel Type | Shank Options | Notes |
|---|---|---|---|
| Polishing discs (Sof-Lex, etc.) | Snap-on or Screw | RA or HP | Snap-on preferred for multi-step systems |
| Separating discs | Screw or Snap-on | RA | Thin discs work well on snap-on; thicker discs need screw |
| Sandpaper strips / abrasive cloth | Split | RA or HP | Thread through slot, wrap in direction of rotation |
| Rubber wheels and cups | Screw | HP | Heavier accessories need the mechanical lock of a screw |
| Diamond finishing strips | None — direct use | N/A | Hand-held strips; no handpiece required |
| Felt bobs | Screw | HP | Charge with polishing compound before use |
| Silicone polishers | Screw | RA or HP | Match arbor hole to mandrel screw diameter |
HP vs. RA Mandrels: Understanding the Difference
HP and RA mandrels share the same 2.35 mm shank diameter, which leads to frequent confusion. The difference is in overall length and the handpiece they fit:
- HP (Handpiece) mandrels have a longer shank, typically 44.5 mm overall length. They fit straight handpieces (also called nose cones or laboratory handpieces). Straight handpieces are used in dental labs for model work, polishing with felt bobs, trimming acrylic, and heavy material removal. HP mandrels spin at 10,000–30,000 RPM.
- RA (Right Angle) mandrels have a shorter shank with a latch-type notch near the base, typically 22–26 mm overall length. They fit contra-angle slow-speed handpieces used chairside for intraoral polishing, finishing restorations, and light adjustments. RA mandrels run at 5,000–20,000 RPM.
The latch notch on RA shanks is the easiest visual identifier. If the shank has a small groove cut near the base, it is RA. If the shank is smooth and longer, it is HP. Inserting an HP mandrel into an RA contra-angle handpiece will not engage the latch, and forcing it can damage the handpiece mechanism. For a full breakdown of shank types including FG, see our guide on the three main types of dental bur shanks.
Speed and Safety Guidelines
Every mandrel and accessory combination has a maximum recommended speed. Exceeding this speed creates a risk of accessory separation, vibration, and operator injury. Follow these general guidelines:
- Small diameter accessories (under 10 mm) — Can typically run at higher RPMs, often up to 30,000 RPM depending on the mandrel rating.
- Medium diameter accessories (10-20 mm) — Reduce speed to between 10,000 and 20,000 RPM.
- Large diameter accessories (over 20 mm) — Keep speeds below 10,000 RPM and use only with HP-shank mandrels rated for the load.
Always inspect mandrels before each use. Look for bending, corrosion, or wear on the screw threads. A damaged mandrel should be discarded immediately. For guidance on maintaining your rotary instruments, follow established sterilization and inspection protocols for all reusable dental accessories.
Mandrel Maintenance and Storage
Proper care extends mandrel life and keeps your accessories running smoothly:
- Clean after each use — Remove debris from the screw threads and shaft. Ultrasonic cleaning works well for screw-type mandrels.
- Sterilize according to protocol — Stainless steel mandrels can be autoclaved. Check manufacturer instructions for specific temperature and time settings.
- Store in organized trays — Bur blocks and sample books designed for mandrels prevent damage and make it easy to locate the right size quickly.
- Replace worn mandrels promptly — A mandrel with a stripped screw or bent shaft will cause the accessory to wobble, reducing both performance and safety.
Frequently Asked Questions
What is a dental mandrel used for?
A dental mandrel acts as the adapter between your handpiece and a rotary accessory. It holds discs, wheels, polishing cups, sandpaper strips, and other attachments so they can spin at controlled speeds. Without a mandrel, most finishing and polishing accessories have no way to connect to the handpiece motor. Every dental office and lab keeps several mandrel types on hand because different accessories require different holding mechanisms.
What is the difference between HP and RA mandrels?
Both HP and RA mandrels have a 2.35 mm shank diameter, but they differ in length and handpiece compatibility. HP mandrels are longer (about 44.5 mm) and fit straight handpieces used mainly in dental laboratories. RA mandrels are shorter (22–26 mm) and have a latch notch that locks into contra-angle slow-speed handpieces used chairside. You cannot interchange them — an HP mandrel will not latch into a contra-angle, and an RA mandrel is too short for a straight handpiece collet.
How do I know which mandrel fits my handpiece?
Check the handpiece type first. Contra-angle handpieces accept RA shanks (2.35 mm with latch notch). Straight handpieces accept HP shanks (2.35 mm, longer, no notch). High-speed turbine handpieces accept FG shanks (1.6 mm friction grip). Then match the mandrel head to your accessory — verify the arbor hole diameter matches the mandrel screw or hub size. When in doubt, the handpiece manufacturer documentation will list compatible shank types.
Can I use an FG mandrel in a straight handpiece?
Not directly. FG mandrels have a 1.6 mm shank designed for high-speed turbine handpieces. Straight handpieces have a 2.35 mm collet that will not grip the thinner FG shank. However, you can use an FG-to-HP adapter mandrel to bridge the size difference. The adapter holds the FG instrument securely while fitting the HP collet. Keep in mind that running FG accessories at slow-speed RPMs may not give you the cutting performance they were designed for, since most FG instruments are optimized for high-speed rotation.
What speed should I run a mandrel at?
The safe speed depends on the accessory attached, not just the mandrel itself. Small-diameter accessories (under 10 mm) can generally handle up to 30,000 RPM. Medium accessories (10–20 mm) should stay between 10,000 and 20,000 RPM. Large accessories (over 20 mm) need to run below 10,000 RPM. Always check the RPM rating printed on the accessory packaging. Running above the rated speed risks the disc or wheel breaking apart, which is a serious safety hazard.
Summary
Mandrels may be among the simplest instruments in your toolkit, but selecting the correct type is essential for safe, efficient work. Screw type mandrels offer reliable disc and wheel attachment for polishing and separating tasks. Split mandrels give you the flexibility to use custom-cut abrasive strips in both straight and tapered configurations. Snap-on mandrels speed up disc changes when you are cycling through grits or burning through separating discs quickly. Adapter mandrels eliminate time-consuming collet changes by converting between shank sizes on the fly.
Match your mandrel to your handpiece shank, verify the arbor hole size for screw types, and always respect speed ratings. With the right mandrel in place, your rotary accessories will perform at their best.