How to Choose a Rotary Tool for Jewelry Making
A rotary tool is one of the most versatile instruments in any jewelry maker's workshop. Whether you are cutting gemstones, engraving metal, or polishing finished pieces, the right rotary tool makes the difference between frustrating work and clean, professional results. This guide covers the main types of rotary tools, the features that matter most, and the accessories you need to get started.
Types of Rotary Tools for Jewelry Making
Not all rotary tools are built for the same tasks. Understanding the differences helps you match the tool to your workflow.
Handheld Rotary Tools
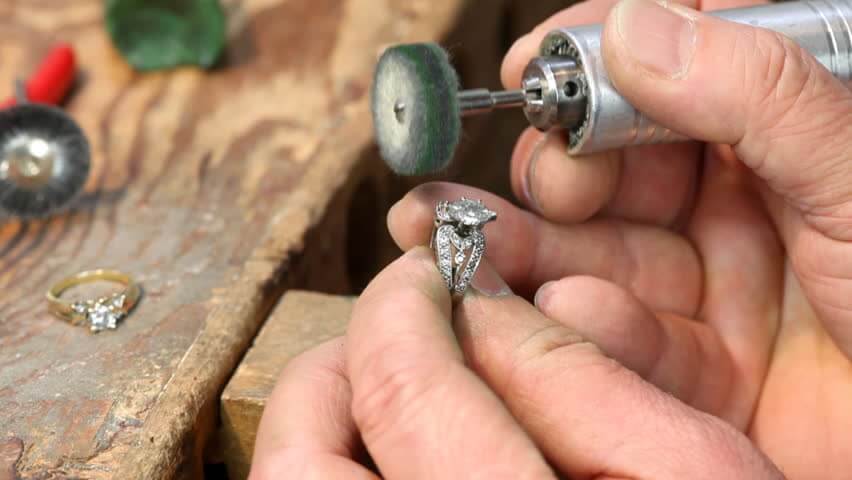
Compact, pen-style rotary tools like the Dremel and similar models are popular among hobbyists and professionals alike. They typically run at 5,000 to 35,000 RPM and accept a wide range of attachments through standard collet systems. Their main advantage is portability and ease of use for light-to-medium tasks such as engraving, surface texturing, and light cutting.
Flex Shaft Machines
A flex shaft system separates the motor from the handpiece, connecting them with a flexible cable. This design keeps the weight of the motor off your hand, reducing fatigue during extended sessions. Flex shafts are the standard choice in professional jewelry studios because they offer superior torque, smoother operation, and better control for detailed work. The Foredom SR series is a well-known example.
Micro Motors
Micro motors are compact, brushless units that deliver high torque in a small handpiece. They are quieter than flex shafts and offer precise speed control, often through a foot pedal. Brands like Marathon and Saeshin are popular in both dental and jewelry applications. Micro motors are an excellent choice if you need consistent power without vibration.

Key Features to Evaluate
When comparing rotary tools, focus on these specifications:
| Feature | What to Look For | Why It Matters |
|---|---|---|
| Power (Amps/Watts) | 1.5–2.5 amps or 100–250 watts | Sufficient torque for cutting metal and stone without stalling |
| Speed Range (RPM) | Variable, 0–35,000 RPM | Low speeds for polishing, high speeds for cutting |
| Speed Control | Foot pedal or dial | Hands-free speed adjustment keeps both hands on the workpiece |
| Collet Size | 3/32" (2.35 mm) standard | Compatibility with most jewelry burs and accessories |
| Weight & Ergonomics | Lightweight handpiece, balanced grip | Reduces hand fatigue during long sessions |
| Noise Level | Below 65 dB preferred | Comfortable for extended studio use |
Variable speed control is particularly important. Polishing with felt bobs and compound works best at 5,000–10,000 RPM, while cutting with diamond discs requires 20,000–30,000 RPM. A single-speed tool forces compromises that affect finish quality.
Essential Accessories and Attachments
The rotary tool itself is only half the equation. The attachments you use determine the range of work you can accomplish.
Cutting and Shaping
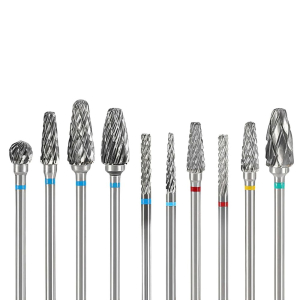
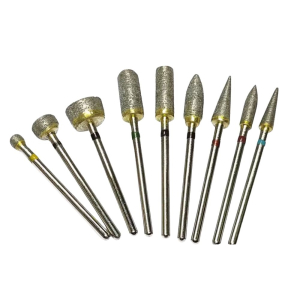
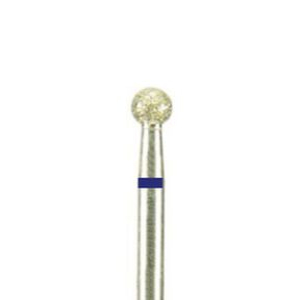
- Diamond burs – Available in ball, cylinder, cone, and flame shapes. Essential for cutting and shaping hard materials like gemstones, glass, and hardened metals. Fine-grit diamond burs also work well for detailed engraving.
- Tungsten carbide burs – Best for shaping softer metals (silver, brass, copper) and removing material quickly. They cut aggressively and leave a rougher surface than diamond burs, so they are typically used in early shaping stages.
- Diamond discs – Thin cutting wheels for slicing metal sheet, wire, and sprues. Available in various diameters and grits.
Grinding and Finishing
- Mounted stones – Silicon carbide or aluminum oxide points for smoothing surfaces and refining shapes after rough cutting.
- Sanding drums and bands – Useful for contour sanding on curved surfaces. Replace bands as they wear for consistent results.
Polishing
- Silicone polishers – Impregnated with abrasive compounds, these come in coarse, medium, and fine grades. They simplify the polishing workflow by combining abrasive and carrier in one tool.
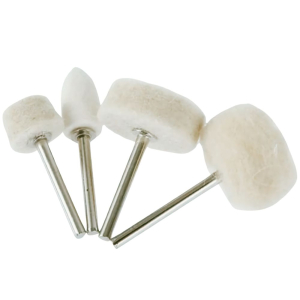
- Felt bobs and wheels – Used with polishing compound (rouge, tripoli, or diamond paste) to achieve a mirror finish. For detailed guidance, see our article on how to use felt bobs with a Dremel rotary tool.
- Polishing brushes – Bristle, muslin, and cotton wheel brushes for pre-polish and final buffing stages.

Choosing the Right Bur Shapes
Different bur shapes serve different purposes in jewelry work. Knowing which shape to reach for saves time and improves results:
| Bur Shape | Common Uses in Jewelry |
|---|---|
| Ball / Round | Setting stones, creating concave surfaces, bead setting |
| Cylinder | Flat surface shaping, channel cutting, slot making |
| Cone / Taper | Reaching tight angles, V-groove cutting, deburring |
| Flame | Contouring, blending curves, accessing narrow gaps |
| Pear | Cavity preparation, general material removal |
| Wheel / Disc | Cutting thin sections, separating sprues |
For a more detailed breakdown, read our guide on the functions of different bur shapes for jewelry making.
Safety Practices
Rotary tools spin at high speeds and generate debris, heat, and fine dust. Follow these precautions every time you work:
- Eye protection – Wear safety glasses or a face shield. Flying metal or stone fragments can cause serious eye injury.
- Dust control – Use a dust mask (N95 or better) and consider a benchtop dust collector, especially when grinding or cutting stone.
- Secure workpieces – Use a bench pin, vise, or ring clamp. Never hold small pieces with bare fingers near a spinning bur.
- Check collets and burs – Ensure burs are seated firmly and collets are tightened before starting the tool. A loose bur can fly out at speed.
- Start at low RPM – Increase speed gradually. Starting at full speed can grab the workpiece or break fragile burs.
- Keep the workspace clear – Remove loose materials, tie back hair, and avoid loose clothing near the tool.
Budget Considerations
Rotary tools range from under $30 for basic hobbyist models to over $500 for professional flex shaft systems. Here is a general breakdown:
| Category | Price Range | Best For |
|---|---|---|
| Entry-level handheld | $25–$80 | Beginners, occasional use, light tasks |
| Mid-range handheld | $80–$200 | Serious hobbyists, moderate daily use |
| Flex shaft system | $200–$500+ | Professional jewelers, extended daily use |
| Micro motor | $150–$400 | Precision work, low-noise environments |
Investing in a mid-range or professional tool pays off quickly if you work with jewelry regularly. Cheap tools often lack consistent speed control, overheat during extended use, and accept fewer attachment types. Quality burs and accessories matter just as much as the tool itself — a good flex shaft with poor burs will still produce poor results.
Recommended Workflow for Beginners
If you are new to rotary tools for jewelry, start with this basic workflow:
- Rough shaping – Use carbide burs or coarse diamond burs at medium speed to remove material and establish the basic form.
- Refining – Switch to finer-grit diamond burs or mounted stones to smooth tool marks and refine details.
- Pre-polish – Use silicone polishers (medium then fine grade) to prepare the surface for final polishing.
- Final polish – Apply polishing compound to a felt bob or cotton wheel and buff to a high shine at low RPM.
Each step removes the marks left by the previous one. Skipping steps leads to visible scratches under the final polish.
Summary
Choosing a rotary tool for jewelry making comes down to matching the tool type to your work style, ensuring it has variable speed control and adequate power, and pairing it with the right accessories. A flex shaft or micro motor is the best investment for serious work, while a quality handheld rotary tool serves well for lighter tasks and beginners. Prioritize variable speed, ergonomic comfort, and compatibility with standard 3/32" shank accessories, and build your bur collection gradually as your skills develop.