Inlay and Onlay Preparation: Procedure and Burs
When a posterior tooth has moderate decay or structural damage, a direct filling may not provide enough support. At the same time, the damage may not be severe enough to justify a full crown. This is where inlays and onlays fill the gap — they restore the tooth conservatively while offering long-term strength and a natural appearance.
What Are Dental Inlays and Onlays?
Inlays and onlays are indirect restorations fabricated outside the mouth, typically in a dental lab, and then bonded to the prepared tooth. They are used on premolars and molars where the chewing forces are highest.
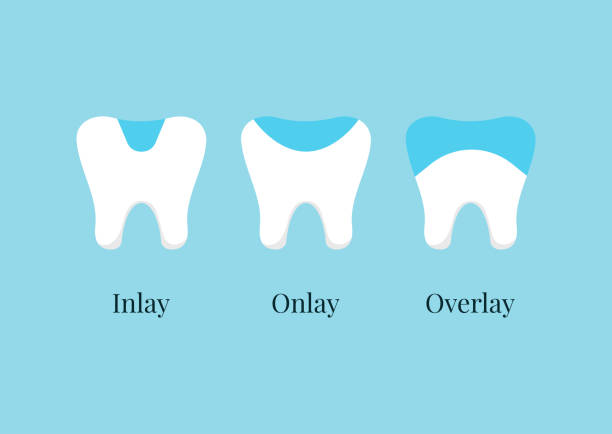
The key distinction between the two lies in coverage:
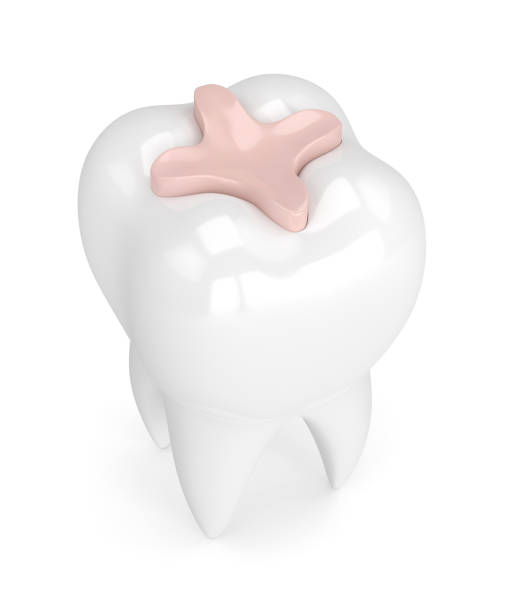
- Inlay: Fits within the cusps of the tooth. It fills the area between the raised edges, covering pits and fissures on the occlusal surface without extending over any cusp tip.
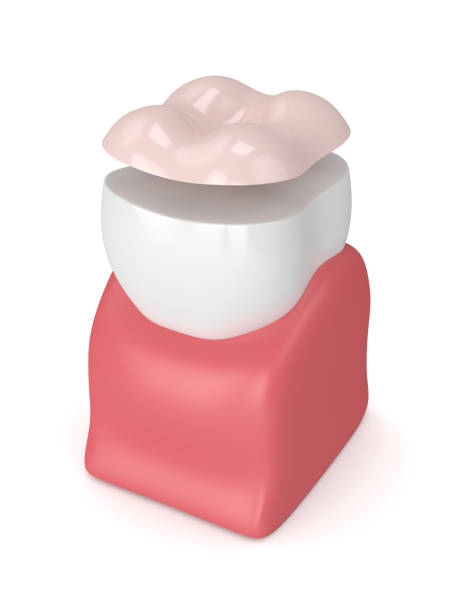
- Onlay: Extends over one or more cusps. It is indicated when the damage or decay involves the cusp structure itself, requiring a broader protective layer.
Both types can be fabricated from several materials, including gold alloy, porcelain (ceramic), composite resin, and zirconia. Porcelain and composite options have grown in popularity because they can be shade-matched to the surrounding tooth structure.
Inlay vs. Onlay: When to Use Each
Choosing between an inlay and an onlay depends on the extent of the damage and the remaining healthy tooth structure. The table below outlines the main differences.
| Feature | Inlay | Onlay |
|---|---|---|
| Coverage area | Between cusps only | One or more cusps included |
| Indication | Moderate decay in pits and fissures | Larger decay involving cusp tips |
| Tooth reduction | Less aggressive | More reduction required over cusps |
| Strength | Good for contained cavities | Better for weakened cusps |
| Alternative | Direct composite filling | Full-coverage crown |
An onlay is sometimes called a partial crown because it covers a significant portion of the occlusal surface while still preserving more natural tooth structure than a full crown would.
Materials for Inlays and Onlays
The choice of material affects aesthetics, strength, and longevity. Here is a practical comparison:
- Gold alloy: Extremely durable and kind to opposing teeth. Gold restorations can last 20 years or more. However, the metallic color makes them less popular for visible areas.
- Porcelain (ceramic): Provides excellent aesthetics with shade matching. Modern ceramics like lithium disilicate offer high strength. Porcelain onlays are the most requested option today.
- Composite resin: More affordable than ceramic and bonds well to tooth structure. It is less wear-resistant over time but easier to repair chairside if damaged.
- Zirconia: The strongest ceramic option, suitable for patients with heavy bite forces. Shade matching is slightly more limited than with lithium disilicate.
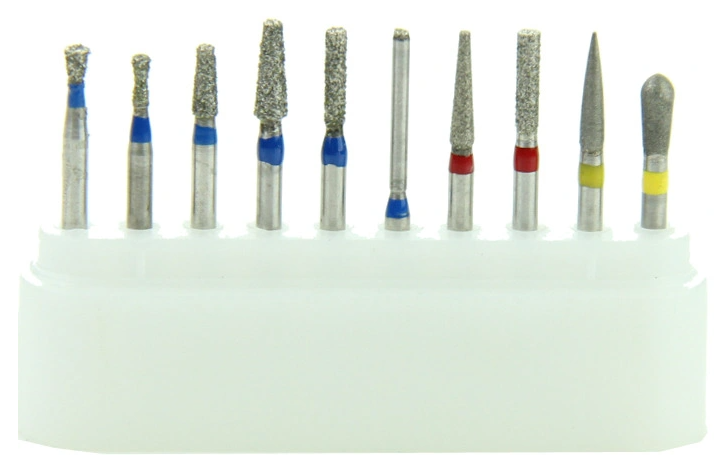
Burs Used in Inlay and Onlay Preparation
Proper bur selection is central to achieving clean margins and appropriate retention form. The preparation typically involves several bur types used in sequence:
Initial Tooth Reduction
A coarse-grit diamond bur (FG) is used first to remove bulk tooth structure and establish the outline form. Tapered burs with a flat end (such as an FG 847 or FG 848) are standard for creating divergent walls with a defined pulpal floor.
Refining Walls and Margins
After the initial shape is cut, switch to a fine-grit diamond or a straight-fissure tungsten carbide bur to smooth the internal walls. The goal is slightly divergent walls (6 to 10 degrees of taper) to allow the restoration to seat without undercuts that would lock it in.
Finishing the Preparation
Use a finishing diamond or a 12-bladed carbide bur to refine the cavosurface margins. Clean, smooth margins allow the lab to fabricate a restoration with precise fit, which minimizes the cement line and reduces the risk of secondary decay. For a detailed look at finishing instruments, read our article on finishing burs.
Step-by-Step Preparation Procedure
The full process typically requires two appointments. Here is what happens at each visit.
First Appointment: Preparation and Impression
- Anesthesia: Administer local anesthetic to numb the treatment area. Confirm adequate anesthesia before beginning any cutting.
- Decay removal: Use a round carbide bur at low speed to excavate all carious tooth structure. Confirm removal with a caries detector dye if needed.
- Outline the preparation: With a coarse tapered diamond bur, establish the preparation boundaries. For an inlay, keep the margins within the cusps. For an onlay, extend the preparation to cover weakened cusps with a minimum 1.5 mm reduction over the cusp tip.
- Create divergent walls: Ensure all internal walls diverge slightly from the pulpal floor toward the occlusal surface. This taper allows the restoration to be inserted and removed from the preparation without binding.
- Smooth and finish margins: Switch to a fine diamond or finishing carbide bur to refine all margins. The cavosurface angle should be approximately 90 degrees with no fragile enamel rods unsupported by dentin.
- Take the impression: Use a polyvinyl siloxane (PVS) impression material or an intraoral digital scanner to capture the preparation. Record the opposing arch and the bite registration as well.
- Place a temporary restoration: Fabricate and seat a temporary filling or provisional restoration to protect the prepared tooth. Use temporary cement that allows easy removal at the second visit.
Second Appointment: Try-In and Cementation
- Remove the temporary: Carefully remove the provisional restoration and all temporary cement. Clean the preparation thoroughly.
- Try-in the restoration: Seat the lab-fabricated inlay or onlay in the preparation. Check the marginal fit, proximal contacts, and occlusal contacts. Adjust if necessary using a fine diamond bur.
- Cement the restoration: Apply resin cement or glass ionomer cement according to the material requirements. For ceramic restorations, etch and apply silane coupling agent before bonding. Light-cure or allow chemical cure per the cement instructions.
- Check the bite: Use articulating paper to verify occlusal contacts. Adjust any high spots with a fine diamond.
- Polish: Finish by polishing the margins and restoration surface with rubber points or a polishing disc to achieve a smooth transition between the restoration and tooth. Our clinic kits include the bur sequences needed for inlay and onlay preparation and finishing in a single organized set.
Advantages of Inlays and Onlays Over Fillings
Indirect restorations offer several benefits compared to direct composite fillings:
- Less polymerization shrinkage: Because the restoration is cured outside the mouth, shrinkage stress on the bonded interface is significantly reduced.
- Better marginal adaptation: Lab fabrication allows more precise shaping and polishing than what can be achieved chairside.
- Higher wear resistance: Ceramic and gold restorations outlast direct composites, especially in areas with heavy occlusal load.
- Preservation of tooth structure: Compared to a full crown, an inlay or onlay removes far less healthy enamel and dentin.
Aftercare and Longevity
Patients should be advised to avoid chewing hard objects (ice, hard candy, pen caps) on the restored tooth. Regular brushing, flossing, and dental checkups are essential for maintaining the bond and detecting any early signs of wear or secondary decay around the margins.
With proper care, porcelain inlays and onlays can last 10 to 15 years, and gold restorations often last even longer. Composite resin restorations tend to have a shorter lifespan of 5 to 8 years, depending on the patient's bite forces and oral hygiene habits. During recall appointments, inspect the margins for staining, gaps, or chipping that might indicate the restoration needs repair or replacement.
If a patient reports sensitivity after cementation, check for high occlusal contacts first. Persistent sensitivity may indicate microleakage or incomplete bonding, which may require removal and recementation or full replacement of the restoration. For more on the burs and instruments used in restorative procedures, see our guide on cavity preparation.
