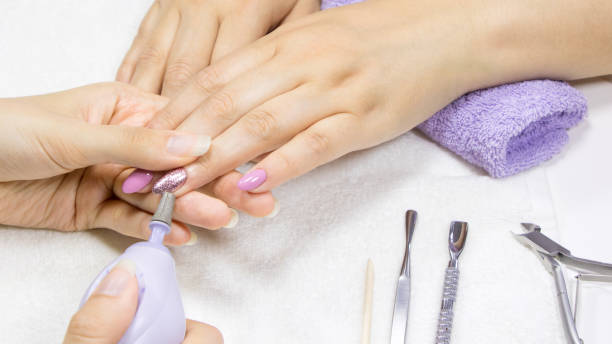
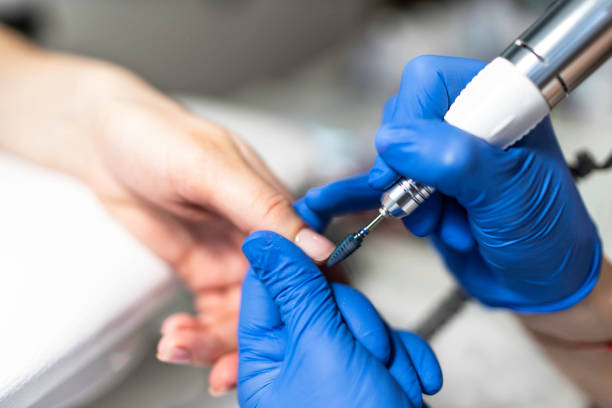
A nail drill (e-file) transforms a 45-minute hand-filed manicure into a 20-minute precision service. But speed without technique leads to damaged nails and unhappy clients. This guide walks through the practical techniques for using nail drill bits at each stage of a professional manicure, from cuticle preparation to final polish.
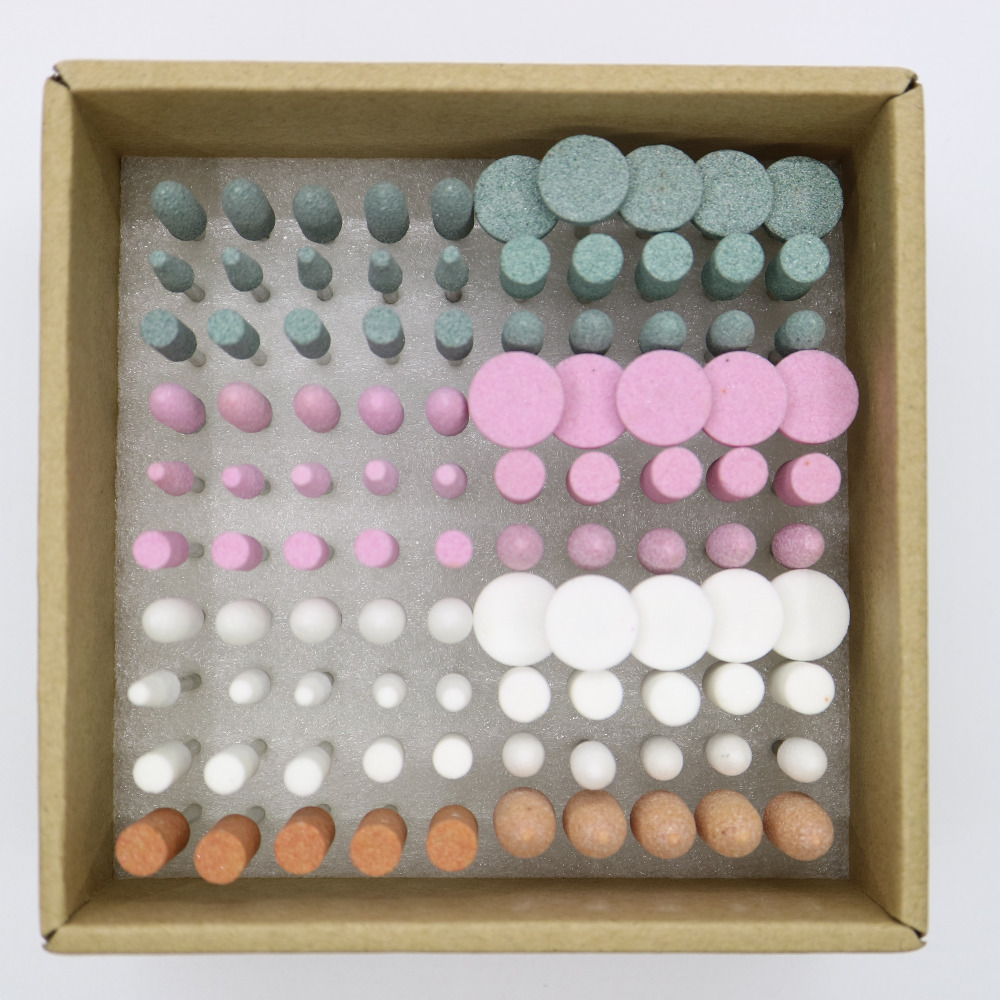
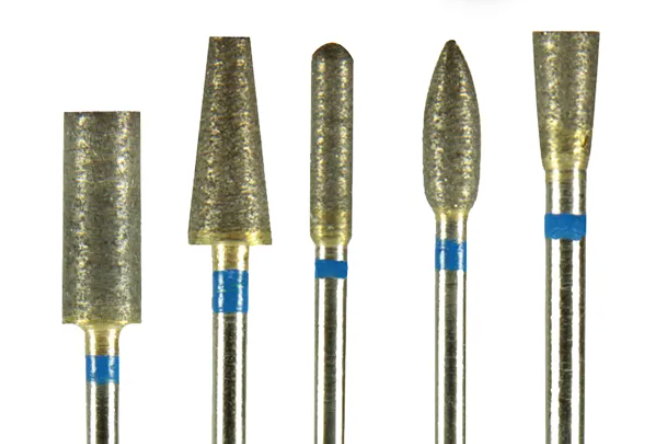
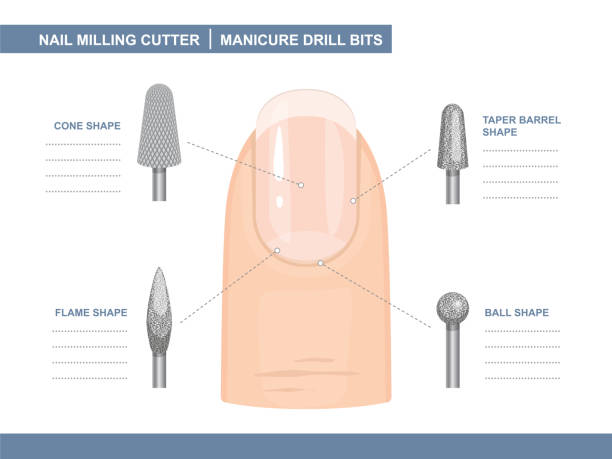
Essential Drill Bits for a Complete Manicure
A full manicure service uses different bits for different stages. Here is a practical breakdown of which bits you need and when to use them.
| Manicure Stage | Recommended Bit | Grit / Cut | RPM Range |
|---|---|---|---|
| Cuticle push & clean | Diamond flame or ball | Fine (red band) | 5,000 - 10,000 |
| Sidewall cleanup | Diamond needle | Fine (red band) | 5,000 - 8,000 |
| Nail surface prep | Diamond barrel | Fine (red band) | 8,000 - 12,000 |
| Gel/acrylic removal | Carbide barrel | Medium cross-cut | 15,000 - 20,000 |
| Shaping & shortening | Carbide or sanding band | Medium (120 grit) | 10,000 - 15,000 |
| Smoothing & buffing | Silicone polisher | Medium then fine | 8,000 - 12,000 |
Cuticle Preparation Technique
Cuticle work is where most of the skill in an e-file manicure lives. Done correctly, it creates a clean, lifted cuticle line that makes polish application look sharp. Done incorrectly, it causes cuts, soreness, and infection risk.
Step-by-Step Cuticle Cleanup
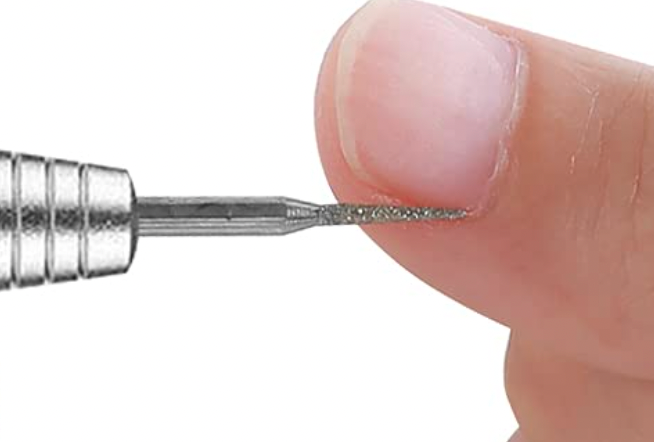
- Choose a fine diamond flame bit. The tapered tip allows you to work close to the cuticle fold without contacting the nail plate aggressively.
- Set your speed to 5,000-8,000 RPM. Lower speed gives you more control. You can always increase if needed.
- Hold the drill at a 45-degree angle to the nail surface. The bit should glide along the cuticle area, not dig into it.
- Work from the sidewall toward the center in one smooth motion. Lift and reposition rather than dragging the bit back and forth.
- Switch to a small ball-shaped diamond bit to clean the pterygium (thin membrane on the nail plate near the cuticle). Use gentle, circular motions.
Key rule: Never hold the bit in one spot for more than a second. Constant movement prevents heat buildup and ensures even material removal.
Nail Surface Preparation
Before applying gel, acrylic, or dip powder, the nail surface needs light preparation to improve adhesion. Over-filing at this stage is one of the most common mistakes, and it leads to thin, weak nails over time.

Proper Surface Prep Method
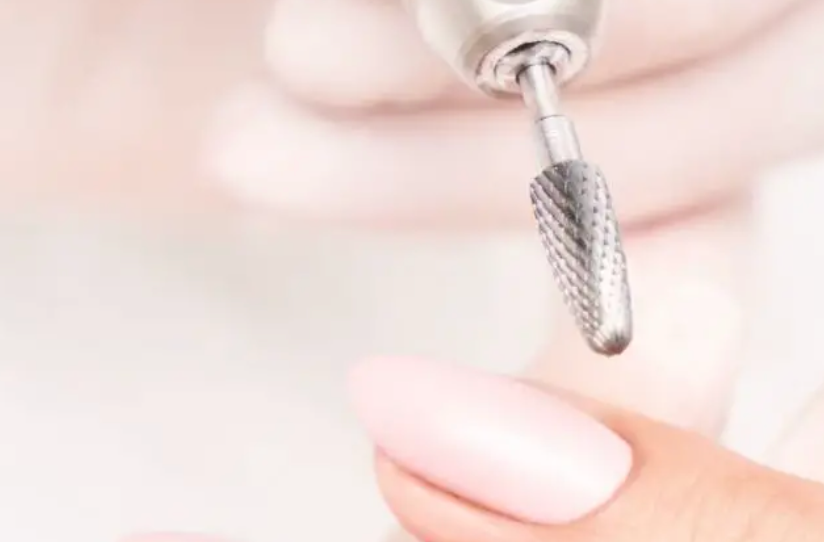
- Use a fine-grit diamond barrel bit or a 240-grit sanding band.
- Set speed to 8,000-10,000 RPM.
- Make 2-3 light passes across the nail surface. You want to remove the natural shine, not dig into the nail plate.
- The nail should look matte and slightly frosted when done. If you see white patches or the client feels warmth, you have gone too far.
Product Removal: Gel and Acrylic
Removing gel or acrylic with a drill requires a different approach than prep work. You need a more aggressive bit at higher speed, but control remains critical.
Gel Removal
- Use a medium ceramic barrel bit or medium carbide barrel. Ceramic generates less heat, making it better for gel-only services.
- Set speed to 15,000-18,000 RPM.
- File in one direction across the nail, working from cuticle area toward the free edge.
- Stop when you see the base coat or natural nail color beneath the gel. Leave a thin layer and soak the rest with acetone or buff by hand.
Acrylic Removal
- Use a coarse cross-cut carbide barrel bit.
- Set speed to 15,000-20,000 RPM.
- Remove roughly 80% of the acrylic with the carbide, then switch to a 180-grit sanding band for the remaining product.
- For detailed guidance on acrylic-specific removal, see our article on choosing the best drill bit for acrylic removal.
Shaping and Shortening Nails
Using a drill for shaping is faster than hand-filing and produces more consistent results, especially on extensions. A medium carbide bit or 120-grit sanding band works well for both natural nails and extensions.
Shaping Tips
- For free-edge shaping: Hold the bit perpendicular to the nail tip and file in one direction. Check symmetry frequently.
- For C-curve adjustment: Use a flame or tapered bit along the sidewalls to refine the arch of the nail.
- For shortening: A cone-shaped carbide bit shortens extensions quickly. Follow up with a barrel bit to smooth the new free edge.
Buffing and Finishing
The final step in any drill-assisted manicure is buffing the nail surface to a smooth, even finish. This step matters whether you are applying polish next or leaving the nails natural.
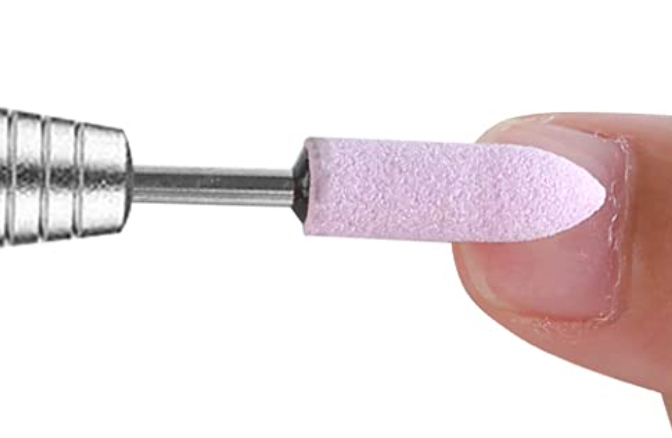
- Use a medium silicone polisher first to smooth out any file marks from shaping or removal.
- Follow with a fine silicone polisher to bring the surface to a high gloss.
- Keep speed at 8,000-12,000 RPM. Higher speeds with silicone bits can generate enough heat to cause discomfort.
Speed and Pressure Guidelines
Speed and pressure are the two variables that separate safe e-filing from damaging e-filing. Here is a reference chart:
| Task | Pressure | Speed |
|---|---|---|
| Cuticle work | Feather light | 5,000 - 10,000 RPM |
| Natural nail prep | Very light | 8,000 - 12,000 RPM |
| Product removal | Light, consistent | 15,000 - 20,000 RPM |
| Shaping | Light to moderate | 10,000 - 15,000 RPM |
| Buffing | Very light | 8,000 - 12,000 RPM |
General rule: If the client feels heat, you are either pressing too hard, moving too slowly, or using a dull bit. Stop immediately, check your technique, and adjust.
Cleaning and Maintaining Your Drill Bits
Proper maintenance extends bit life and keeps your workspace sanitary. Follow these practices after every client:
- Brush off debris with a brass wire cleaning brush immediately after use.
- Soak in disinfectant for the time specified by the product manufacturer (typically 10-15 minutes).
- Rinse and dry completely before storing. Moisture causes corrosion on metal bits.
- Autoclave if required by your state or country regulations for salon sanitation.
- Inspect regularly. Replace diamond bits when the grit feels smooth, carbide bits when the flutes are rounded, and ceramic bits if you see chips or cracks.
Handling Different Nail Types
Not every client has the same nail thickness or condition. Adjusting your approach based on the individual nail prevents damage and produces a cleaner result.
Thin or Weak Natural Nails
Clients with thin nails require extra caution. Reduce your speed by 20-30% from your normal settings and use only fine-grit bits for surface work. Avoid any bulk removal directly on the natural nail. If removing gel or acrylic from thin nails, leave a slightly thicker protective layer before switching to hand-filing.
Thick or Textured Natural Nails
Some clients have naturally thick, ridged nail plates. A medium diamond barrel bit at moderate speed helps smooth ridges before product application. Take care not to over-thin the high points of the ridges, as this creates weak spots.
Damaged or Peeling Nails
If a client arrives with peeling or lifting layers on the nail plate, avoid using the drill on those areas entirely. The drill can catch on lifted layers and tear them further. Use hand-filing and gentle buffing on damaged sections, and reserve the drill for healthy areas of the nail.
Common Mistakes New Technicians Make
Learning to use a nail drill takes practice. These are the errors that come up most often during training:
- Filing in a back-and-forth motion: This creates friction heat quickly. Always file in one direction across the nail.
- Using the same bit for everything: Each stage of the manicure has an ideal bit. Switching bits takes seconds and dramatically improves results.
- Setting the speed too high from the start: Begin at a lower RPM and increase gradually. It is much easier to speed up than to fix damage from going too fast.
- Neglecting the handpiece angle: Holding the drill perpendicular to the nail surface creates a digging action. A 15-45 degree angle lets the bit glide and reduces the risk of gouging.
- Forgetting to check client comfort: Ask your client periodically if they feel any warmth or pressure. Not all clients will speak up on their own, and catching heat buildup early prevents burns.
Using Drill Bits for Nail Art
Beyond standard manicure work, nail drill bits open up creative possibilities for textured and dimensional nail art.
- Fine needle bits carve thin lines and grooves into cured gel or acrylic for etched designs.
- Small ball bits create dot patterns and concave impressions.
- Flame bits sculpt raised 3D elements by shaping cured acrylic overlays.
Set your speed low (5,000-8,000 RPM) for art work and practice on tip wheels before working on clients.
Mastering nail drill bit technique takes practice, but the fundamentals covered here will give you a solid foundation. For a deeper comparison of bit materials, our guide on types of nail drill bits covers each material in detail. New to e-filing? Start with our beginner's guide to nail drill bits for the basics.