

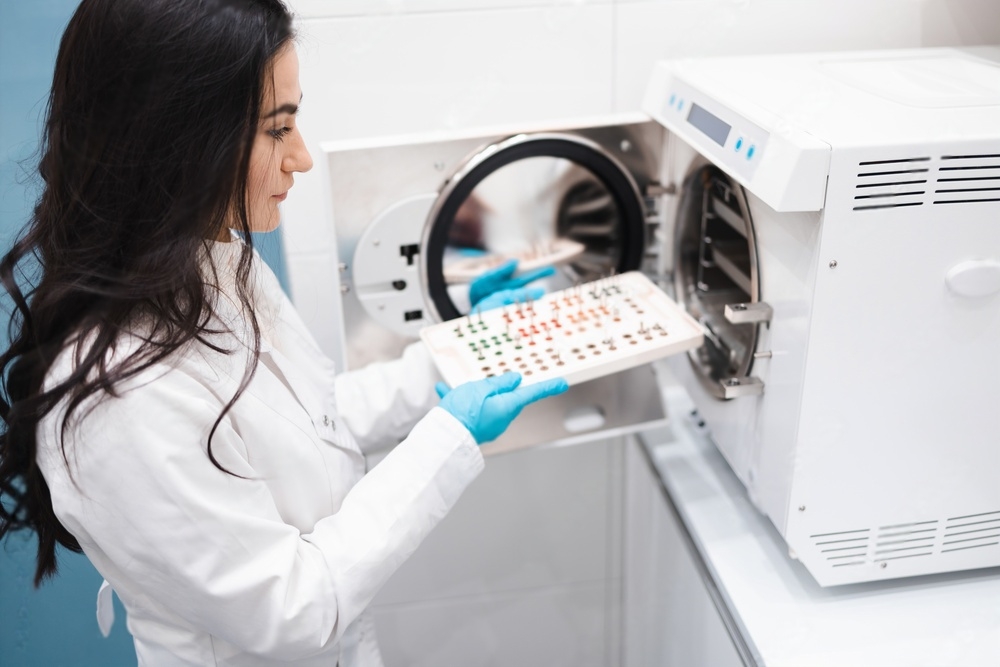
How to Clean, Disinfect, and Store Diamond Dental Burs
Proper cleaning and sterilization of diamond dental burs is a basic requirement in every dental practice. Contaminated instruments put patients at risk and violate infection control standards. Beyond safety, good maintenance habits also extend the working life of your burs, saving money over time.
This guide walks through a proven three-step process — pre-cleaning, high-pressure steam sterilization, and organized storage — that keeps your diamond dental burs in reliable working condition between uses.
Why Diamond Bur Hygiene Matters
Diamond burs contact tooth structure, saliva, blood, and soft tissue during every procedure. Biological debris fills the spaces between diamond particles on the bur head, which creates two problems:
- Infection risk — bacteria and viral particles can survive on contaminated surfaces and transfer to the next patient
- Reduced cutting performance — clogged diamond grit cuts slower and generates more heat, which can damage pulp tissue
Regulatory bodies including the CDC and ADA require that all semi-critical instruments (those contacting mucous membranes or non-intact skin) undergo heat sterilization between patients. Diamond burs fall squarely into this category.
Step 1: Pre-Cleaning the Diamond Burs
Pre-cleaning removes the bulk of biological material before sterilization. Skipping this step allows organic residue to bake onto the bur surface during autoclaving, making it harder to remove and potentially shielding microorganisms from the sterilization process.
Manual Brushing
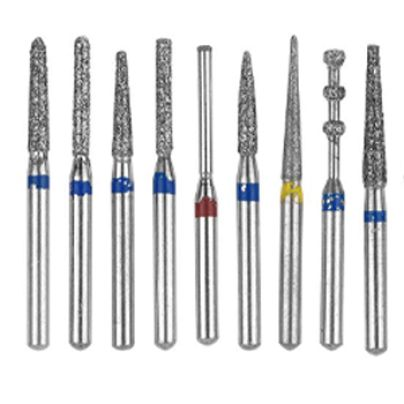
Start by gently brushing each bur with a soft nylon brush under running water. Work the bristles around the entire bur head, paying extra attention to the diamond-coated surface where debris tends to pack tightly between the abrasive particles.
Ultrasonic Cleaning (Recommended)
For a more thorough result, place the burs in an ultrasonic cleaner filled with an enzymatic cleaning solution. Ultrasonic cleaners use high-frequency sound waves to create microscopic bubbles that collapse against surfaces, dislodging debris from areas a brush cannot reach. Run the cycle for 5 to 10 minutes depending on the level of contamination.
Ultrasonic cleaning is especially effective for diamond burs because the diamond grit surface has thousands of tiny crevices that trap particles. Manual brushing alone often leaves residue in these spaces.
Rinsing and Drying
After cleaning, rinse each bur thoroughly under running water to remove loosened debris and any remaining cleaning solution. Pat the surface dry with non-woven fabric or sterile gauze. Moisture left on burs before autoclaving can cause corrosion on the metal shank over time.
Step 2: High-Pressure Steam Sterilization
Autoclave sterilization is the gold standard for diamond burs. It is fast, reliable, cost-effective, and does not leave chemical residues. The process uses pressurized steam to destroy all forms of microbial life, including bacterial spores.
Autoclave Settings for Diamond Burs
| Parameter | Standard Cycle | Flash Cycle |
|---|---|---|
| Temperature | 121°C (250°F) | 134°C (273°F) |
| Pressure | 15 psi | 30 psi |
| Duration | 30 minutes | 15 minutes |
| Drying time | 15-30 minutes | 10-15 minutes |
Most practices use the standard 121°C cycle, which provides a wider safety margin for complete sterilization. The 134°C flash cycle is acceptable when instruments are needed quickly, but it should not be the default method for routine processing.
Loading the Sterilization Box
Place each bur in its designated slot inside a sterilization box or cassette. The slots keep burs separated so that steam can circulate freely around every surface. Burs that touch each other or overlap may not receive adequate steam contact, creating potential sterilization failures.
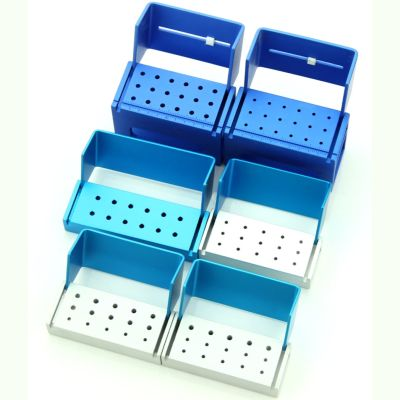
Close the sterilization box and place it in the autoclave chamber. Do not overload the autoclave — leave space between cassettes and pouches for proper steam circulation.
Cooling After Sterilization
After the cycle completes, allow the sterilization box to cool inside the autoclave until it reaches a safe handling temperature. Opening the autoclave door prematurely can cause wet packs (condensation on instrument surfaces), which compromises the sterile barrier and requires reprocessing.
Step 3: Storage and Inventory Management
Proper storage maintains the sterile condition of processed burs until they are needed for the next patient.
Storage Guidelines
- Keep burs in the sterilization box — do not transfer sterilized burs into open containers or drawers where airborne contaminants can settle on them
- Store in a clean, dry location — avoid areas near sinks, air vents, or high-traffic zones where splashing or dust exposure is likely
- Label with the sterilization date — most facilities follow a first-in-first-out rotation to ensure no burs sit unused beyond the recommended sterile shelf life
- Inspect before use — check each bur for wear, diamond loss, or shank damage before inserting it into a handpiece
When to Replace Diamond Burs
No amount of cleaning restores a worn-out bur. Replace diamond burs when you notice any of the following:
- Visible loss of diamond particles from the bur head
- Reduced cutting speed that requires increased pressure
- Vibration or wobble when the bur rotates in the handpiece
- Bent or corroded shank
- Discoloration that does not clean off, which may indicate metal fatigue
Using a worn bur increases procedure time, generates excess heat, and delivers a rougher surface finish. For more detail on recognizing wear patterns, see our guide on cleaning diamond dental burs.
Common Mistakes to Avoid
Even experienced dental teams sometimes develop habits that undermine their sterilization protocols. Watch out for these frequent errors:
- Skipping pre-cleaning — dried biological material can shield bacteria from steam contact during autoclaving
- Using chemical disinfectants as a substitute — cold chemical sterilants do not reliably kill all spore-forming organisms and can damage the diamond bond
- Overloading the autoclave — packing too many items restricts steam flow and leads to incomplete sterilization
- Storing burs in open containers — exposure to ambient air recontaminates sterilized instruments within hours
- Reusing single-use burs — some disposable burs are designed for one patient only and should not be reprocessed
Tracking and Documentation
Establish a written protocol for tracking bur sterilization cycles. A simple log should record:
- Date and time of each autoclave cycle
- Autoclave temperature and duration settings
- Biological indicator test results (run spore tests at least weekly)
- Name or initials of the staff member who processed the load
This documentation satisfies regulatory inspection requirements and provides a traceable record if any sterilization question arises. Many modern autoclaves print cycle reports automatically, which simplifies record-keeping.
Sterilization Methods Compared
While autoclave sterilization is the recommended method for diamond burs, dental professionals sometimes ask about alternative approaches. Here is how the main options compare:
| Method | Effectiveness | Bur Safety | Cost |
|---|---|---|---|
| Autoclave (steam) | Kills all microorganisms including spores | Safe for diamond burs | Low per cycle |
| Dry heat sterilizer | Effective at higher temperatures (160-170°C) | Safe but longer cycle time | Low per cycle |
| Chemical sterilants | Variable; may not kill all spores | Can damage diamond bond over time | Moderate (solution cost) |
| UV sterilization | Surface-level only; not reliable for instruments | No damage but insufficient | Low |
Dry heat sterilization is an acceptable alternative when autoclaving is unavailable, but it requires longer exposure times (typically 60 minutes at 170°C). Chemical sterilants such as glutaraldehyde should be treated as a last resort because prolonged chemical exposure can weaken the bonding agent that holds diamond particles to the bur head. UV sterilization does not meet the standard for semi-critical instruments and should never be used as a primary method.
For practices that process a high volume of instruments daily, investing in a second autoclave unit reduces bottlenecks and ensures burs are always available when needed. The cost of an additional sterilizer is quickly offset by improved workflow and reduced instrument downtime.
Summary
Maintaining diamond dental burs through proper cleaning, sterilization, and storage is a non-negotiable part of infection control. Pre-clean with a brush or ultrasonic cleaner, sterilize at 121-134°C in an autoclave, and store burs in sealed sterilization boxes until needed. Inspect every bur before use and replace any that show wear. These steps protect patients, meet regulatory standards, and keep your diamond burs performing at their best for as long as possible.
