Drilling a hole through a gemstone is one of the most common and most demanding tasks in jewelry making. Whether you are creating beads, pendants, or custom settings, the ability to drill clean, centered holes without cracking or chipping the stone is a skill that separates experienced jewelers from beginners. The process requires patience, the right tools, and a solid understanding of how different stones behave under pressure.
This guide covers the complete gemstone drilling process from tool selection through the final steps, with practical tips to help you get clean results on your first attempt.
Essential Tools for Gemstone Drilling
Before you start drilling, gather all the equipment and materials listed below. Having everything within reach prevents you from having to stop mid-drill, which can cause alignment problems if the stone shifts.
- The gemstone you intend to drill
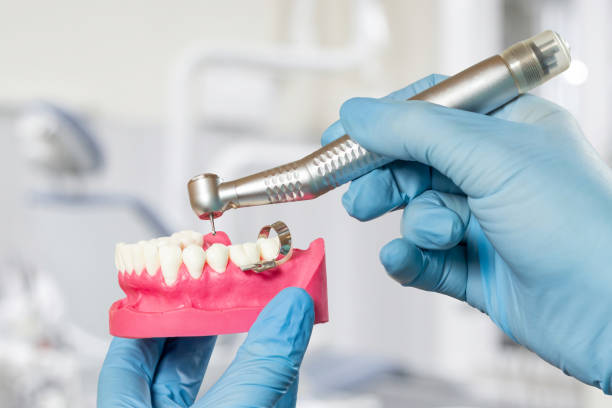
- A rotary tool such as a Dremel or similar device, preferably one with a flexible shaft attachment for better control
- Diamond burs set with multiple shapes and sizes for drilling and enlarging holes
- A container with sufficient volume and depth to hold water during drilling
- Clean water for cooling and debris removal
- Safety glasses and dust mask to protect against stone particles
- A fine-point marking pen for marking drill locations accurately
- Modeling clay or putty to hold the stone steady during drilling (optional but recommended)
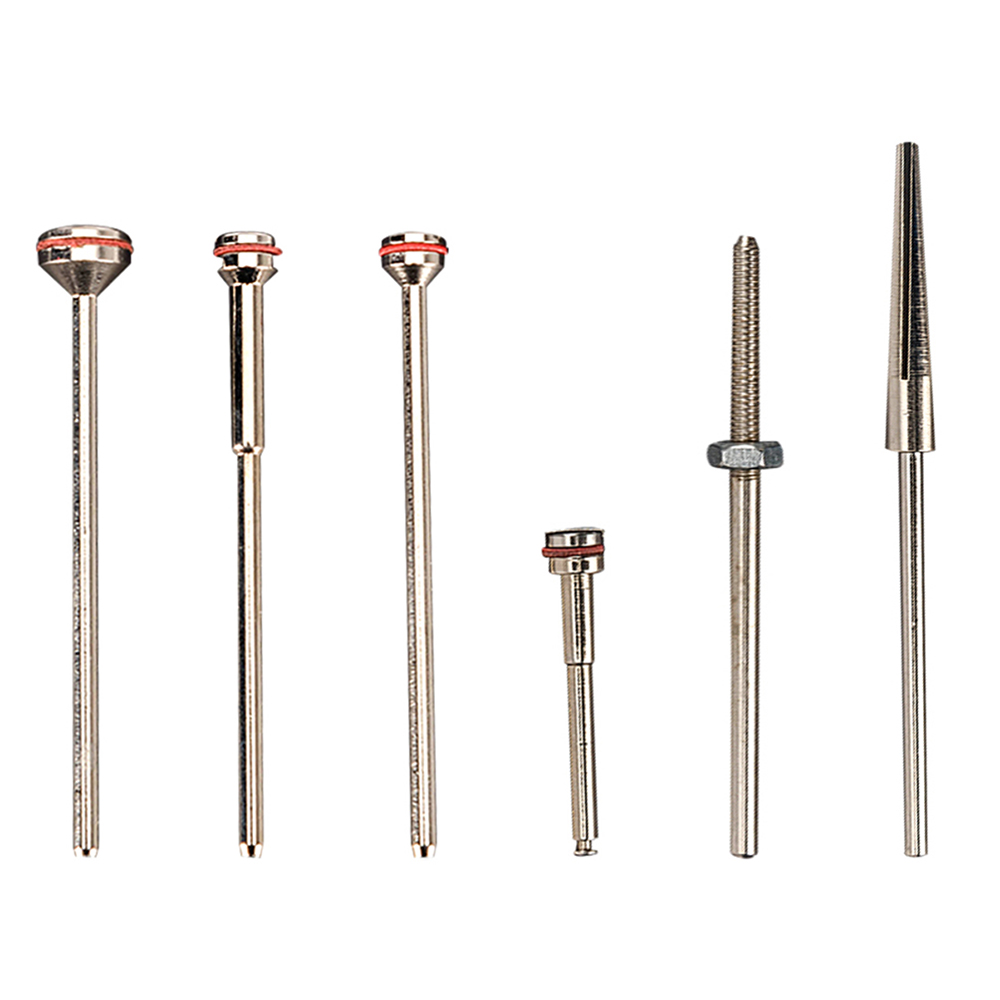
Choosing the Right Diamond Burs
Diamond burs are the only practical choice for drilling through gemstones. The extreme hardness of most gemstones, especially varieties like quartz, garnet, sapphire, and jade, means that standard steel drill bits will dull instantly and make no progress. Diamond is the only common abrasive hard enough to cut through these materials at a reasonable pace.
For gemstone drilling, you will primarily use two bur shapes:
- Round (ball) burs: These create the initial dimple and starting point for the hole. The rounded tip prevents the bur from skating across the stone surface when you begin drilling. Start with a small diameter round bur and progress to larger sizes if needed.
- Cylindrical burs: Once the initial hole is established, switch to a cylindrical bur to extend the hole deeper into the stone. Cylindrical burs cut on their sides and bottom, producing a straighter, more uniform hole than a round bur would at depth.
Having a full diamond burs set gives you the flexibility to choose the exact diameter and shape needed for each project. We stock a range of sets on our website with shapes suitable for gemstone work.
Preparing the Gemstone
Proper preparation prevents most drilling failures. Take the following steps before you power on your rotary tool:
- Inspect the stone carefully. Look for existing fractures, inclusions, or weak points near where you plan to drill. Natural flaws in the stone can cause it to crack under drilling pressure. If possible, choose a drilling path that avoids visible inclusions.
- Mark both sides of the stone. Use your marking pen to place a precise dot on both the entry and exit sides of the gemstone where you want the hole. Marking both sides is essential because you will drill from each side toward the middle, and the marks help you align the two holes so they meet accurately in the center.
- Secure the stone. Place the gemstone in modeling clay or a dedicated stone holder to prevent it from spinning or shifting during drilling. An unsecured stone is both a safety hazard and a recipe for off-center holes.
Step-by-Step Drilling Process
With your tools ready and the stone prepared, follow these steps to drill a clean hole through your gemstone.
Step 1: Mount the Round Bur
Insert a small-diameter round (ball) diamond bur into your rotary tool or flexible shaft handpiece. Tighten the collet firmly so the bur cannot slip during use. A loose bur will wobble, creating an oversized and uneven hole.
Step 2: Submerge the Stone in Water
Fill your container with enough water to cover the gemstone completely. Water serves two purposes during drilling: it cools the diamond bur and the stone, preventing heat damage, and it flushes away stone dust that would otherwise clog the cutting surface of the bur and reduce its effectiveness.
Never drill a gemstone dry. The heat generated by dry drilling can crack the stone instantly, and the diamond bur will wear out much faster without water cooling.
Step 3: Begin Drilling at Low Speed
Put on your safety glasses and dust mask. Start the rotary tool at a low to moderate speed. High speeds generate more heat and give you less control, especially when starting the hole. Bring the round bur down to the marked spot on the stone gently. Do not press the bur down with force. Let the diamond particles cut at their own pace while you guide the direction.
One common mistake is using a drill press arm to lower the bur onto the stone. This applies too much downward force, which accelerates bur wear and can crack the stone. Instead, hold the handpiece and control the pressure manually. You should feel the bur cutting steadily without vibration or resistance spikes.
Step 4: Switch to the Cylindrical Bur
After the round bur has created a dimple roughly half the depth you need, switch to a cylindrical bur with a slightly smaller diameter than the round bur's widest point. The cylindrical shape will extend the hole downward with straighter walls and a more consistent diameter. Continue drilling underwater with light, steady pressure.
Step 5: Drill Halfway to Two-Thirds Through
Continue drilling until you have penetrated approximately halfway to two-thirds through the stone's thickness. Depending on the hardness and thickness of the gemstone, this may take anywhere from two to five minutes. Do not drill all the way through from one side. Pushing the bur through the back of the stone creates a condition called "blowout," where a chunk of material breaks away from the exit side, leaving a rough, cratered edge instead of a clean hole.
Step 6: Flip and Drill from the Other Side
Turn the gemstone over and locate the mark you placed on the opposite side. Secure the stone again and begin drilling from this side using the same round-to-cylindrical bur progression. Because you marked both sides before starting, the two holes should be close to aligned. With practice, getting them to meet precisely becomes second nature.
Step 7: Complete the Through-Hole
Continue drilling from the second side until you feel the bur break through into the hole you drilled from the first side. You will feel a subtle change in resistance when the two holes connect. At this point, run the cylindrical bur through the complete hole a few times to smooth the interior walls and ensure a uniform diameter from end to end.
Gemstone Hardness and Drilling Difficulty
| Gemstone | Mohs Hardness | Drilling Difficulty | Notes |
|---|---|---|---|
| Amber | 2-2.5 | Easy | Very heat-sensitive, use low speed |
| Turquoise | 5-6 | Moderate | Can be porous, seal after drilling |
| Quartz / Amethyst | 7 | Moderate-Hard | Standard approach works well |
| Garnet | 6.5-7.5 | Hard | Prone to fracture along crystal planes |
| Sapphire / Ruby | 9 | Very Hard | Requires fresh, sharp diamond burs |
Safety Precautions
Gemstone drilling produces fine mineral dust that is hazardous to breathe. Even when drilling underwater, some particles become airborne when you lift the stone or the bur out of the water. Always wear a dust mask rated for fine particles and safety glasses rated for impact protection. Work in a well-ventilated area and clean up stone dust with a damp cloth rather than sweeping it dry.
For more safety guidelines when using rotary tools, see our guide on Dremel safety practices.
Troubleshooting Common Problems
- Stone cracks during drilling: Usually caused by too much pressure, dry drilling, or drilling through an existing fracture. Reduce pressure, ensure full water coverage, and inspect stones before starting.
- Hole is off-center: Typically the result of the bur skating across the surface before biting in. Start with a small round bur to create a stable dimple before switching to larger sizes.
- Bur wears out quickly: Check your water level and reduce speed. Excessive heat is the primary cause of premature diamond bur wear. For more on maintaining your tools, read our article on cleaning diamond burs.
- Exit side blowout: Always drill from both sides toward the center rather than pushing through from one side.
With the right diamond burs, proper technique, and adequate water cooling, drilling holes in gemstones is a straightforward process that any jeweler can master. Take your time, let the tools do the work, and practice on inexpensive stones before moving to valuable material. The results will speak for themselves as your holes become cleaner and more precisely placed with each attempt.