Proper sterilization of dental burs is a non-negotiable part of infection control. Burs contact blood, saliva, and hard tissue during every procedure, creating a direct transmission pathway for pathogens if reprocessing fails. This guide walks through each step of the reprocessing cycle, from chairside collection to sterile storage, with specific parameters you can implement immediately in your practice.
Why Dental Bur Sterilization Matters
Dental burs are classified as semi-critical instruments by the CDC because they contact mucous membranes and penetrate soft tissue. During routine procedures such as cavity preparation or crown reduction, burs are exposed to blood, saliva, dentin debris, and potentially infectious aerosols. Without proper reprocessing, these contaminants can transfer between patients, creating a risk of cross-infection with bloodborne pathogens including hepatitis B, hepatitis C, and HIV.
Beyond patient safety, regulatory bodies including OSHA and state dental boards require documented sterilization protocols. Failure to maintain proper records can result in practice citations, liability exposure, and loss of licensure. A consistent, well-documented sterilization workflow protects both patients and the practice.
Step 1: Chairside Collection and Transport
Begin the reprocessing chain the moment a bur leaves the handpiece. Delays allow organic debris to dry onto the cutting surface, making later cleaning significantly harder and increasing the chance that biofilm will survive the sterilization process.
- Remove the bur from the handpiece immediately after the procedure is complete.
- Place used burs into a designated puncture-resistant container — never loose on the instrument tray where they pose a sharps injury risk.
- If processing will be delayed more than a few minutes, place burs in an enzymatic pre-soak solution to prevent debris from drying and hardening on the cutting surfaces.
- Transport the container to the sterilization area with a closed lid to prevent environmental contamination.
Step 2: Pre-Cleaning
Sterilization cannot penetrate dried blood or calcified debris. Thorough cleaning before sterilization is the single most important step in the reprocessing chain. An instrument that enters the autoclave dirty will come out sterile on the surface but may still harbor viable microorganisms trapped beneath organic matter. Two cleaning methods are standard in dental practice.
Ultrasonic Cleaning (Preferred Method)
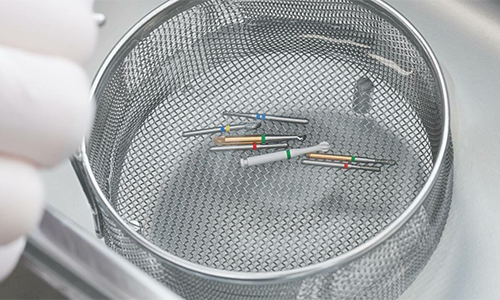
Ultrasonic cleaners use high-frequency sound waves (typically 35–45 kHz) to generate cavitation bubbles in a cleaning solution. These microscopic bubbles implode on contact with the bur surface, dislodging debris from flutes, diamond coatings, and hard-to-reach geometry that manual scrubbing often misses.
- Use an enzymatic or neutral-pH detergent designed for ultrasonic use. Avoid chlorine-based solutions, which corrode tungsten carbide and degrade the brazing on diamond burs.
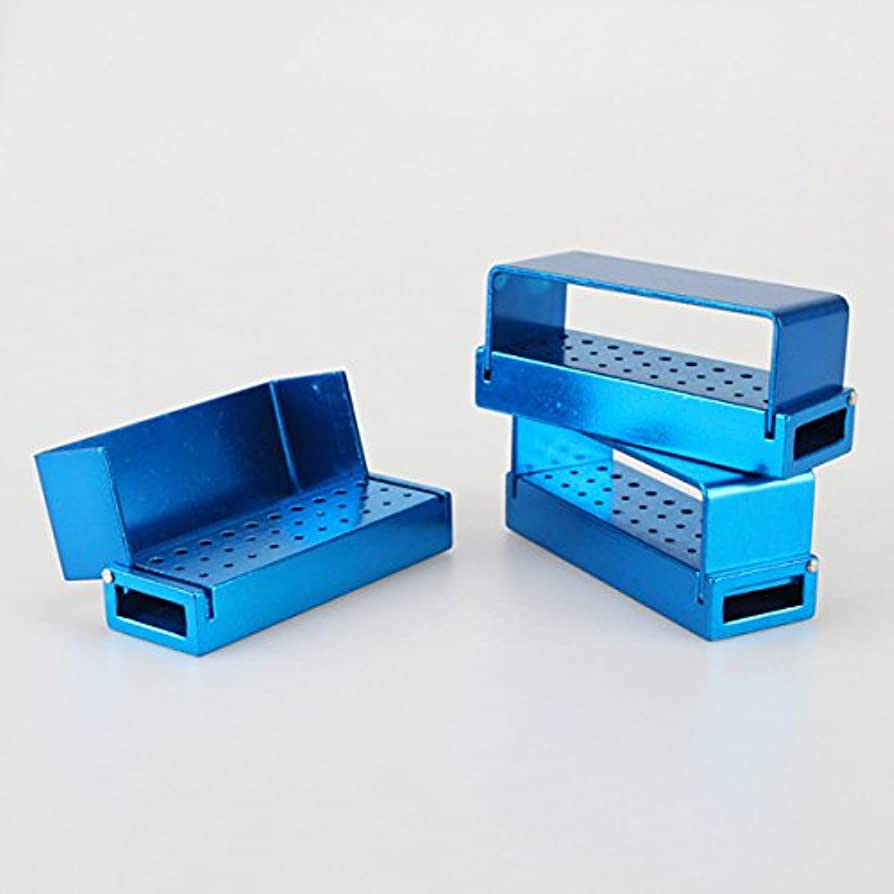
- Place burs in a mesh basket or dedicated bur holder — do not pile burs loosely on the tank floor, where cavitation energy is weakest.
- Run the cycle for 5–10 minutes, depending on the level of contamination. Heavily soiled burs from surgical procedures may need a second cycle.
- After the cycle, rinse all burs under running water for at least 30 seconds to remove detergent residue that could interfere with sterilization.
- Inspect each bur visually under magnification if available. If debris remains in the flutes or diamond coating, repeat the cycle or switch to manual scrubbing.
Manual Scrubbing (Backup Method)
Manual scrubbing is acceptable when an ultrasonic unit is unavailable, but it carries a higher risk of sharps injury and is generally less effective at reaching recessed areas. Always wear heavy-duty utility gloves (not thin examination gloves) and face protection when manually scrubbing contaminated instruments.
- Soak burs in enzymatic detergent for 3–5 minutes to loosen dried material.
- Scrub each bur individually with a stiff nylon brush under running water, holding the bur below the water line to minimize aerosol generation.
- Pay special attention to the working end — flutes on carbide burs and the diamond coating on diamond burs trap debris differently and require different scrubbing angles.
- Rinse thoroughly under running water and inspect before proceeding to the next step.
For more detail on cleaning diamond-coated instruments specifically, see how to clean diamond burs.
Ultrasonic Cleaning for Dental Burs: Step-by-Step
The pre-cleaning section above covers the basics of ultrasonic use. This section provides a deeper protocol for operators who want to maximize cleaning efficacy and extend the working life of their burs.
How Ultrasonic Cleaners Work
Ultrasonic cleaning relies on acoustic cavitation. A transducer bonded to the tank converts electrical energy into high-frequency sound waves, typically operating between 35 and 45 kHz. These waves create alternating high-pressure and low-pressure cycles in the cleaning solution. During the low-pressure phase, microscopic vacuum bubbles form. During the high-pressure phase, those bubbles collapse violently against instrument surfaces, producing localized jet streams that blast debris from flutes, diamond grit, and crevices no brush can reach. The process is mechanical, not chemical — the solution assists, but cavitation does the heavy lifting.
Protocol: Solution Preparation Through Final Inspection
- Prepare the solution. Fill the tank to the manufacturer’s indicated level with fresh enzymatic detergent diluted per label instructions. Run the unit empty (degas) for 3–5 minutes to remove dissolved air that dampens cavitation performance.
- Load instruments. Place burs in a mesh cassette or perforated basket, spaced so they do not touch each other. Overlapping burs create “shadow zones” where cavitation cannot reach. Submerge the basket fully — instruments above the solution line receive no cleaning.
- Set cycle time. Standard contamination: 5 minutes. Heavy surgical debris or dried biofilm: 10 minutes. Longer cycles do not compensate for an overloaded basket.
- Rinse immediately. Remove the basket and rinse all burs under running tap water for a minimum of 30 seconds. Residual detergent left on bur surfaces can interfere with autoclave steam penetration and may cause discoloration.
- Inspect under magnification. Use a 2–3× loupe or magnifying lamp to check flutes and diamond surfaces. If debris persists, repeat the cycle with fresh solution before proceeding to packaging.
Best Practices for Consistent Results
- Solution temperature: Maintain the bath between 40–60 °C. Below 40 °C, enzymatic activity drops sharply. Above 60 °C, proteins in blood coagulate and bond more tightly to metal surfaces.
- Solution change frequency: Replace the cleaning solution at minimum once daily, or sooner if the liquid becomes visibly cloudy or discolored. Saturated solution loses both cavitation efficiency and enzymatic activity.
- Basket positioning: Center the basket in the tank, suspended from the rim rather than resting on the bottom. Direct contact with the tank floor dampens cavitation energy and may damage the transducer over time.
Common Ultrasonic Cleaning Mistakes
- Overloading the basket. Packing too many instruments into a single cycle reduces cleaning quality across the entire load. Run two half-full cycles rather than one overfilled cycle.
- Using the wrong solution. Household detergents, bleach, or chlorhexidine are not formulated for ultrasonic use. They produce excessive foam that blocks cavitation, and chlorine-based agents corrode carbide and damage diamond brazing.
- Skipping the rinse. Detergent residue left on instruments can produce staining during autoclaving and may leave a chemical film that compromises the sterile barrier in pouches.
- Ignoring the degas step. A freshly filled tank contains dissolved air. Without degassing, cavitation intensity drops by as much as 30%, leaving instruments inadequately cleaned.
Step 3: Drying and Inspection
After cleaning, dry burs thoroughly with disposable paper towels or compressed air. Moisture left on instruments before packaging serves two purposes, neither of them good: it can compromise the sterilization pouch seal integrity, and it promotes corrosion in non-stainless components, particularly on carbide bur flutes and shank junctions.
During drying, inspect every bur carefully for the following issues:
- Residual debris — Return to the cleaning step if any contamination is visible. Do not proceed to packaging.
- Diamond coating loss — Bald spots or areas where diamond particles have detached reduce cutting efficiency and create an uneven surface that is harder to sterilize effectively. Discard these burs.
- Bent or damaged shanks — A bent shank causes eccentric rotation at high speed, risking bur fracture in the handpiece and potential injury to the patient. Discard immediately.
- Corroded or chipped flutes — Carbide burs with visible rust, pitting, or chipped blade edges should be discarded. They will not cut cleanly and may leave metal fragments in the preparation.
Step 4: Packaging
Place cleaned and inspected burs into sterilization pouches or cassettes before loading them into the autoclave. Proper packaging ensures the sterile barrier is maintained from the moment the autoclave cycle ends until the bur is needed for a procedure. Without packaging, a sterilized bur becomes contaminated the moment it is exposed to the ambient environment.
- Use pouches with integrated chemical indicators (both internal and external) so you can verify process exposure at a glance.
- Do not overfill pouches. Burs should lie flat without overlapping, allowing steam to contact all surfaces evenly.
- Seal pouches completely using a heat sealer or self-seal adhesive strip. A partial seal allows microbial re-entry after sterilization, negating the entire process.
- Label each pouch with the sterilization date, the load number, and optionally the autoclave unit identifier if your practice runs multiple units.
Dental Bur Sterilization Methods Compared
Choosing the right sterilization method depends on your instrument inventory, throughput needs, and the materials you are processing. Here is how the three approved methods stack up across every factor that matters in daily practice.
| Factor | Steam Autoclave | Chemical Vapor | Dry Heat |
|---|---|---|---|
| Temperature | 132°C (270°F) | 132°C (270°F) | 170°C (340°F) |
| Cycle Time | 15–30 min | 20–40 min | 60 min |
| Corrosion Risk | Moderate (moisture) | Low | Low–moderate |
| Best for Diamond Burs | Yes ✓ | Yes ✓ | Caution above 170°C |
| Best for Carbide Burs | Yes ✓ (dry fully after) | Yes ✓ (ideal) | Yes ✓ |
| Pouch Compatible | Yes | Yes | Limited |
| Equipment Cost | $$ | $$$ | $ |
| Running Cost | Low (distilled water) | Moderate (proprietary solution) | Low (electricity only) |
| Ventilation Needed | No | Yes (chemical fumes) | No |
Most dental practices use steam autoclaving as the primary method because it is the fastest, least expensive to operate, and works with standard sterilization pouches. Chemical vapor is a strong second choice if corrosion is a recurring problem with your carbide burs — the low-moisture process is gentler on metal surfaces. Dry heat works but the 60-minute cycle and limited pouch compatibility make it impractical for high-volume clinics.
Understanding your bur's specifications helps you choose the right method. If you are not sure about your bur's material composition or heat tolerance, decode the ISO number on the bur shank — it tells you the exact material, coating, and shank type.
Step 5: Sterilization
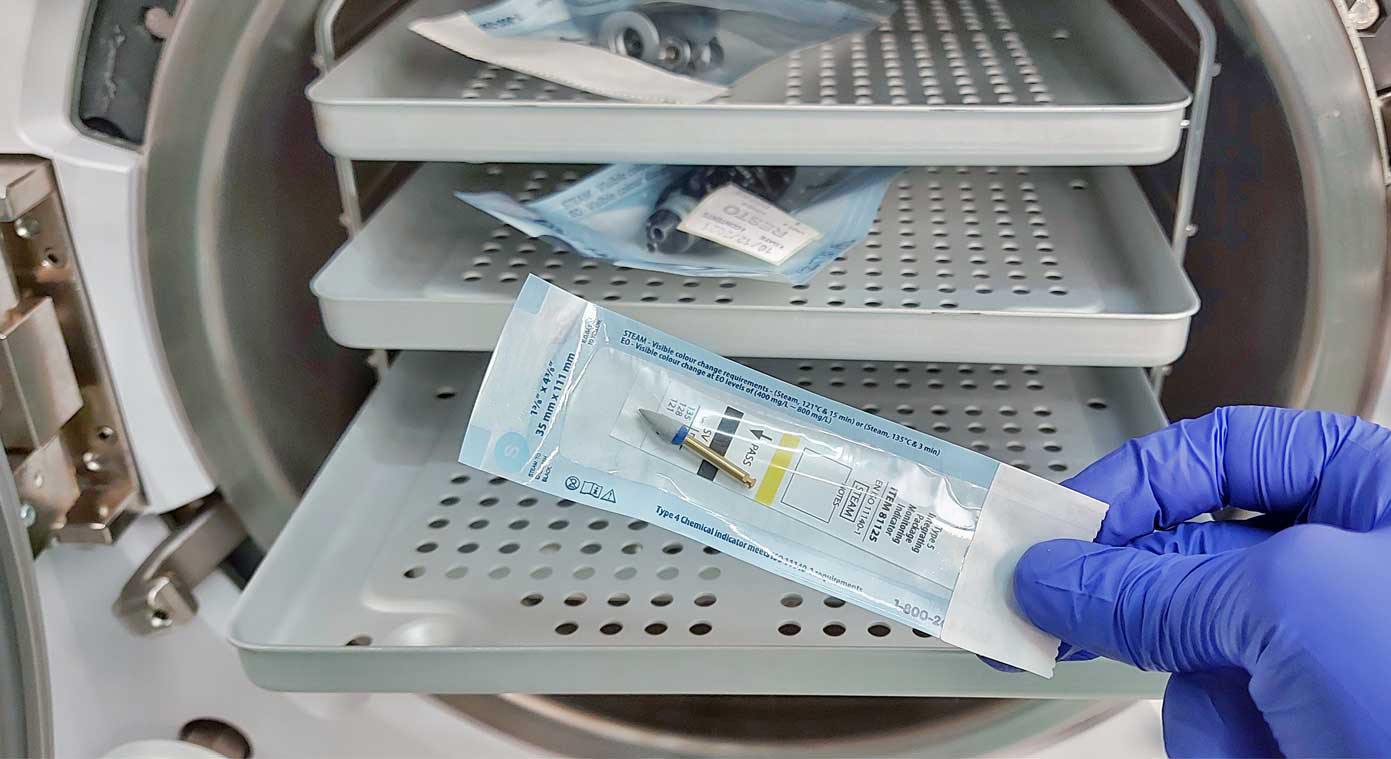
Three sterilization methods are approved for dental burs. The table below compares their key parameters, advantages, and limitations.
| Method | Temperature | Time | Notes |
|---|---|---|---|
| Steam autoclave | 132 °C (270 °F) | 15–30 min | Most common and reliable. Preferred for all bur types. Compatible with standard pouches. |
| Dry heat | 170 °C (340 °F) | 60 min | Longer cycle time. Can cause oxidation and corrosion with repeated use on some alloys. |
| Chemical vapor | 132 °C (270 °F) | 20–40 min | Lower corrosion risk than steam. Requires proprietary chemical solution and adequate ventilation. |
Cleaning vs Sterilization: Understanding the Difference
Cleaning and sterilization serve distinct roles in the reprocessing chain. Cleaning removes visible debris, biofilm, and organic matter. Sterilization destroys all viable microorganisms, including bacterial spores. One cannot replace the other — both are required in sequence. The table below clarifies each method’s purpose.
| Method | Purpose | Kills Spores? | Best For |
|---|---|---|---|
| Ultrasonic cleaning | Remove debris/biofilm | No | Pre-sterilization cleaning |
| Steam autoclave | Sterilize | Yes | All bur types, standard practice |
| Chemical vapor | Sterilize | Yes | Corrosion-sensitive instruments |
| Dry heat | Sterilize | Yes | Unpackaged instruments, backup |
Steam autoclaving is the recommended method for most dental practices. It offers the shortest cycle time, reliable spore kill, and compatibility with standard sterilization pouches and cassettes. The CDC guideline specifies a minimum of 132 °C (270 °F) for wrapped instruments in a gravity displacement autoclave.
Autoclave Best Practices
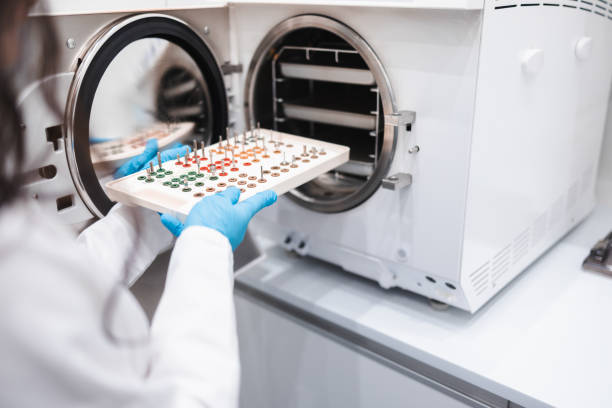
- Do not overload the chamber. Pouches need adequate space between them for steam to circulate freely and contact all instrument surfaces.
- Place pouches on their edge with the paper side facing up so steam can penetrate through the porous material and contact the instruments inside.
- Run biological indicator (spore test) monitoring at least weekly, or more frequently according to your local regulatory requirements. Document every test result.
- Allow the drying cycle to complete fully before removing pouches from the chamber. Wet pouches have compromised barrier integrity and are not considered sterile.
- If a biological indicator test returns a positive result (spore growth detected), immediately recall and re-sterilize all instruments processed since the last negative test.
Step 6: Storage and Handling
Sterile burs must remain in their sealed pouches until the moment of use. Once a pouch is opened, the bur should be used during that appointment or returned to the reprocessing cycle for re-sterilization. There is no safe way to re-seal a sterilization pouch.
- Store sealed pouches in a clean, dry, enclosed cabinet — not in open drawers or countertop holders exposed to dust and ambient contamination.
- Check the chemical indicator on each pouch before opening. If the external indicator has not changed color appropriately, the contents should not be considered sterile regardless of the processing date.
- Handle sterile burs with clean, gloved hands or sterile transfer forceps. Never touch the working end of a sterilized bur with bare fingers.
- Record each autoclave cycle in a sterilization log documenting the date, cycle parameters, load contents, and biological indicator results. Retain these records for the period required by your jurisdiction, typically a minimum of three years.
Common Sterilization Mistakes
Even experienced dental teams make reprocessing errors that compromise the sterile chain. Watch for these frequent issues and address them through staff training and protocol audits.
- Skipping pre-cleaning. An autoclave cannot sterilize through a layer of dried blood or tissue. Cleaning is not optional — it is the foundation that makes sterilization effective.
- Reusing sterilization pouches. Pouches are single-use devices. Resealing a used pouch does not restore the sterile barrier, as the paper material loses its filtering properties after one autoclave cycle.
- Ignoring chemical indicators. Indicators exist specifically to catch autoclave malfunctions such as insufficient temperature or steam penetration. Dismissing a failed indicator puts patients directly at risk.
- Storing burs loose in drawers. Unpackaged burs are not sterile regardless of whether they went through an autoclave cycle. The sterile barrier provided by the pouch is what maintains sterility after processing.
- Using damaged burs. Sterilization does not restore a bur with corroded flutes or a degraded diamond coating. Damaged burs should be discarded, not re-sterilized and returned to clinical use.
How Often Should Dental Burs Be Replaced?
Sterilization extends a bur's safe clinical life, but it does not restore cutting performance. Diamond burs lose abrasive particles with each use and should be replaced after approximately five preparations. Using a worn diamond bur forces the clinician to apply more pressure, generating excess heat and risking thermal damage to the pulp. Carbide burs last longer but should be retired when flutes show visible wear, chipping, or reduced cutting efficiency. For a broader overview of bur types and their expected lifespan, see our dental burs guide.
Frequently Asked Questions
How long should dental burs be in an ultrasonic cleaner?
Run dental burs in the ultrasonic cleaner for 5–10 minutes using a fresh enzymatic detergent solution. Standard contamination from restorative procedures typically requires 5 minutes. Burs used in surgical extractions, endodontic access, or other procedures involving heavy blood and tissue exposure benefit from a full 10-minute cycle. If debris remains after the first cycle, replace the solution and run a second cycle rather than extending a single cycle beyond 10 minutes.
Can you autoclave diamond burs?
Yes. Steam autoclaving at 132 °C (270 °F) is safe and recommended for both diamond burs and tungsten carbide burs. The diamond grit is bonded to the shank through electroplating or sintering, both of which withstand standard autoclave temperatures without degradation. Avoid dry heat above 170 °C for extended periods, as excessive temperature can weaken the brazing alloy on some economy-grade diamond burs.
How often should ultrasonic cleaning solution be changed?
Change the ultrasonic cleaning solution at least once daily, at the start of the first sterilization run. If the solution becomes visibly cloudy, discolored, or produces excessive foam before the end of the day, replace it immediately. Contaminated solution reduces cavitation efficiency and redeposits debris onto instruments rather than removing it. Always degas fresh solution for 3–5 minutes before loading the first batch of instruments.
Summary
Effective dental bur sterilization follows a strict six-step sequence: chairside collection, pre-cleaning (preferably ultrasonic), drying and inspection, packaging in indicator-equipped pouches, steam autoclaving at validated parameters, and proper sealed storage until use. Skipping or shortcutting any step compromises the entire sterile chain. Build these steps into your daily workflow as a fixed protocol with documented verification at each stage, and your infection control will remain reliable across every procedure and every patient.
Looking for quality dental burs that hold up to repeated sterilization cycles? Browse our full dental bur catalog to find diamond, carbide, and specialty burs built for clinical durability.
Can Dental Burs Be Sterilized?
Yes. Most reusable dental burs can be sterilized when they are first cleaned thoroughly, then processed with the correct sterilization protocol and cycle parameters.
Step-by-Step Autoclave Workflow
Step 1: Remove debris immediately after use and rinse.
Step 2: Perform ultrasonic cleaning and dry completely.
Step 3: Package burs in sterilization pouches with indicators.
Step 4: Run validated autoclave cycle per manufacturer IFU.
Step 5: Store in clean, dry, closed environment.
Related product categories: Tungsten Carbide Burs and Diamond Dental Burs.
FAQ: Sterilizing Dental Burs
How many times can you sterilize a dental bur? It depends on bur type, wear status, and manufacturer guidance. Replace burs when cutting efficiency drops, coating is damaged, or runout appears.
Autoclave vs chemical sterilization? Autoclave is generally preferred for reliable, validated sterilization in clinical settings.
CDC and ADA Sterilization Checklist
Step 1: Clean burs thoroughly first. Debris and bioburden must be removed before sterilization.
Step 2: Inspect and package burs in a pouch, cassette, or other validated system before the sterilization cycle.
Step 3: Use a heat sterilization cycle that matches the bur manufacturer instructions for use and the sterilizer instructions.
Step 4: Monitor every cycle and include biological indicator testing at least weekly, with records kept for traceability.
Step 5: After processing, keep burs dry, protected, and packaged until they are needed for patient care.
These steps align with core CDC infection-control expectations and ADA chairside sterilization guidance: clean first, heat sterilize heat-stable burs, monitor the process, and maintain package integrity until use.