Zirconia has become the dominant material for posterior crowns, bridges, and implant-supported restorations. Its flexural strength exceeds 1000 MPa for 3Y-TZP formulations, making it far harder than lithium disilicate or feldspathic porcelain. That hardness is an advantage in the mouth but a real challenge at the chair. Standard diamond burs that cut through e.max in seconds will glaze over and stall against zirconia if you pick the wrong type. Worse, aggressive technique generates localized heat that triggers the tetragonal-to-monoclinic phase transformation, introducing microcracks that compromise long-term survival.
This guide covers bur selection, technique, and finishing protocols specifically for zirconia adjustment and contouring.
Why Zirconia Demands Different Instrumentation
Zirconia sits at roughly 8.5 on the Mohs hardness scale, compared to 6-7 for most glass ceramics. That difference matters because diamond particles in a standard electroplated bur are bonded at a density and exposure height optimized for softer substrates. Against zirconia, those particles dull rapidly, forcing the clinician to increase pressure, which generates heat and vibration rather than efficient cutting.
Three factors make zirconia adjustment distinct from other ceramic work:
Heat sensitivity: Sustained temperatures above 200°C at the surface can initiate low-temperature degradation (LTD). The phase change creates volume expansion of roughly 4%, producing subsurface microcracks that propagate under cyclic loading.
Hardness mismatch: Only diamond is harder than zirconia. Carbide burs are essentially useless for bulk removal on fully sintered zirconia. Even coarse carbide flutes chip and deform after a few seconds of contact.
Surface integrity requirements: Rough grinding leaves deep scratches that act as stress concentrators. Unlike glass ceramics, zirconia cannot be etched and glazed to mask surface defects. Scratches left by coarse adjustment persist unless systematically polished out.
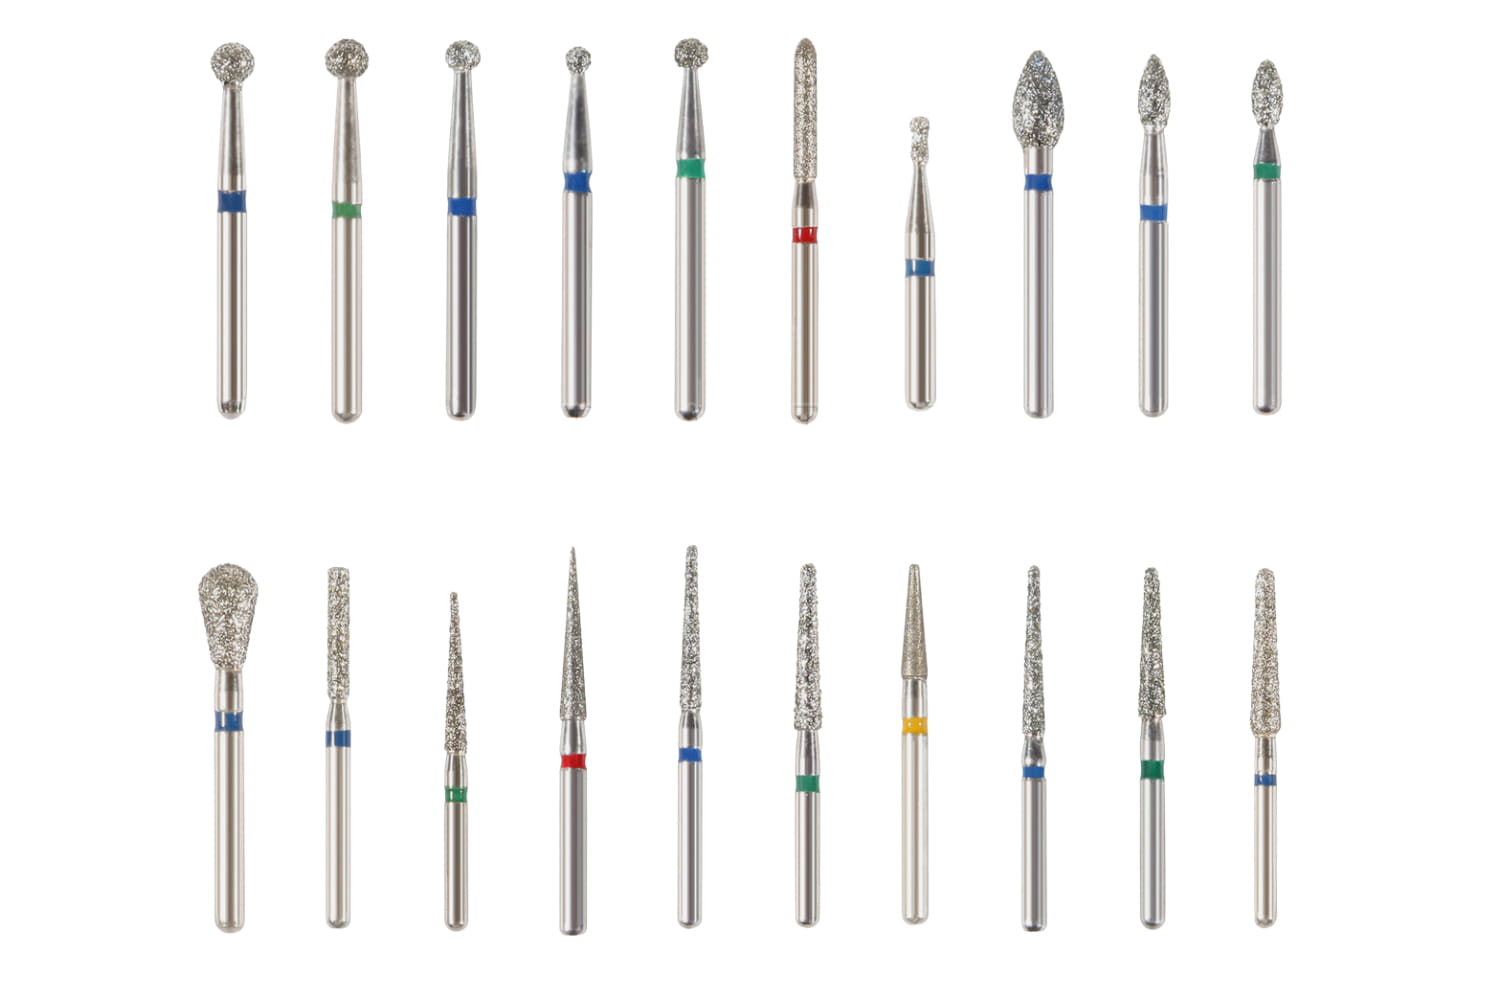
Grit Selection: Coarse, Medium, and Fine
Diamond grit is classified by particle size. For zirconia work, each grit range has a specific role in the workflow.
Grit | Particle Size | Band Color | Use on Zirconia |
|---|---|---|---|
Super Coarse | 150-180 μm | Black | Bulk reduction only. High heat generation. Use sparingly with heavy irrigation. |
Coarse | 125-150 μm | Green | Primary adjustment of occlusion and proximal contacts. Best balance of cutting rate and surface quality. |
Medium | 100-120 μm | Blue/None | Refinement after coarse adjustment. Reduces scratch depth before polishing. |
Fine | 40-50 μm | Red | Pre-polishing step. Produces surface suitable for rubber wheel or paste finishing. |
Superfine | 15-25 μm | Yellow | Final smoothing. Approaches polished surface finish directly. |
For routine chairside occlusal adjustment, start with coarse grit for initial contact removal, then step down to medium. If the restoration will remain unglazed (common for monolithic zirconia), continue through fine and superfine before moving to polishing instruments. Skipping grits leaves deep scratches that rubber polishers cannot fully eliminate.
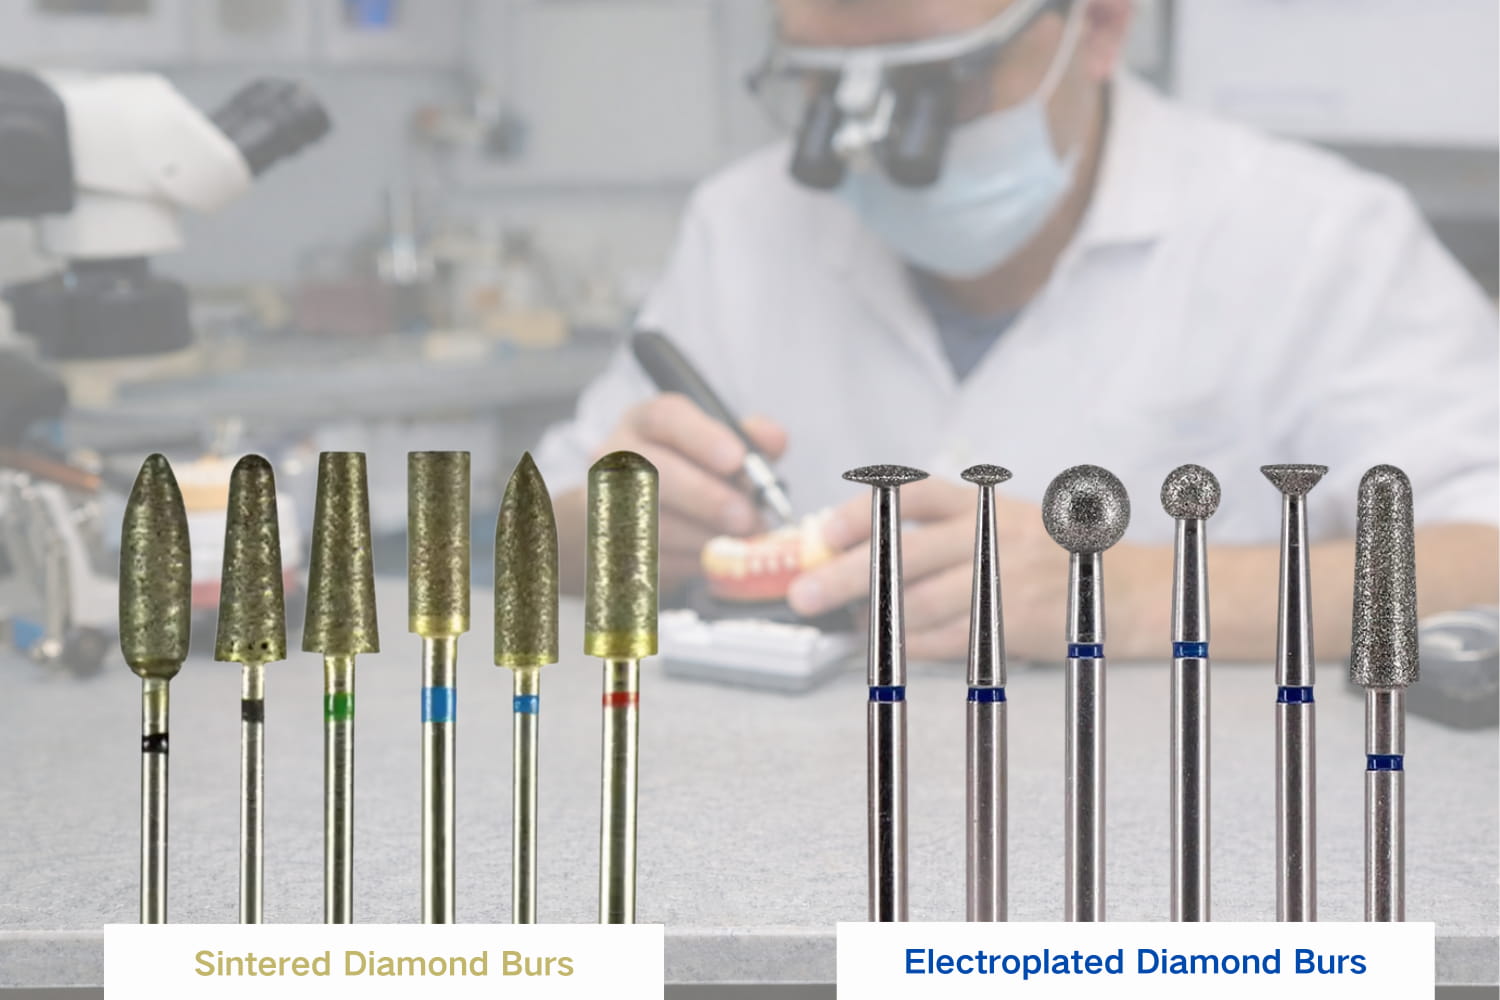
Sintered vs Electroplated Diamond Burs
This distinction matters more for zirconia than for any other restorative material.
Electroplated (Single-Layer) Diamond Burs
Standard zirconia diamond burs use a single layer of diamond particles bonded to a metal shank with nickel plating. They cut aggressively when new because diamond particles are fully exposed. The problem: against zirconia, that single layer wears fast. A fresh electroplated bur may give you 3-5 good adjustments on zirconia before cutting efficiency drops noticeably. Once the diamond layer is gone, you are grinding metal against ceramic, generating heat with no material removal.
Electroplated burs remain the right choice for quick chairside adjustments where you need to remove a small high spot. Their initial cutting efficiency is excellent and the cost per bur is low. Just discard them promptly once they stop cutting freely.
Sintered (Multi-Layer) Diamond Burs
Fully sintered diamond burs embed diamond particles throughout the cutting head, not just on the surface. As the outer layer wears, fresh diamond is exposed beneath. This self-renewing property makes sintered burs dramatically more durable against hard substrates like zirconia.
Sintered burs cut slightly slower than a fresh electroplated bur, but they maintain consistent cutting performance over dozens of uses. They are the better choice for lab-side contouring, significant chairside reshaping, or any situation where you need to remove more than a superficial amount of zirconia. The higher per-unit cost is offset by longevity.
One caveat: sintered burs tend to run at lower RPM (typically HP shank, 20,000-35,000 RPM in a straight handpiece) compared to FG-shank electroplated burs in a high-speed handpiece. Plan your workflow accordingly.
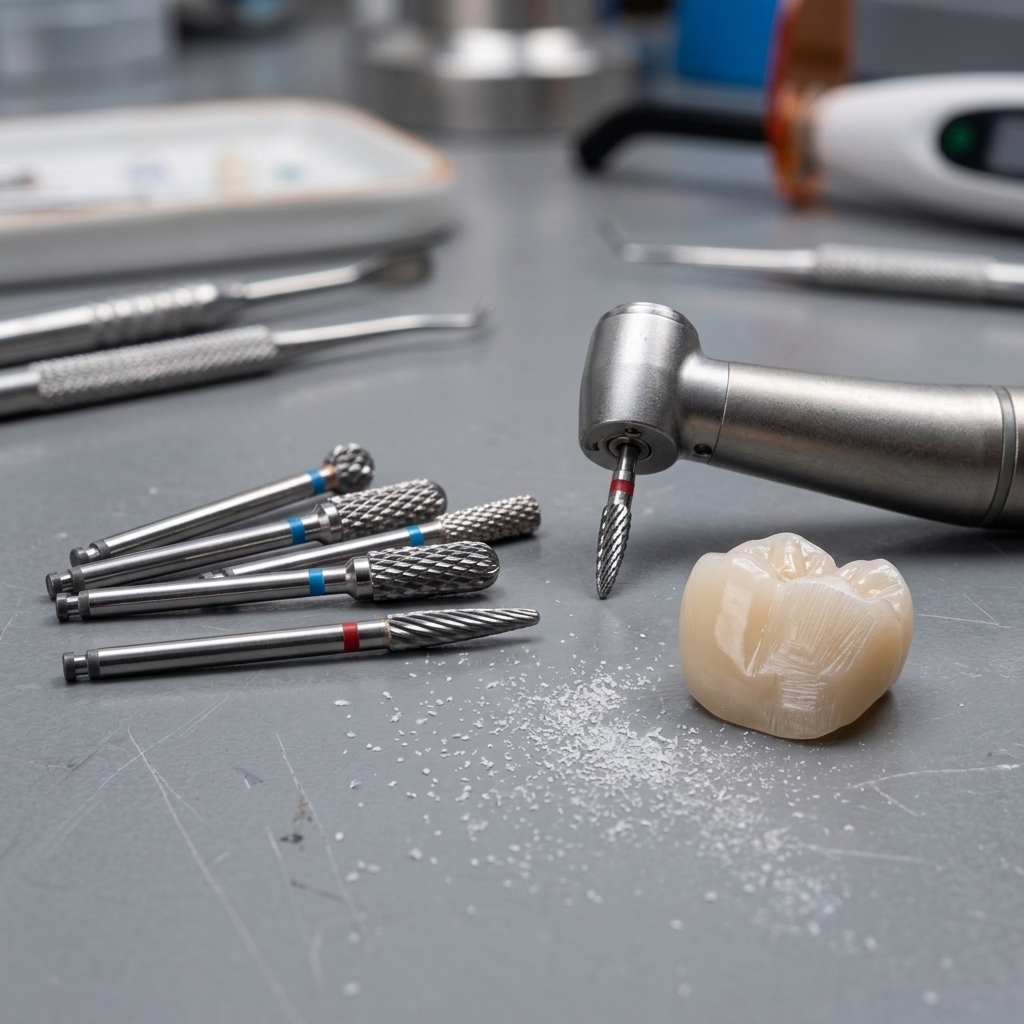
Bur Shape Selection for Zirconia Crown Adjustment
Shape selection follows the same anatomic logic as other ceramic work, with one key difference: you want the largest contact area that the anatomy allows. Larger contact area distributes cutting forces and reduces point-loading that causes localized overheating.
Football (Egg Shape / 379 Series)
The football shape is the workhorse for occlusal adjustment. Its rounded profile matches fossa and cusp tip anatomy. Use it for reducing centric holds, smoothing marginal ridges, and blending occlusal contours. The broad contact surface generates less heat per unit area than pointed shapes.
Flame (862 Series)
Flame shapes access interproximal areas, lingual surfaces of anterior crowns, and tight embrasure spaces. The tapered tip allows precise adjustment in confined areas. Because the tip concentrates force on a small area, use light intermittent strokes and adequate water spray to manage heat.
Tapered Barrel (847 Series)
Tapered barrels work well for axial wall reduction, adjusting emergence profile, and modifying subgingival contours before cementation. The flat cutting surface provides predictable material removal with minimal rocking.
Wheel (016 Disc Shape)
A thin diamond wheel handles contact opening and connector adjustments. Use caution: the thin edge concentrates force into a narrow line, producing peak temperatures at the cut. Keep the bur moving and the water flowing.
Speed and Pressure: Avoiding Microcracks
The two variables you control at the handpiece are RPM and applied force. Both directly influence heat generation and surface damage.
Speed recommendations:
High-speed handpiece (FG burs): 300,000-400,000 RPM with light touch. The high speed allows the diamond to do the work without heavy pressure. Avoid stalling the bur against the surface.
Straight handpiece (HP sintered burs): 20,000-35,000 RPM. Lower speed is compensated by the bur's aggressive diamond matrix. Let the bur find its own cutting rate.
Slow-speed handpiece for polishing: 8,000-15,000 RPM with polishing rubbers or paste.
Pressure guidelines:
Apply no more than 1-2 N of force. That is roughly the weight of a small apple resting on the surface. If you are pressing hard enough to flex the handpiece head, you are pressing too hard.
Use short, sweeping strokes of 1-2 seconds. Lift, reposition, repeat. Continuous contact in one spot is the fastest route to thermal damage.
If the bur chatters or bounces, it is dull. Replace it. Forcing a dull bur generates friction heat without efficient cutting.
Wet vs Dry Cutting
The short answer: always use water when adjusting zirconia with diamond burs. The longer answer involves some nuance.
Water spray cools the interface, flushes debris from the cutting zone, and reduces diamond clogging. Thermocouple measurements show dry grinding with a coarse diamond bur pushes surface temperatures past 400°C within 5 seconds of continuous contact. With water spray at 30-50 mL/min, peak temperature stays below 100°C under identical load.
Some clinicians prefer dry adjustment for visibility, especially when checking occlusal contacts with articulating paper. If you must cut dry, limit contact to sub-second touches with the bur, lifting completely between each pass. Use fine or medium grit rather than coarse for dry work. And consider switching to diamond stones mounted in a slow-speed handpiece for controlled dry adjustment, as the lower RPM generates substantially less heat.
For a comparison of how different abrasive instruments handle various ceramic materials, see this overview of green stones for ceramics and precious metal.
Dedicated Zirconia Burs vs Standard Diamond Burs
Several manufacturers now market burs labeled specifically for zirconia. What actually differs?
Dedicated zirconia diamond burs typically feature one or more of these modifications:
Higher diamond concentration: More particles per square millimeter maintains cutting efficiency against the hard substrate.
Coarser base grit: Standard "coarse" may be 125 μm; zirconia-specific coarse may start at 150 μm with more aggressive particle exposure.
Stronger bonding matrix: Enhanced nickel or resin bonding resists particle pullout during high-load cutting.
Optimized shank taper: Some designs use a stiffer neck to reduce vibration transmission.
Are they necessary? For minor occlusal spot grinding (removing a single premature contact), a fresh standard coarse diamond bur works fine. You will burn through it faster than on porcelain, but the clinical result is acceptable. For anything beyond spot adjustment, purpose-built zirconia burs pay for themselves in time savings and reduced risk of thermal damage. The difference is most pronounced during lab-side contouring of bridge frameworks.
Understanding how diamond burs compare to carbide burs can also help clarify why diamond is the only practical option for zirconia work.
Polishing Sequence After Zirconia Adjustment
Any chairside adjustment disrupts the polished or glazed surface of a zirconia restoration. Leaving that disrupted surface unfinished increases wear on opposing enamel and creates plaque-retentive roughness. A proper polishing sequence restores surface smoothness to clinically acceptable levels.
A typical three-step chairside protocol:
Step 1 - Coarse polisher (pink or brown rubber wheel/point): 8,000-12,000 RPM, dry or with light water mist. This removes the deepest scratches from diamond bur adjustment. Spend 15-20 seconds per surface.
Step 2 - Medium polisher (green or blue rubber wheel/point): 8,000-12,000 RPM, dry. Refines the surface left by step 1. The surface should start showing some reflectivity at this stage.
Step 3 - Fine polisher (white or light gray wheel) or diamond polishing paste: 5,000-8,000 RPM for wheels, or goat-hair brush with 1-3 μm diamond paste. This produces a surface with Ra values below 0.2 μm, which research shows generates enamel wear comparable to glazed zirconia.
For detailed guidance on polishing instrument selection across different materials, refer to this breakdown of dental polisher types.
Skip the polishing sequence and you leave your patient with a restoration that acts like 1000-grit sandpaper against their opposing tooth. The 3-4 minutes spent polishing chairside prevents measurable enamel wear over the life of the restoration.
Clinical Checklist: Zirconia Adjustment Protocol
Mark contacts with articulating paper (200 μm film for initial check, 40 μm for refinement).
Select coarse diamond bur (football for occlusal, flame for interproximal).
Adjust with water spray, light pressure, intermittent 1-2 second strokes.
Re-check contacts. Repeat as needed.
Step down to medium grit diamond for surface refinement.
Follow three-step polishing protocol: coarse rubber, medium rubber, fine rubber or diamond paste.
Verify surface smoothness with explorer. A properly polished surface should feel glass-smooth with no catches.
Discard any diamond bur that required excessive pressure. A dull bur used on the next patient risks thermal damage.
Zirconia rewards methodical technique. Match your bur to the task, respect the material's thermal sensitivity, and always finish what you grind. The difference between a well-adjusted zirconia crown and one that causes opposing wear comes down to the last few minutes of polishing that too many clinicians skip.