![How to Use a Die Grinder: Bit Guide, Setup & Pro Tips [2026]](https://www.burdental.com/image/catalog/Blog/20220606/Equipment-DieGrinder-Norton-Kit-lines-width-1500px-gigapixel-studio-studio.jpg)
What is a die grinder used for? A die grinder is used for precision cutting, deburring, shaping, and polishing on metal, acrylic, composite, and other hard materials by matching the right bit to the job and RPM.
Die Grinder Bits: Which Type for Which Job?
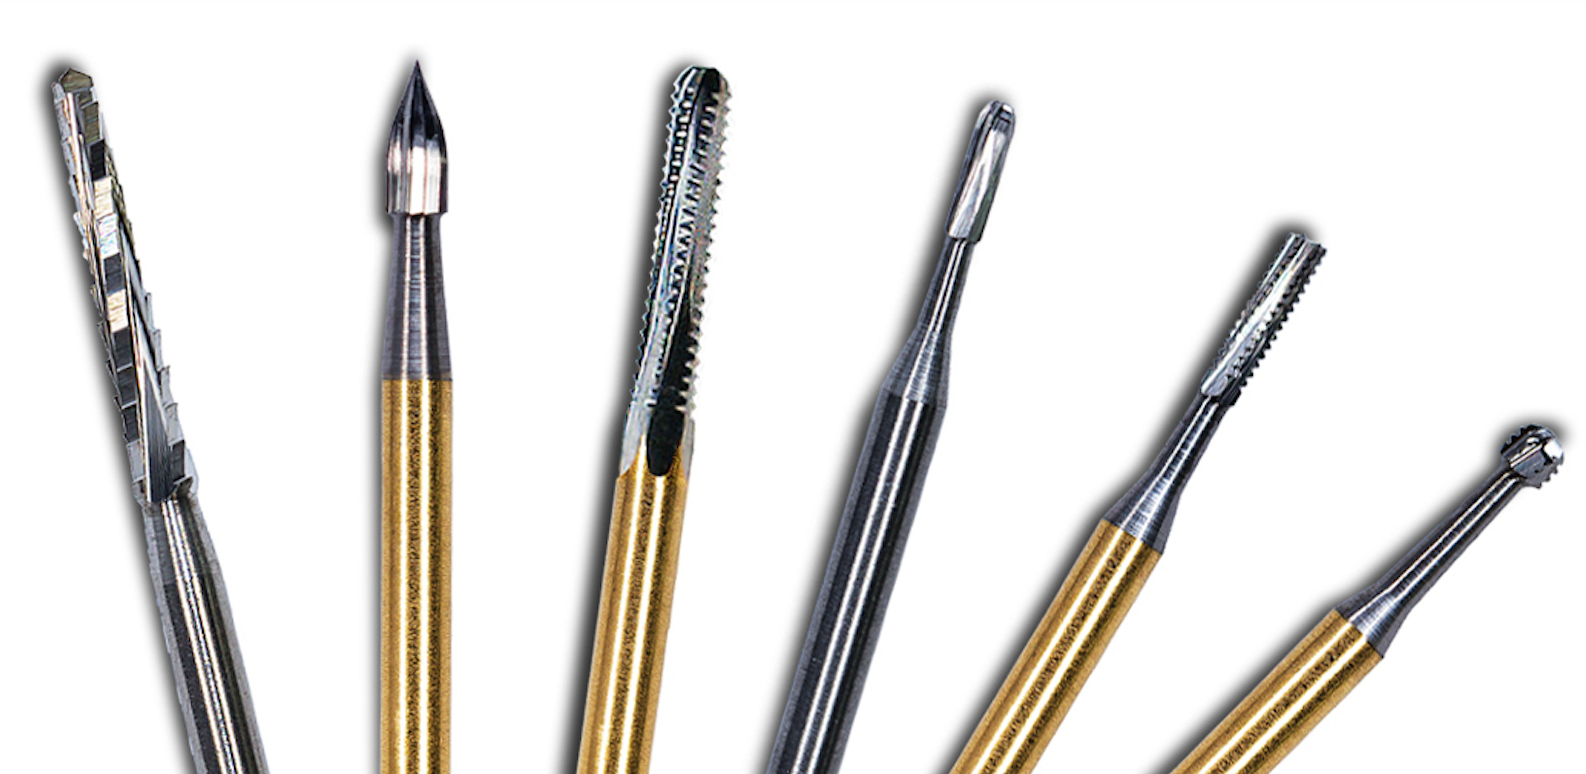
Carbide burs: Fast stock removal on steel and hard alloys.
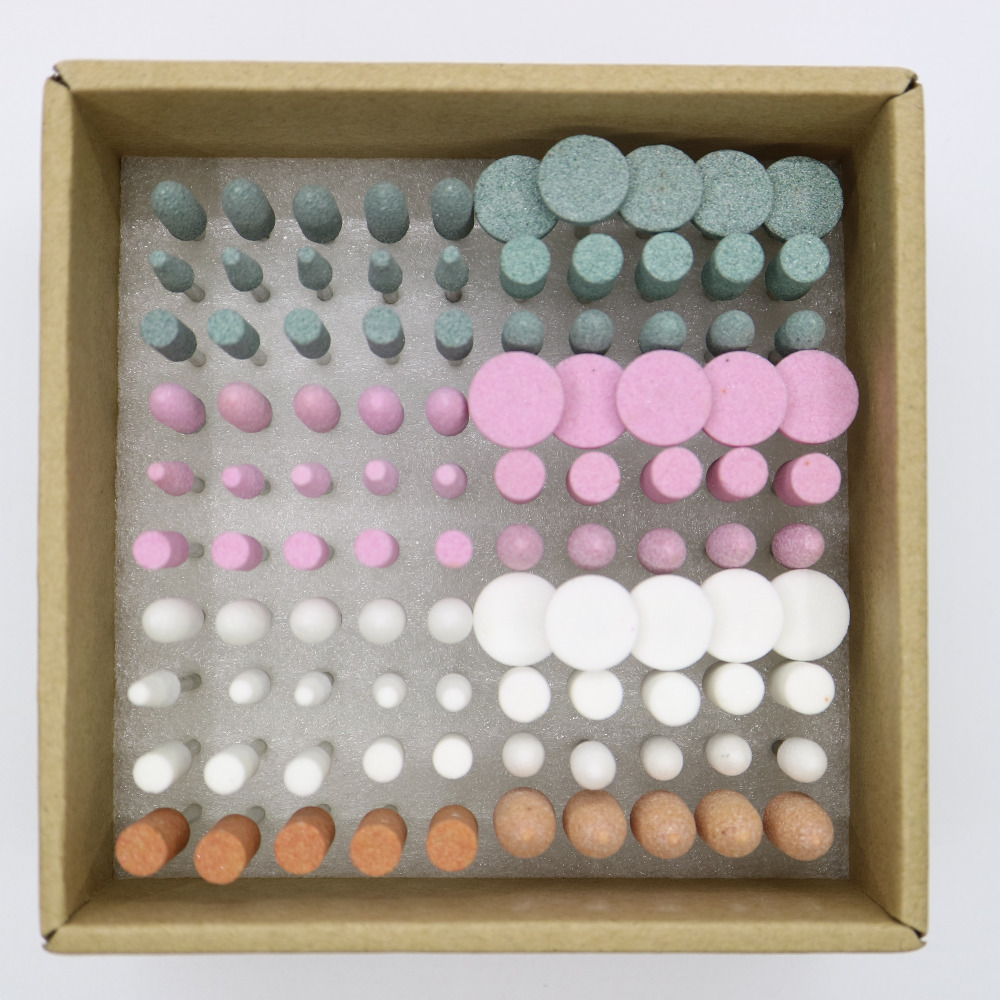
Mounted stones: Surface smoothing and edge refinement.
Flap wheels: Blending, finishing, and light polishing.
Recommended product lines: Tungsten Carbide Cutters (HP) and Dental Lab Burs.
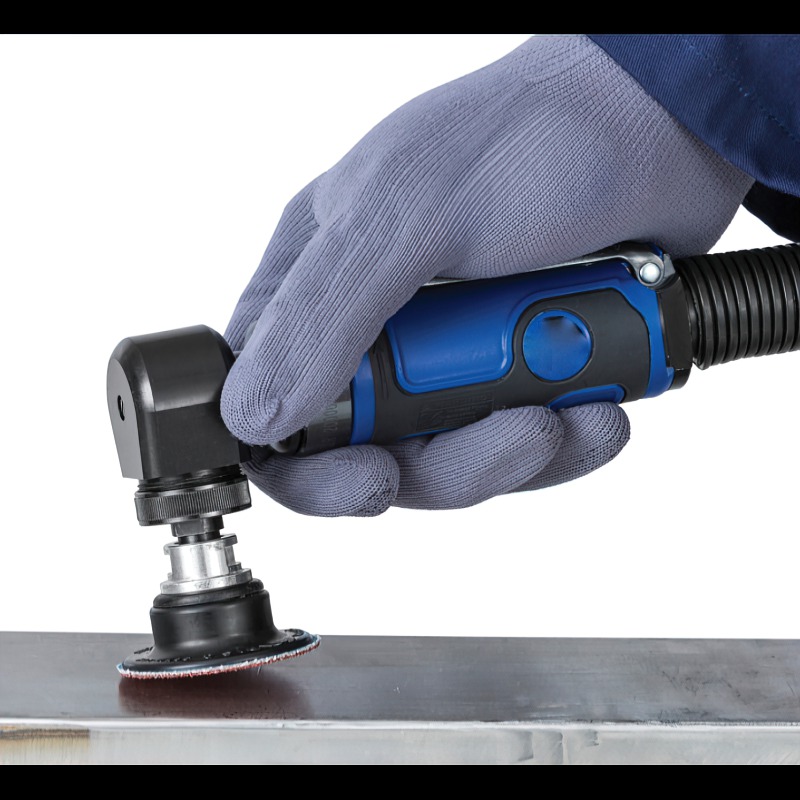
A die grinder is one of those tools that earns its keep fast. Compact enough to hold in one hand, powerful enough to chew through hardened steel, it fills the gap between a full-size angle grinder and a precision rotary tool. But the grinder itself is only half the equation. The bit you mount in the collet determines what the tool can actually do—and how well it does it. Pick the wrong attachment and you waste time, burn through consumables, or leave a finish that needs rework. This guide walks through the fundamentals: what a die grinder is, which bits match which jobs, how to set up and run the tool safely, and why tungsten carbide burs have become the go-to choice for serious metalwork and dental lab applications alike.
What Is a Die Grinder?
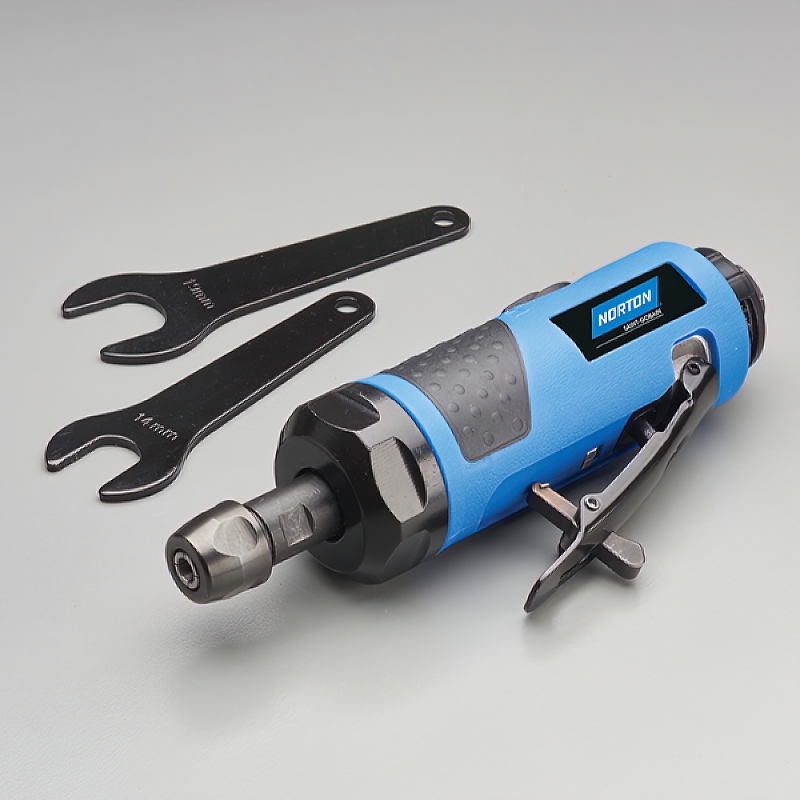
A die grinder is a handheld rotary tool designed for grinding, sanding, polishing, honing, and machining. The name comes from its original purpose—smoothing and finishing dies used in manufacturing. Most die grinders accept accessories with 1/4-inch (6.35 mm) or 1/8-inch (3.175 mm) shanks, held in place by a collet.
Two main types dominate the market: pneumatic (air-powered) and electric. Pneumatic models are lighter, run cooler during extended use, and are the standard in production shops with existing compressed-air lines. Electric die grinders—corded or cordless—offer portability and work fine in field settings where dragging an air hose is impractical.
| Feature | Die Grinder | Rotary Tool (e.g., Dremel) |
|---|---|---|
| Typical RPM | 20,000–30,000 free speed | 5,000–35,000 variable |
| Power | 0.3–1.0 HP (pneumatic) | 1.0–1.8 amps (electric) |
| Collet Size | 1/4" standard; 1/8" with adapter | 1/8" standard; 1/4" rare |
| Weight | 0.5–1.5 kg | 0.3–0.6 kg |
| Best For | Heavy material removal, weld grinding, porting | Detail work, engraving, light finishing |
| Torque | High—maintains speed under load | Low—stalls under heavy load |
The higher torque of a die grinder means it holds its RPM when you push into the workpiece. That matters when you are hogging material off a weld bead or opening up an intake port.
What Is a Die Grinder Used For?
A die grinder handles jobs that are too detailed for an angle grinder and too demanding for a standard rotary tool. Its combination of high RPM, strong torque, and compact size makes it the right fit for dozens of tasks across metalwork, woodworking, automotive repair, and dental lab work. Here are the most common applications:
- Weld cleanup and blending — Grinding down weld beads flush with the surrounding surface, especially in tight joints and inside corners where a flat disc cannot reach.
- Deburring and edge breaking — Removing sharp edges, flash, and burrs from machined parts, laser-cut plate, and drilled holes. A ball-nose carbide bur cleans the inside of a hole in seconds.
- Cylinder head porting — Reshaping intake and exhaust ports on engine heads to improve airflow. This is precision material removal where the die grinder's controllability matters most.
- Rust, paint, and scale removal — Wire brush and flap wheel attachments strip coatings back to bare metal without gouging the base surface.
- Metal shaping and carving — Sculpting sheet metal, enlarging slots, notching tubing, and cutting access holes in panels. A tungsten carbide bur removes steel faster than a file and with more control than a cutting disc.
- Woodworking detail — Carving, texturing, and shaping hardwood with structured-tooth carbide burs designed for wood. Die grinders see regular use in chainsaw art, furniture repair, and custom cabinetry.
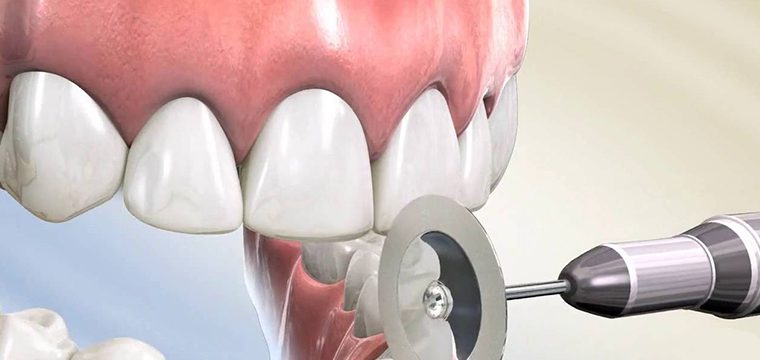
- Dental lab model trimming — Trimming plaster, stone, and acrylic models with HP-shank lab carbide burs. HP-shank (2.35 mm) burs are the standard for dental lab die grinders and low-speed handpieces, offering the right balance of speed and control for trimming dies, adjusting occlusion on stone models, and finishing acrylic baseplates. Lab technicians reach for die grinders daily because the tool handles plaster, stone, and acrylic equally well with a quick bur swap. For details on shank sizing, see our guide on the three main shank types.
- Automotive repair — Cleaning gasket surfaces, cutting seized bolts, smoothing casting flash on brake calipers, and prepping body panels for filler.
- Surface finishing and polishing — Stepping through mounted stones, flap wheels, and felt bobs to take a rough surface to a satin or mirror finish. For polishing technique, see our guide on polishing with rotary tools.
- Mold and die maintenance — The original use case. Smoothing parting lines, repairing dings, and polishing cavity surfaces in injection molds, stamping dies, and casting patterns.
The thread connecting all these applications is the same: you need controlled material removal in a tight space, at speed, with a good surface finish. That is exactly what a die grinder delivers.
Choosing the Right Die Grinder Bit
The accessory catalog for die grinders is long: carbide burs, mounted stones, flap wheels, wire brushes, sanding drums, cut-off discs, felt bobs. Each has a job it does best. Below is a breakdown of the main categories.
Tungsten Carbide Burs
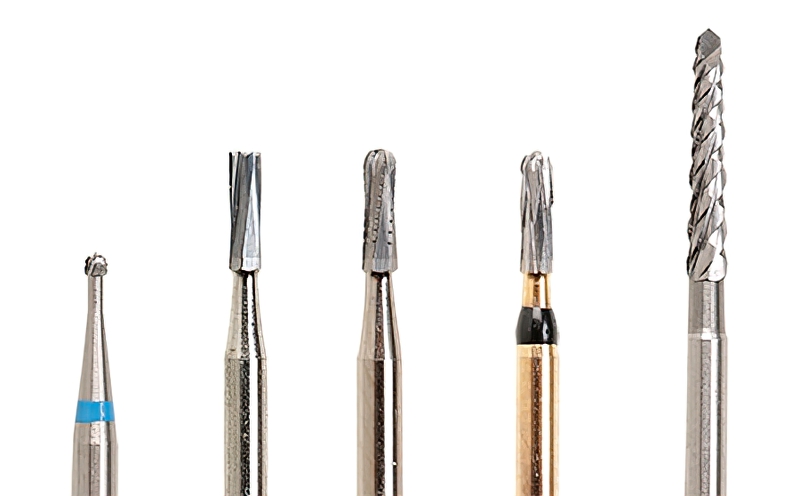
Tungsten carbide burs are the workhorses of die grinding. Made from sintered tungsten carbide—a material nearly as hard as diamond—they cut steel, stainless, cast iron, and aluminum without losing their edge the way HSS bits do. A quality carbide bur will outlast a dozen mounted stones on the same job.
Flute geometry matters. Single-cut (one set of flutes spiraling up the head) produces long chips and leaves a smoother finish. It works well on steel and hard metals where you want controlled, even removal. Double-cut (cross-hatched flutes) breaks chips into smaller pieces, cuts more aggressively, and clears material faster. Double-cut is the better pick for soft metals like aluminum, where single-cut flutes tend to load up.
Shank sizes for die grinder carbide burs are typically 1/4" (6.35 mm) for industrial work and 3/32" or 1/8" HP shanks for dental lab handpieces. Burdental stocks a full range of tungsten carbide burs for industrial die grinders as well as lab carbide burs sized for dental handpieces. Whether you are cleaning up welds in a fab shop or trimming a dental model, the same material science applies—carbide just works harder and lasts longer than the alternatives. For a detailed breakdown of which carbide bur shapes and cuts to pick for your die grinder, see our guide on carbide burs for die grinders.
Mounted Stones
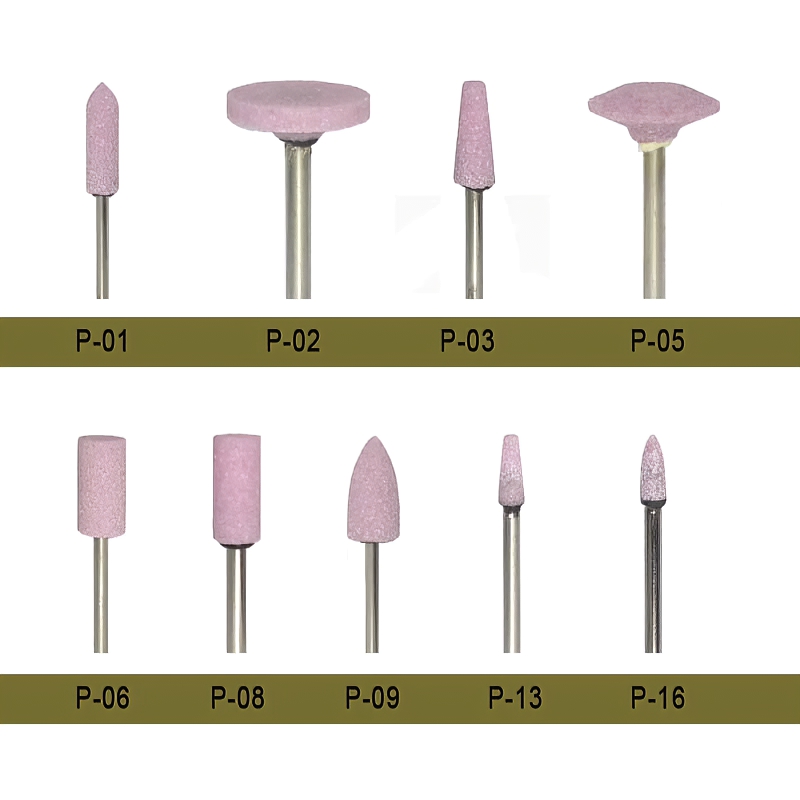
Mounted stones are bonded abrasive points available in dozens of shapes. Aluminum oxide stones (usually pink, red, or brown) are the general-purpose option for ferrous metals. Silicon carbide stones (green or gray) are harder and work better on non-ferrous metals, glass, and ceramics.
In dental labs, white and green stones see heavy daily use for adjusting zirconia and porcelain restorations. For a deeper comparison, see our guide on green stones vs white stones. Industrial users lean on mounted stones for deburring castings and smoothing inside radii where a flat grinding wheel cannot reach.
Other Attachments
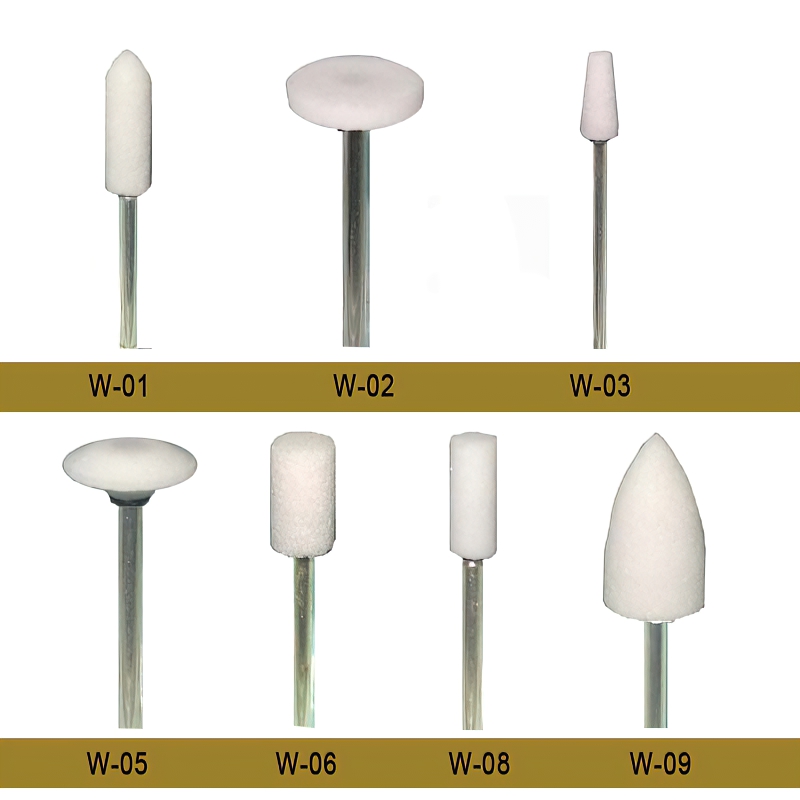
Flap wheels blend and finish surfaces with a conformable sanding action. Wire brushes (steel or brass) strip rust, paint, and scale without removing base metal. Felt bobs carry polishing compound for mirror-finish work on metal and acrylic—read our walkthrough on how to use felt bobs for tips. Cut-off wheels (reinforced abrasive discs) slice through bolts, sheet metal, and exhaust tubing. Always use a guard when running cut-off wheels at speed.
How to Set Up a Die Grinder
- Check the air supply (pneumatic models). Most die grinders need 4–6 CFM at 90 PSI. An undersized compressor will let the RPM sag under load, which causes poor cuts and excess heat. Check your compressor's rating at the outlet, not the tank—those are different numbers.
- Install the attachment. Back the collet nut off, insert the bur or stone shank fully into the collet, and tighten with the wrench provided. Verify the shank is seated at least 3/4 of its length. A loose bur is a thrown bur—and at 25,000 RPM that is a genuine hazard.
- Confirm the RPM rating. Every accessory has a maximum safe RPM stamped or printed on it. Mounted stones, cut-off wheels, and flap wheels all have limits. Carbide burs are more forgiving—most industrial burs are rated to 35,000+ RPM—but it is still good practice to check. Running any attachment above its rated speed risks a violent failure.
- Secure the workpiece. Clamp it in a vise or fixture whenever possible. Holding a small part in one hand while grinding with the other is asking for trouble. If you must work freehand on a large assembly, brace your wrists and stand where the sparks fly away from you, not into your face.
Grinding Techniques
Let the tool do the work. Pressing harder does not make a die grinder cut faster. Extra pressure increases heat, accelerates wear, and can stall the motor. Light, consistent contact produces the best stock removal rate and the cleanest surface.
Keep moving. Dwelling in one spot digs a groove. Move the bur steadily across the area you are working, overlapping passes like mowing a lawn. For weld cleanup, follow the weld line in long, sweeping strokes rather than pecking at high spots.
Work in stages. Rough out the shape with an aggressive double-cut carbide bur, then switch to a finer single-cut bur or mounted stone for finishing. Trying to get a polished surface with one accessory usually takes longer than using two in sequence.
Mind the direction of cut. A carbide bur cuts differently depending on whether you climb-cut (bur rotation pulling into the material) or conventional-cut (bur pushing away). Conventional cutting gives more control and a smoother finish for most freehand work. Climb cutting removes stock faster but can grab and kick if you are not ready for it. For a rundown of how different bur shapes behave, check out bur shapes and their functions.
Safety Rules
Eye protection is mandatory. Safety glasses at minimum; a full face shield is better when grinding overhead or cutting. Hot chips and abrasive fragments fly unpredictably.
Hearing protection. Pneumatic die grinders run in the 95–105 dB range. That is loud enough to cause permanent hearing damage with daily use. Foam plugs or over-ear muffs—pick one and wear it.
No loose gloves near the collet. Leather gloves protect your hands from heat and sharp edges, but loose-fitting gloves can catch on a spinning bur and pull your fingers in. Snug-fitting mechanics' gloves are the safer option.
Inspect accessories before mounting. Cracks in mounted stones, bent shanks on burs, frayed wire brushes—any of these can fail catastrophically under rotation. Toss anything that looks questionable.
Disconnect before changing bits. Unplug the tool or close the air valve. Accidentally triggering the throttle while your fingers are near the collet is a mistake you only want to read about, not experience.
Common Mistakes When Using a Die Grinder
Most die grinder problems trace back to a handful of repeated errors. Avoiding these will extend the life of your bits, produce better finishes, and keep you out of the emergency room.
1. Running at the wrong RPM for the accessory. Every mounted stone, flap wheel, and cut-off disc has a maximum rated speed printed on it. Exceed that number and the accessory can fly apart. On the other end, running a carbide bur too slowly causes it to chatter and dig in rather than shear cleanly. Check the manufacturer's speed rating before you pull the trigger, and use a variable-speed grinder or inline regulator to dial the RPM to the right range.
2. Using single-cut burs on aluminum. Single-cut flutes produce long, continuous chips. On soft metals like aluminum, copper, or brass, those chips pack into the flute valleys and weld themselves to the carbide. Within seconds the bur is loaded up, generating heat instead of cutting. Switch to a double-cut bur for aluminum—the cross-hatched flutes break chips into small pieces that clear out on their own. If you only have single-cut burs, reduce your feed rate and use a cutting wax or lubricant to prevent loading.
3. Pressing too hard. A die grinder is not a bench grinder. Leaning into the workpiece does not speed up material removal—it stalls the motor, overheats the bur, and accelerates wear on both the tool and the accessory. On pneumatic models, excessive pressure drops the vane speed below the efficient cutting range, and you end up rubbing instead of cutting. Let the bur's flute geometry do the work. If you feel like you need more pressure, switch to a more aggressive bit instead.
4. Not matching collet size to shank diameter. A 1/8-inch shank crammed into a 1/4-inch collet with a reducer sleeve that does not seat properly will wobble. That wobble translates into chatter marks on the workpiece, uneven wear on the bur, and in the worst case the bit walks out of the collet entirely. Always verify that the shank diameter matches the collet bore. If you need to use 1/8-inch shanks in a 1/4-inch grinder, use a precision collet adapter—not a random bushing from the hardware drawer.
5. Skipping safety gear. It takes exactly one hot chip in the eye to learn this lesson. Safety glasses are the bare minimum. Add hearing protection for any session longer than a few minutes—pneumatic grinders sit at 95 to 105 dB, well above the threshold for permanent hearing damage. Snug-fitting gloves protect your hands from heat and sharp edges without the entanglement risk of loose leather work gloves.
6. Using worn or cracked mounted stones. A mounted stone with a hairline crack may look fine sitting on the bench. Spin it at 25,000 RPM and it becomes shrapnel. Abrasive stones also wear unevenly over time, developing flat spots that cause vibration. Inspect every stone before you mount it—hold it up to a light and look for fractures. If the stone wobbles when you spin it by hand, throw it out. Replacement stones cost a few dollars; a trip to the ER costs considerably more.
Die Grinder Applications
The table below maps common tasks to the best attachment type. Notice how often carbide burs show up—they handle more jobs than any other single accessory.
| Application | Recommended Bit | Notes |
|---|---|---|
| Weld cleanup | Double-cut carbide bur (cylindrical or tree shape) | Fastest method for blending welds flush |
| Rust & paint removal | Wire brush or flap wheel | Wire brush for heavy scale; flap wheel for lighter coatings |
| Porting & polishing (engines) | Carbide bur, then cartridge roll | Rough with carbide, finish with abrasive roll or stone |
| Deburring holes & edges | Single-cut carbide bur (ball or oval) | Ball shape reaches inside holes; oval handles flat edges |
| Cutting bolts & sheet metal | Reinforced cut-off wheel | Always use a guard; replace cracked discs immediately |
| Surface finishing & blending | Flap wheel or mounted stone | Progressive grits for scratch-free results |
| Dental lab model trimming | HP carbide bur or green stone | Carbide for plaster/stone; green stones for zirconia adjustment |
| Automotive detailing (gaskets, corrosion) | Carbide bur or brass wire brush | Brass brush avoids sparking on aluminum heads |
A die grinder paired with a small set of carbide burs and a few mounted stones covers 90 percent of the grinding, shaping, and finishing tasks in most shops. Add a felt bob and some polishing compound, and you can take a rough casting all the way to a mirror shine without switching tools. For help choosing the right carbide bur for your die grinder, see our buyer's guide, or browse our full product catalog for the complete lineup of burs, stones, and accessories.
Best Die Grinder Bits for Different Materials
Choosing the right bit for the material you are working on makes the difference between a clean job and a frustrating mess. Here is what works and what does not, based on real shop experience.
| Material | Best Bit Type | Cut Style | RPM Range | Notes |
|---|---|---|---|---|
| Mild Steel | Tungsten carbide bur | Single-cut | 20,000–30,000 | Smooth finish, long chip control |
| Stainless Steel | Tungsten carbide bur | Single-cut | 15,000–25,000 | Lower RPM reduces work hardening |
| Aluminum | Tungsten carbide bur | Double-cut (ALUM cut) | 20,000–30,000 | Non-loading flute geometry is critical |
| Cast Iron | Tungsten carbide bur | Double-cut | 20,000–28,000 | Produces dust — wear a respirator |
| Wood | Structured-tooth carbide bur | Coarse tooth | 15,000–20,000 | Standard metal burs clog fast in wood |
| Plastics / Composites | Single-cut carbide or diamond | Fine flute | 10,000–20,000 | Low RPM prevents melting |
| Weld Seams | Cylindrical carbide bur | Double-cut | 20,000–28,000 | Tree shape for inside corners |
| Zirconia / Ceramics | Diamond stone | Medium grit | 20,000–25,000 | Carbide chips ceramics; diamond grinds cleanly |
If you are working across multiple materials in the same session, keep at least three burs loaded and ready: a single-cut for steel, a double-cut or ALUM-cut for soft metals, and a mounted stone for finishing passes. Swapping bits takes ten seconds. Trying to force the wrong bit through the wrong material wastes minutes and ruins the finish.
Frequently Asked Questions
What RPM should I run my die grinder at?
It depends entirely on the accessory. Carbide burs perform best between 15,000 and 35,000 RPM depending on the head diameter—smaller heads can run faster. Mounted stones typically max out between 20,000 and 25,000 RPM. Flap wheels and cut-off discs usually cap around 20,000 RPM, sometimes lower for larger diameters. Always check the rated speed printed on the accessory itself. If your grinder does not have variable speed, use an inline air regulator (pneumatic) or buy a variable-speed electric model to stay within the safe range.
Can I use dental burs in a die grinder?
Only if the shank sizes match. Dental FG (friction-grip) burs have a 1.6 mm shank and will not fit a standard die grinder collet. Dental HP (handpiece) burs have a 2.35 mm shank, which is close to 3/32 inch—some die grinders accept 3/32" collets, but verify the fit is snug before running the tool. The bigger issue is head size: dental burs have small cutting heads designed for low-load precision work. They will cut metal, but they remove material slowly compared to industrial carbide burs with 1/4-inch shanks and larger heads. For die grinder work on metal, stick with burs built for industrial RPM and load.
What is the difference between single-cut and double-cut carbide burs?
Single-cut burs have one set of flutes spiraling up the head. They produce long chips, cut smoothly, and leave a finer surface finish. They work best on steel, stainless steel, and other hard ferrous metals. Double-cut burs have a second set of flutes crossing the first at an angle, creating a diamond pattern. This breaks chips into smaller pieces and removes material faster. Double-cut burs are the better choice for soft metals like aluminum and copper, where single-cut flutes tend to clog with packed chips. For general-purpose die grinder work across mixed materials, double-cut is the more versatile option.
How long do carbide burs last in a die grinder?
Longer than any other die grinder accessory, which is one reason they are worth the higher upfront cost. A quality tungsten carbide bur used on mild steel at the correct RPM and light pressure can last 20 to 50 hours of active cutting time. On stainless or hardened steel, expect roughly half that. The main factors that shorten bur life are excessive pressure (which chips the flute edges), running too slow (which causes impact loading instead of clean shearing), and heat buildup from dwelling in one spot. When a carbide bur starts cutting noticeably slower or leaving a rougher finish than it used to, it is done—there is no practical way to resharpen the flutes.
What does a die grinder do?
A die grinder removes or refines material using high-speed rotary accessories for grinding, shaping, deburring, and finishing. It spins a collet-mounted accessory at 20,000 to 30,000 RPM.
What is a die grinder machine?
A die grinder machine is a handheld rotary power tool, pneumatic or electric, designed for precision material removal in shops and dental labs.
Die grinder vs angle grinder — what is the difference?
Die grinders are smaller, lighter, and spin at higher RPM for detail work and tight-access grinding. Angle grinders are larger with higher torque for heavy stock removal using disc-style attachments. If the job fits a 4.5-inch disc, use an angle grinder. For cavities, tubes, and fillet welds, reach for the die grinder.