Rotary Tools vs Hand Tools for Wood Carving
Wood carving spans a wide range of styles and techniques, from delicate chip carving to large-scale sculptural work. The tools you choose shape not only the final result but also how you experience the craft. The two main approaches are power carving with rotary tools and traditional hand carving with non-electric tools like knives, chisels, gouges, and mallets.
Both methods have loyal followings among hobbyists and professional carvers. This article breaks down the strengths and weaknesses of each approach so you can decide which fits your projects, your skill level, and your personal preferences.
How Rotary Tools Work for Wood Carving
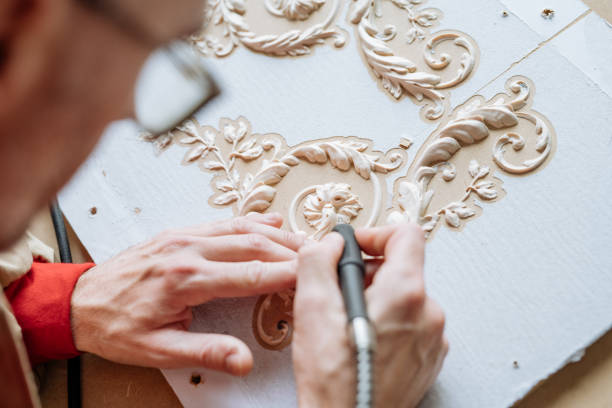
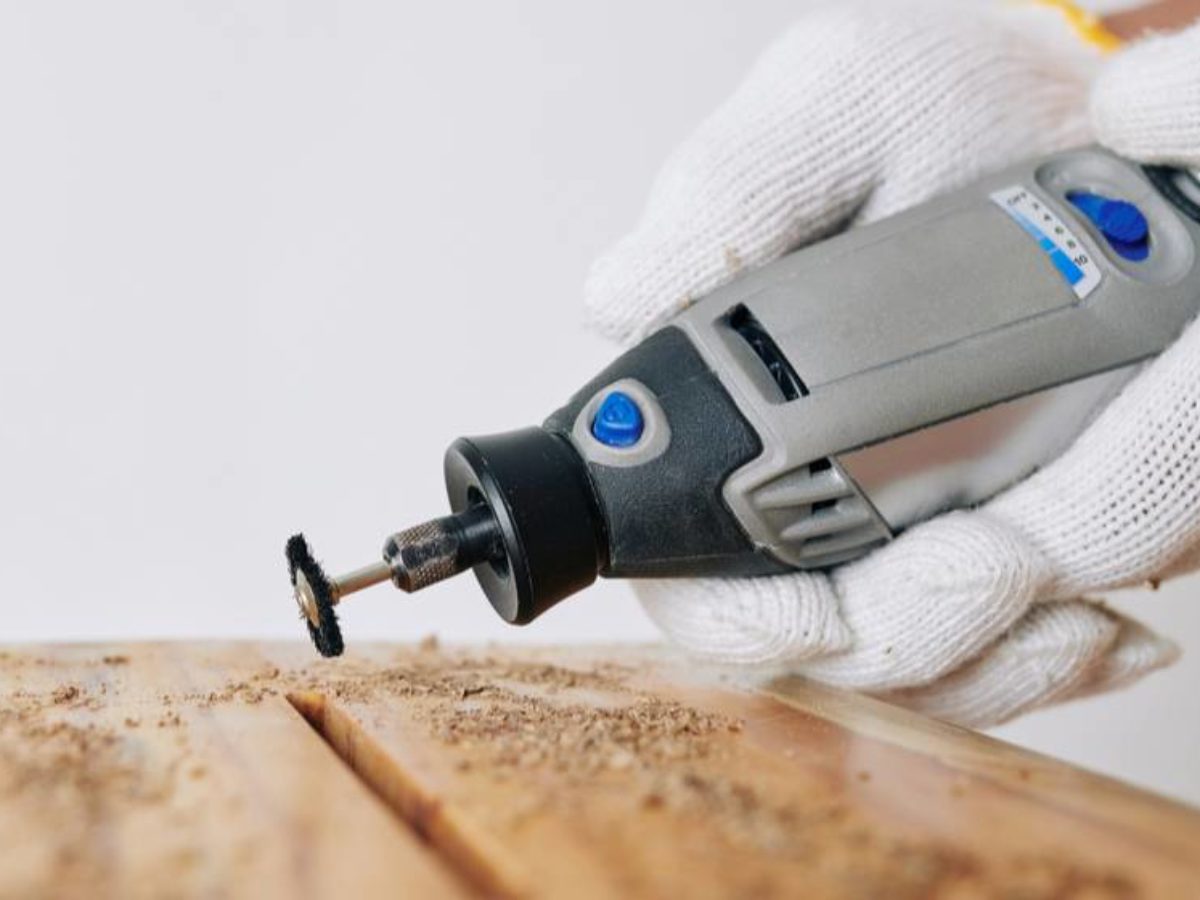
Rotary tools like the Dremel spin interchangeable bits and burs at variable speeds, typically ranging from 5,000 to 35,000 RPM. The motor drives a collet that accepts shanked accessories in various shapes and abrasive types. By swapping between cutting burs, sanding drums, carving bits, and polishing wheels, a single rotary tool can handle roughing, detailing, and finishing stages.
The most common rotary tool accessories for wood carving include structured tooth carbide burs for fast material removal, diamond-coated bits for fine detail, sanding drums and flap wheels for smoothing, and felt bobs or polishing wheels for the final surface treatment.
Advantages of Rotary Tools for Wood Carving
Speed and Efficiency
Rotary tools remove material significantly faster than hand tools. Tasks that would take hours with a gouge and mallet, such as hollowing a bowl or roughing out a figure, can be completed in a fraction of the time with a carbide bur spinning at high speed. For carvers who produce work in volume or tackle large pieces, this time savings adds up quickly.
Lower Physical Effort
Because the motor does most of the work, rotary tool carving puts far less strain on your hands, wrists, and shoulders. This matters for long carving sessions and for carvers who deal with repetitive strain issues. The tool does the cutting; you guide the direction.
Interchangeable Accessories
A single rotary tool paired with a good set of bits can replace an entire rack of hand tools. Switching from a cutting bur to a sanding drum takes seconds. This also means that when a bit wears out or breaks, replacing it costs a fraction of what a new set of chisels would run. For a detailed look at bit shapes and their uses, see our guide on bur shapes for rotary tools.
Disadvantages of Rotary Tools for Wood Carving
Steeper Margin for Error
Rotary tools remove material fast, and that speed works against you when you slip or misjudge depth. Small splits, cracks, and over-cuts are common problems, especially for beginners still learning to control feed rate and pressure. Practice on scrap wood before committing to a final piece.
Dust and Safety Concerns
High-speed cutting generates fine wood dust that becomes airborne and can irritate the lungs over time. Wearing a respirator rated for fine particles is non-negotiable. Eye protection is equally important, as small chips and splinters fly unpredictably during rotary carving. A dust collection system or working outdoors helps reduce exposure.
Noise
Rotary tools produce a constant high-pitched whine that can be fatiguing during long sessions. Hearing protection is recommended, particularly at higher RPM settings. This also makes rotary carving less practical in shared living spaces or apartment workshops.
How Hand Tools Work for Wood Carving
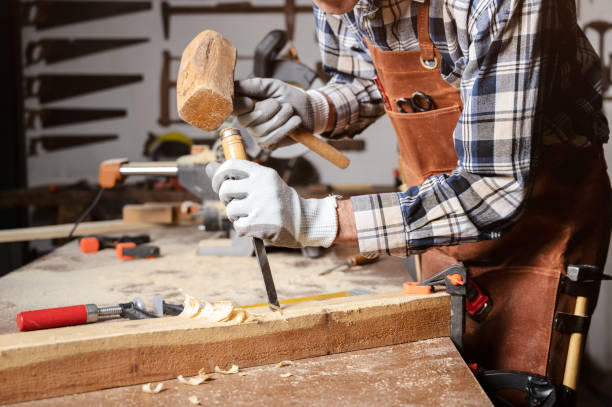
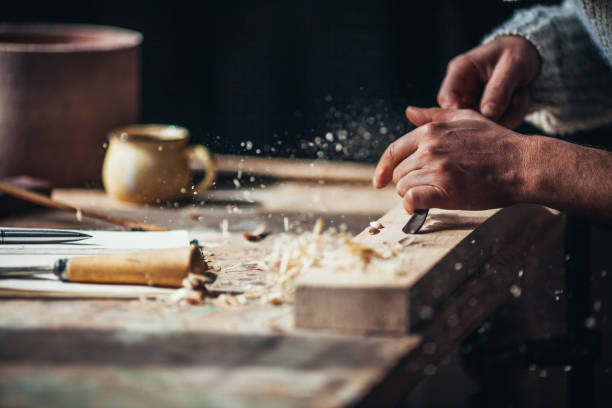
Traditional hand carving relies on edged tools driven by hand pressure or mallet strikes. The core toolkit includes carving knives for whittling, chisels for flat cuts, gouges in various sweeps for curved cuts, V-tools for outlining, and mallets for driving chisels and gouges through harder wood.
Each tool is designed for a specific type of cut, and experienced carvers develop an intuitive feel for how different woods respond to each blade profile. The directional control is entirely in the carver's hands, which allows for extremely precise work.
Advantages of Hand Tools for Wood Carving
Precision and Detail
Hand tools give the carver direct tactile feedback with every cut. A skilled woodworker can shave off paper-thin curls of wood, creating sharp edges, clean transitions, and fine textures that are difficult to replicate with a spinning bit. For work where surface quality and detail matter most, hand tools have a clear edge.
Variety of Techniques
Hand carving encompasses many distinct disciplines: whittling, chip carving, relief carving, spoon carving, letter carving, and sculptural carving in the round. Each technique uses different tools and produces a different aesthetic. The learning never stops, and the creative possibilities are enormous.
Quiet and Clean
Hand carving produces shavings and chips rather than fine dust, making it much cleaner and safer for your respiratory system. It is also nearly silent, which means you can carve at any hour without disturbing anyone. No electricity is needed, so you can carve outdoors, at a campsite, or anywhere you have a stable surface.
Disadvantages of Hand Tools for Wood Carving
Longer Learning Curve
Learning to sharpen, maintain, and control hand carving tools takes considerable time. Each gouge sweep, each wood species, and each grain direction requires a slightly different approach. Beginners should expect months of regular practice before producing work they are satisfied with.
Physical Demand
Hand carving requires sustained physical effort, especially when working with harder woods or removing large amounts of material. Extended sessions can tire out hands and forearms. Keeping your carving bench at the right height and taking regular breaks helps manage fatigue.
Slower Output
Hand carving simply takes more time per piece. For carvers who sell their work or produce items in batches, this slower pace can limit productivity and income potential. A piece that takes two hours with a rotary tool might take eight or more hours by hand, depending on the complexity and the hardness of the wood.
Rotary Tools vs Hand Tools: Side-by-Side Comparison
| Factor | Rotary Tools | Hand Tools |
|---|---|---|
| Speed | Fast material removal | Slow, deliberate cuts |
| Precision | Good, but risk of over-cutting | Excellent with practice |
| Physical effort | Low | Moderate to high |
| Learning curve | Moderate | Steep |
| Noise level | High | Very low |
| Dust / mess | Fine airborne dust | Shavings and chips |
| Best for | Large pieces, fast roughing | Fine detail, surface quality |
| Tool cost | Lower replacement cost per bit | Higher per-tool investment |
Which Method Should You Choose?
The honest answer for most serious carvers is both. Rotary tools excel at the roughing stage, where you need to remove large amounts of wood quickly to establish the basic form. Hand tools shine during the finishing stages, where control and surface quality matter most.
If you are just starting out and want to try one method first, consider what kind of carving interests you. For small figurines, spoons, and whittling projects, start with a basic set of carving knives and gouges. For larger sculptures, sign carving, or projects where you want fast results, a Dremel or similar rotary tool with a set of carving burs is the better entry point.
Many experienced carvers rough out with a rotary tool, refine with gouges, and finish with hand-sanding or a polishing accessory on the rotary tool. This hybrid workflow gives you the best of both approaches. For more on choosing the right rotary tool accessories, read our article on rotary tools for jewelry making, which covers many of the same bit types used in wood carving.
