
How to Clean and Disinfect Dental Burs Properly
Dental burs contact saliva, blood, and soft tissue during every procedure. Without proper cleaning and disinfection, these instruments become a direct pathway for cross-infection between patients. This article covers the types of dental burs, how contamination occurs, and the step-by-step cleaning and sterilization methods that meet current infection control standards.
What Are Dental Burs
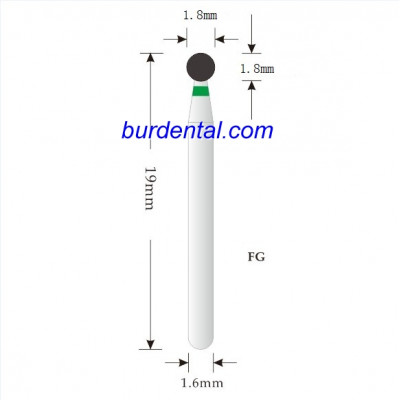
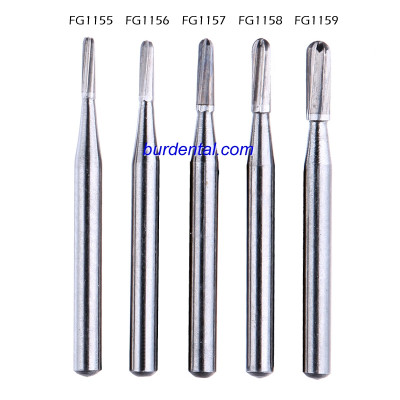
A dental bur is a small cutting or grinding attachment used with a dental handpiece. Each bur consists of two main parts: the head (the working end with cutting edges or diamond grit) and the shank (the smooth shaft that fits into the handpiece).
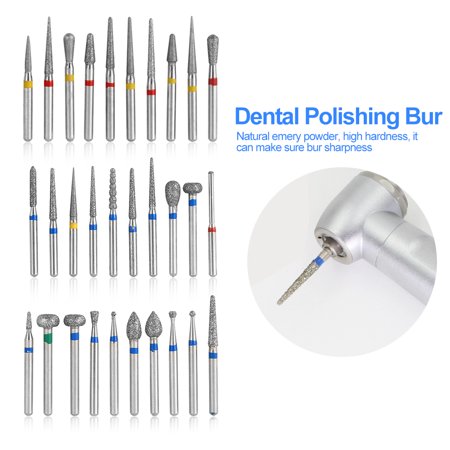
Dental burs are made from different materials depending on their intended use:
| Bur Type | Material | Common Uses |
|---|---|---|
| Diamond burs | Diamond grit bonded to metal | Crown preparation, enamel reduction, porcelain adjustment |
| Tungsten carbide burs | Tungsten carbide alloy | Cavity preparation, amalgam removal, finishing |
| Steel burs | Stainless steel | Dentin removal, low-speed procedures |
Each material requires slightly different care during cleaning. Diamond burs have textured surfaces that trap debris more readily than smooth carbide burs. Understanding these material differences helps you select the right cleaning approach for each bur type in your collection.
How Cross-Infection Occurs Through Dental Burs
Contamination of dental burs happens through two primary mechanisms:
Surface Contamination
During any intraoral procedure, the bur head comes into direct contact with the patient's saliva, blood, and tissue debris. This biological material coats the bur surface and can harbor bacteria, viruses, and other pathogens. Even brief contact is enough to transfer infectious agents.
Texture-Trapped Pathogens
The cutting edges and diamond grit on bur heads create microscopic crevices where biological material accumulates. Standard wiping or rinsing cannot reach these trapped contaminants. This is why structured cleaning protocols with soaking, brushing, and sterilization are necessary rather than simple surface cleaning.
Step-by-Step Cleaning and Disinfection Protocol
Follow this sequence after every patient use. Each step builds on the previous one, and skipping steps reduces the effectiveness of the entire process.
Step 1: Pre-Soak in Disinfectant
Immediately after use, place burs in a container of 2% glutaraldehyde solution. Allow them to soak for a minimum of 30 minutes. This initial soak serves two purposes:
- Kills the majority of surface bacteria and viruses on contact
- Loosens dried blood, saliva, and tissue debris for easier mechanical cleaning
Research shows that 20 mg/L glutaraldehyde eliminates bacteria and HBsAg (Hepatitis B surface antigen) within a 30-minute soak period.
Step 2: Mechanical Cleaning
After soaking, scrub each bur individually with a small-headed toothbrush or dedicated bur cleaning brush. Pay special attention to the textured head of the bur where debris collects in the flutes and between diamond particles. Work under running water to flush loosened material away.
For diamond burs specifically, our article on cleaning diamond burs covers additional techniques for removing embedded debris from diamond grit surfaces.
Step 3: Rinse Thoroughly
Rinse each bur under clean running water for at least 30 seconds to remove all traces of disinfectant and loosened debris. Residual glutaraldehyde can irritate oral tissues if burs are reused without proper rinsing.
Step 4: Ultrasonic Cleaning (Recommended)
Place rinsed burs in an ultrasonic cleaner filled with enzymatic cleaning solution. Run the cycle for 5-10 minutes. The ultrasonic vibrations create microscopic cavitation bubbles that penetrate areas a brush cannot reach, removing remaining biological material from deep within the bur texture.
| Cleaning Method | Effectiveness | Best For |
|---|---|---|
| Manual brushing alone | Moderate | Smooth-surface carbide burs |
| Ultrasonic cleaning | High | Diamond burs with textured surfaces |
| Ultrasonic + manual brushing | Very high | All bur types, recommended standard |
Step 5: Sterilization
After cleaning, burs must be sterilized before reuse. Autoclaving is the standard method:
- Place cleaned burs in sterilization pouches or cassettes
- Load into the autoclave without overcrowding
- Run at 134 degrees Celsius (273 degrees Fahrenheit) for 3-4 minutes in a pre-vacuum autoclave, or at 121 degrees Celsius (250 degrees Fahrenheit) for 15-20 minutes in a gravity displacement autoclave
- Allow burs to dry completely before storage
Chemical sterilization with glutaraldehyde (10-hour soak at higher concentration) is an alternative for heat-sensitive items, but autoclaving remains the preferred method due to its reliability and speed.
Choosing the Right Disinfectant
Not all disinfectants are suitable for dental burs. The ideal solution must meet three requirements:
- Effective against a broad spectrum of pathogens -- Including bacteria, viruses (especially Hepatitis B and HIV), and fungi
- Low corrosiveness to metals -- Harsh chemicals damage carbide cutting edges and dissolve diamond bonding agents
- Minimal tissue irritation -- Residual disinfectant on burs must not cause harm if traces contact oral tissues
Common Disinfectants Compared
| Disinfectant | Soak Time | Corrosion Risk | Effectiveness |
|---|---|---|---|
| 2% Glutaraldehyde | 30 min (disinfection) / 10 hr (sterilization) | Low | High |
| Enzymatic cleaner | 5-10 min (pre-cleaning only) | Very low | Moderate (cleaning, not sterilization) |
| Hydrogen peroxide (6%) | 30 min | Moderate | High |
| Quaternary ammonium | 10 min | Low | Low to moderate |
Glutaraldehyde at 2% concentration remains the most widely used option for dental bur disinfection due to its strong antimicrobial action and relatively low impact on metal instruments.
Storage and Handling After Sterilization
Proper storage protects sterilized burs from recontamination:
- Keep burs in sealed sterilization pouches until they are needed for a procedure
- Store in a clean, dry environment away from aerosol-generating areas
- Use bur blocks or organizers to prevent burs from contacting each other, which can dull cutting edges
- Label pouches with sterilization date and discard if the pouch seal is broken
- Handle sterilized burs with clean gloves to avoid transferring contaminants from bare hands
For more on sterilization best practices, read our guide on dental instrument sterilization.
One Patient, One Bur: The Standard of Care
Current infection control guidelines recommend a "one patient, one bur" protocol. This means each patient receives a freshly sterilized bur that has not been used on any other patient since its last sterilization cycle. This standard exists because:
- Even thorough cleaning cannot guarantee 100% removal of all biological material from textured bur surfaces
- Repeated sterilization cycles eventually degrade bur performance, providing a natural replacement schedule
- Using dedicated burs per patient eliminates the risk of between-patient cross-contamination entirely
Every dental professional has a responsibility to follow these protocols consistently. Proper cleaning and sterilization of dental burs protects both patients and clinical staff from preventable infections.
How Sterilization Affects Bur Performance
Repeated autoclave cycles do affect dental burs over time. Diamond burs may experience slight loosening of the diamond grit bonding after many sterilization cycles, resulting in reduced cutting efficiency. Tungsten carbide burs are more heat-resistant but can develop micro-corrosion if exposed to certain chemical disinfectants for extended periods beyond recommended soak times.
Monitor your burs for these signs of wear after sterilization:
- Reduced cutting speed -- The bur requires more pressure to achieve the same result
- Visible grit loss -- Bald patches appear on diamond bur heads where grit has separated
- Discoloration -- Persistent staining that does not clean off may indicate surface degradation
- Vibration during use -- An unbalanced bur head can indicate uneven wear from chemical exposure
Replace burs that show any of these signs immediately. Using a worn or damaged bur increases overall procedure time, reduces clinical precision, and may cause unnecessary patient discomfort during treatment. Maintaining a regular rotation of burs and tracking sterilization cycles per instrument helps identify when replacement is needed before clinical performance drops below acceptable standards in your practice.
